What can you expect from an Android car radio today? How do I install it? Which upgrades and apps should I install?
Inhalt:
The old radio was annoying!
The old Zenec radio got on our nerves just five kilometres after we bought the used Rodius.
The N720 was already slow as a toad due to Windows CE and flexible as an anvil. No apps, apart from the ones that came with it, meant it was a complete mess. The display is comparatively poor, touch is resistive and the reverse screen only appears when the radio is finally booted. It has to boot up to switch on the rear view? WTF?! You had to manually connect the phone to the radio each time and then switch on Bluetooth audio again in a different menu. My 99 EUR cheap JVC car radio was much better at connecting to a smartphone 10 years ago. Put it in, connected.
Using Google Maps navigation on the phone led to problems. As the supplied iGo does not display real-time traffic information (how can it do that without an internet connection?) and only announces exits when you are 100 metres away, we only use it very rarely. When using Google Maps, the radio cut off the first two seconds of the navigation announcements if music was not playing from the phone at the same time. Apparently, the car radio’s Bluetooth switched to energy-saving mode after a few seconds – as if it needed to save energy in the car! „… turn off“ usually only came through as an announcement. Sometimes nothing at all. That made me really aggressive.
I found the invoice for the radio in the vehicle documents: EUR 1,100 including installation. IIRC that was in 2015? The Rodius previously belonged to a pharmacy. Pharmacy prices, that fits, doesn’t it?
Woman wants sound!
My wife wanted more sound. She wanted sound in her car again, like her mates in her youth.
She wanted me to install different speakers. But I knew from experience that SsangYong doesn’t install complete rubbish. Hardly any manufacturer does that nowadays (BM*cough*W). The problem was simply the overpriced Zenec. I wanted to have another Chinese cracker like the ones from Pumpkin. They can do everything and sound good.
I watched endless YouTube videos, but got stuck on the Saab Unleashed channel. He had a list of the best Android car radios of 2023 and, last but not least, he highly recommended the Ekiy T7!
Subwoofer
The Rodius is big, so we needed a subwoofer. It shouldn’t break the budget. The search turned out to be even more difficult! Good and cheap? Does that even exist? Long search, short answer: yes, there is! These subwoofers are sold out from time to time and I got mine directly from Germany and also as B-goods much cheaper (70.59 EUR). Maybe look for this search term? –>
10″ 600w / RMS Power: 180W or ask „my“ dealer?
The subwoofer has a 10″ driver and 180 watts RMS, which is certainly enough for a decent bass foundation in small normal cars, but in the Rodius it gets a bit lost. You do notice that the bass can’t just come from the standard speakers, but your trouser legs don’t flap when the subwoofer is four metres behind you. That wasn’t the aim either. It was just to have more pressure and the subwoofer was to be invisible. It didn’t fit under the seats, but it did fit in the rear left-hand compartment, where the wiper fluid for the rear window and the connections for the trailer coupling are located.
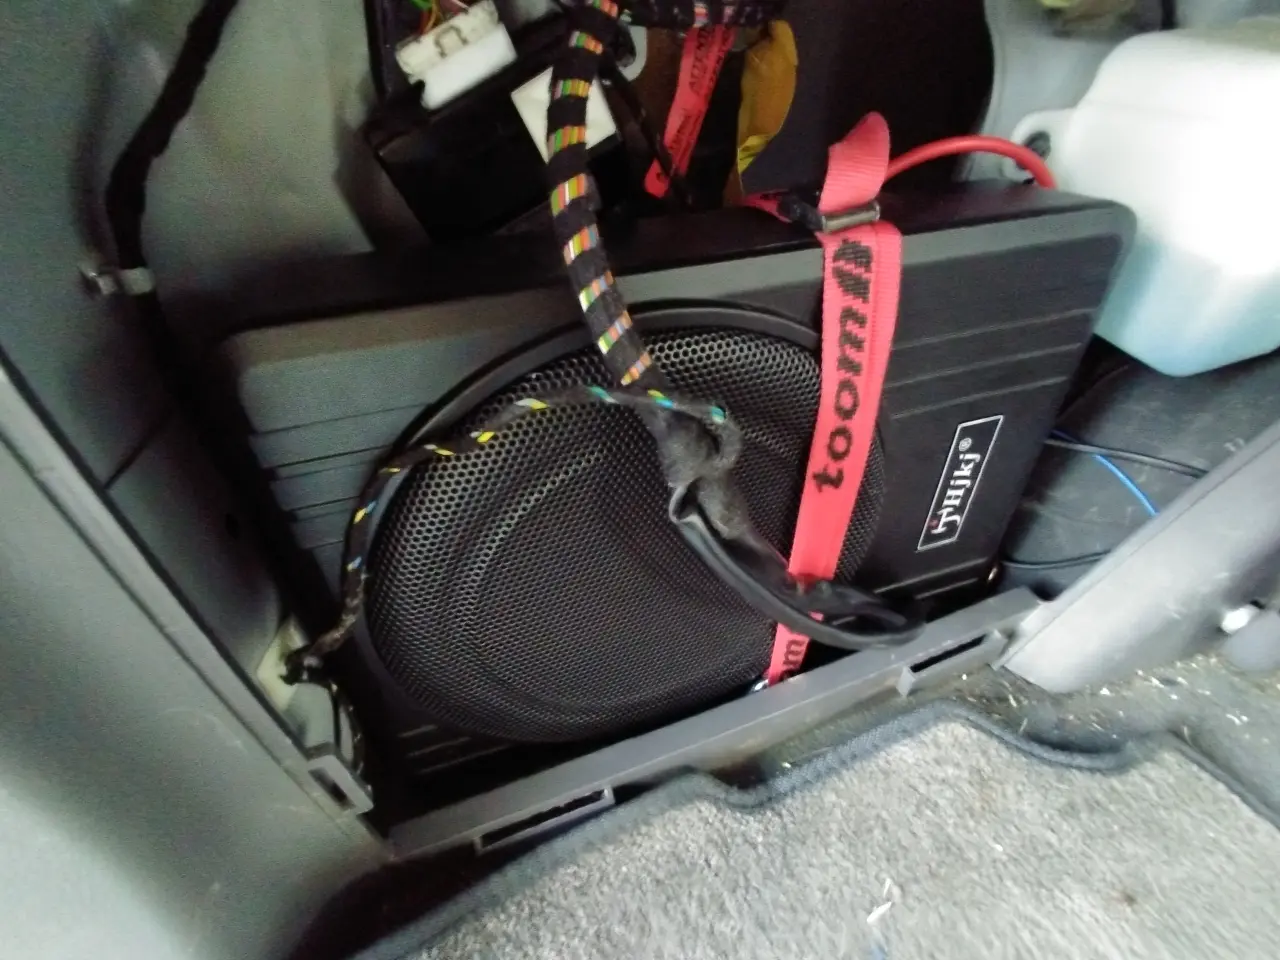
I think the air conditioning for the rear passengers is on the other side behind the flap. I would have to see if I could install a second subwoofer there. 🙂
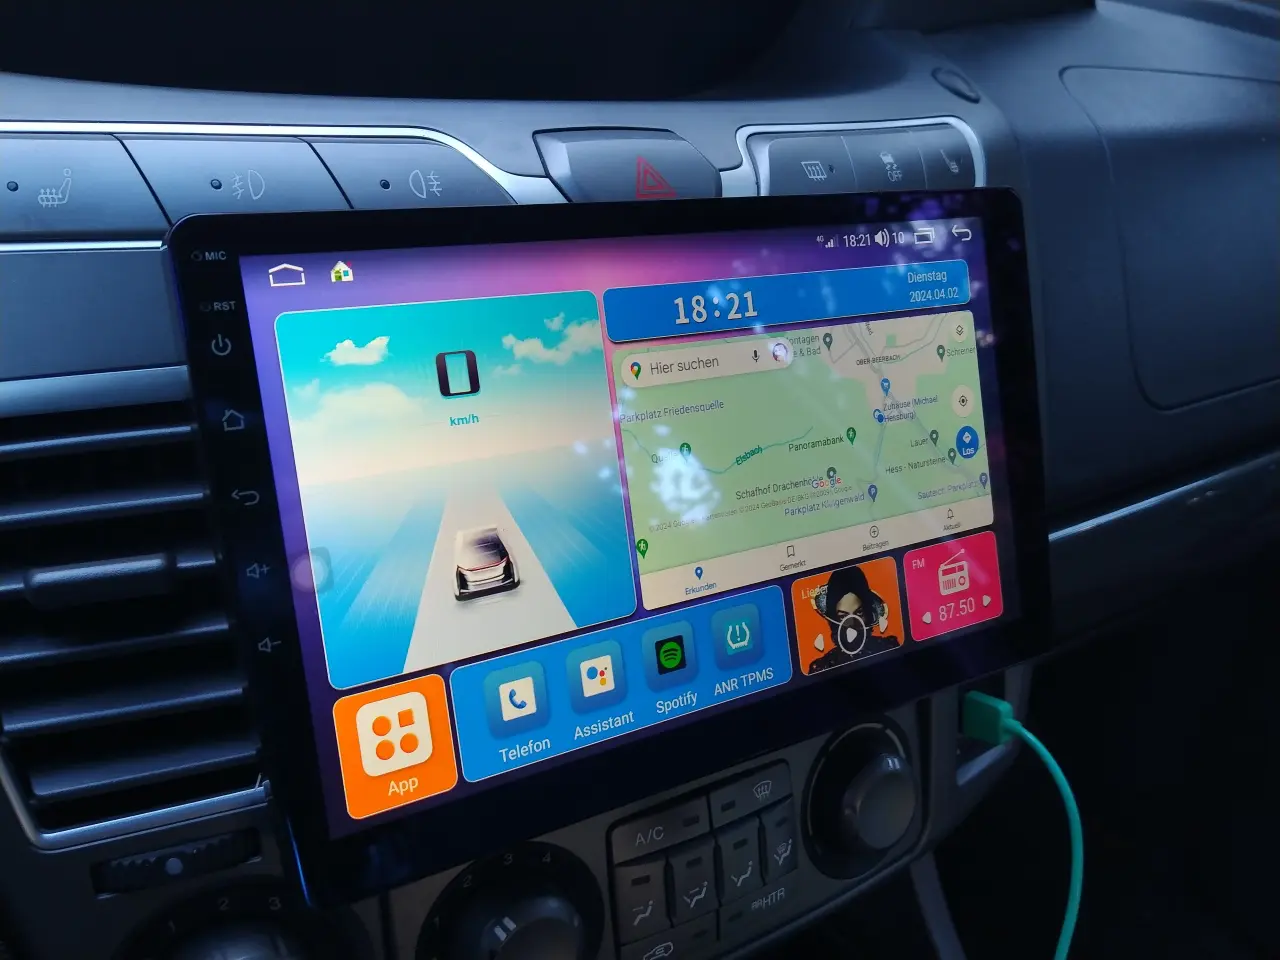
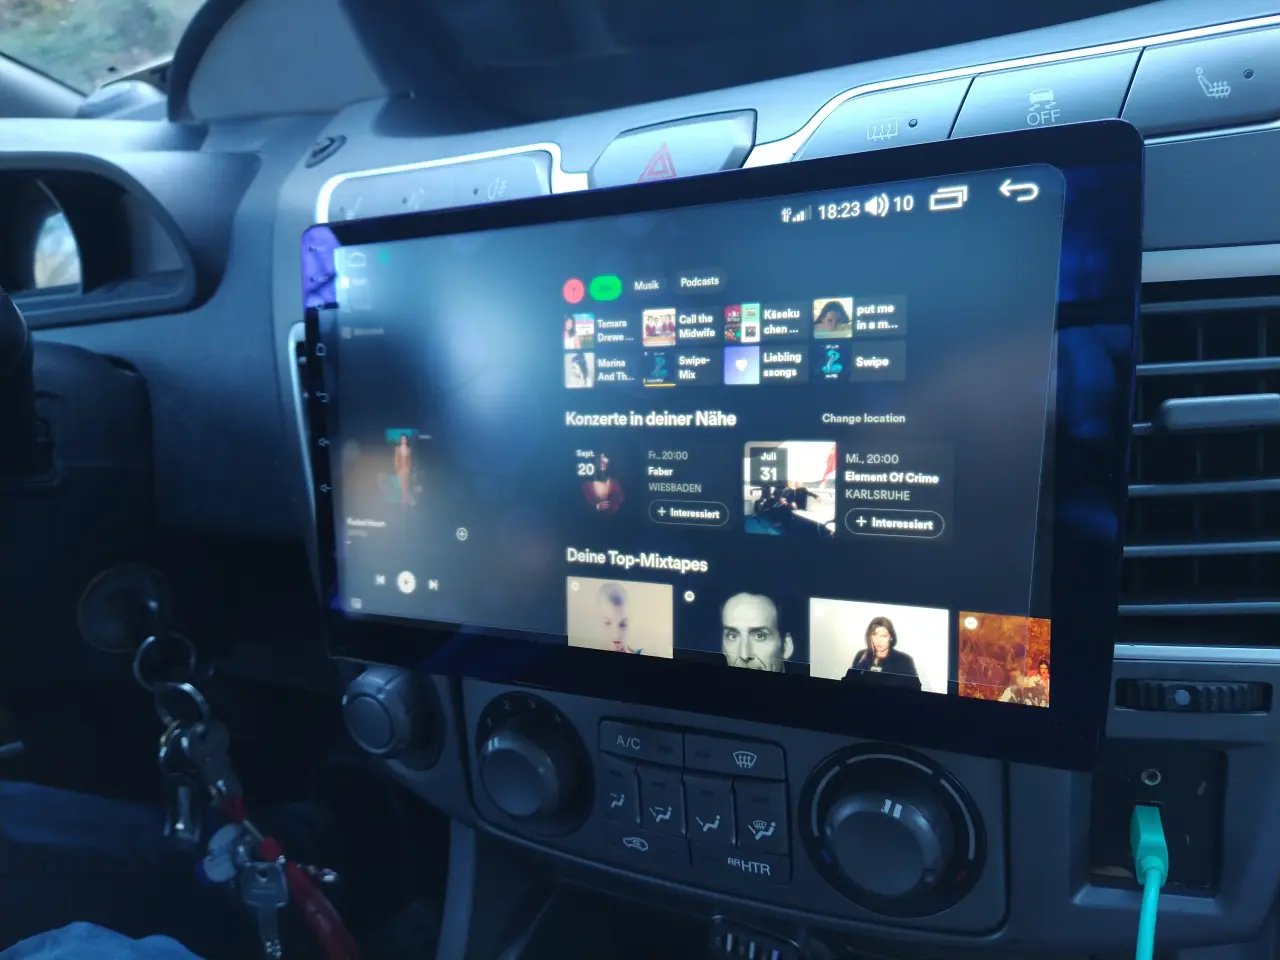
The Ekiy T7
I ordered an Ekiy T7 directly from the Ekiy store from Ali during Black Week.
10 inch car radio.
China high-end.
Costs between 140 and 190 EUR depending on the features. I paid 175 EUR with some upgrades for the small version of the T7 with 4 GB RAM and 32 GB eMMC. It costs 124 EUR individually. The price always fluctuates massively. It can be worth waiting!
- Why do I need more than 4 GB RAM for a car radio?
At most, it runs Maps, Spotify or the radio app and the dashcam app at the same time. Nothing more. - Why do I need more than 32 GB eMMC for a car radio?
There’s no music collection on it, no photos and no masses of apps.
So this version should be more than enough. With more (useless) memory, you can easily bring the radio up to 210 EUR.
The radio is available in all (im)possible vehicle-specific versions. Not for the SsangYong Rodius, of course. But it is available for Tivoli, Rexton & Co.
Key data
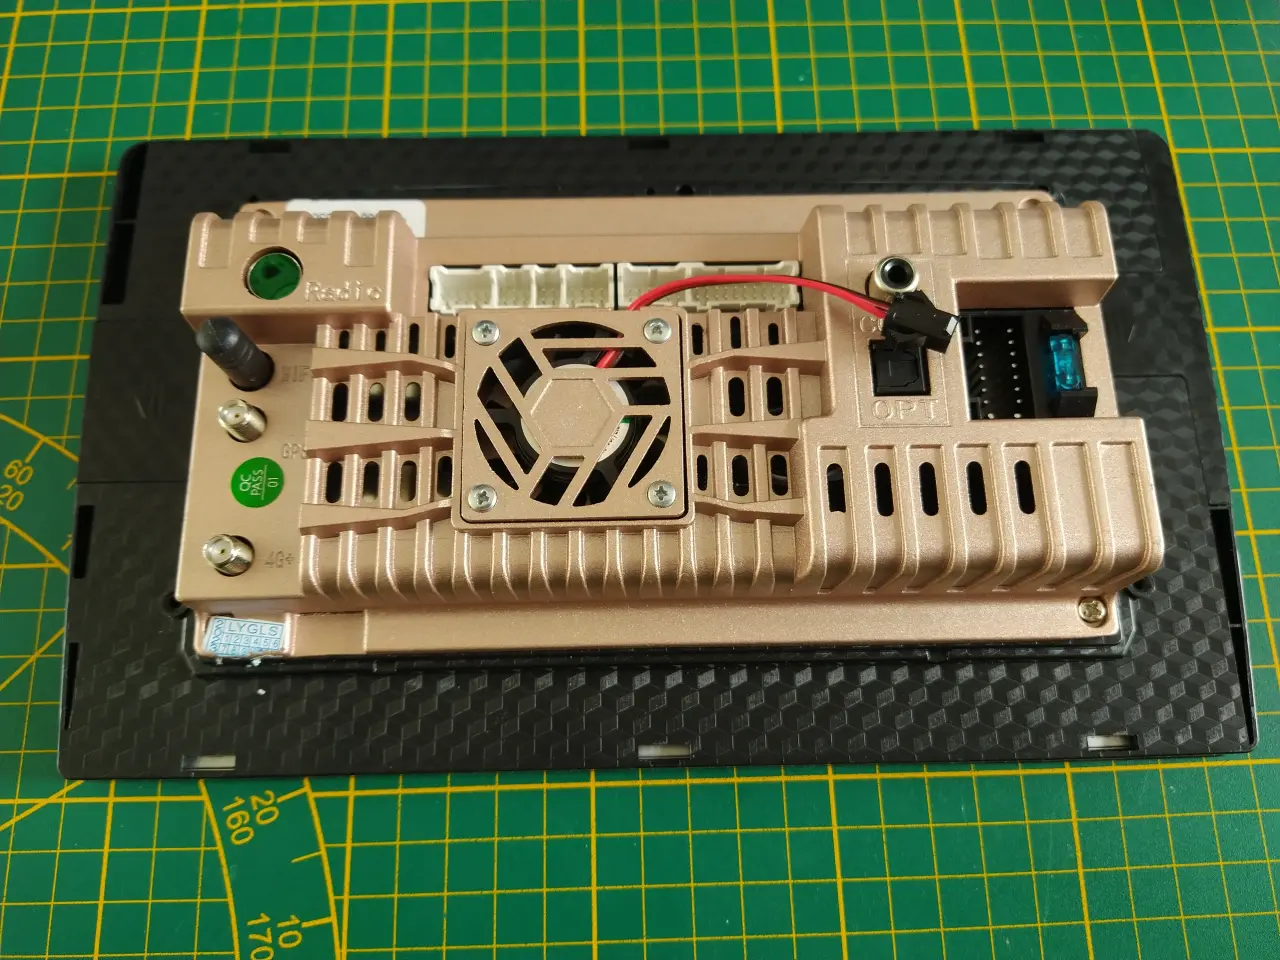
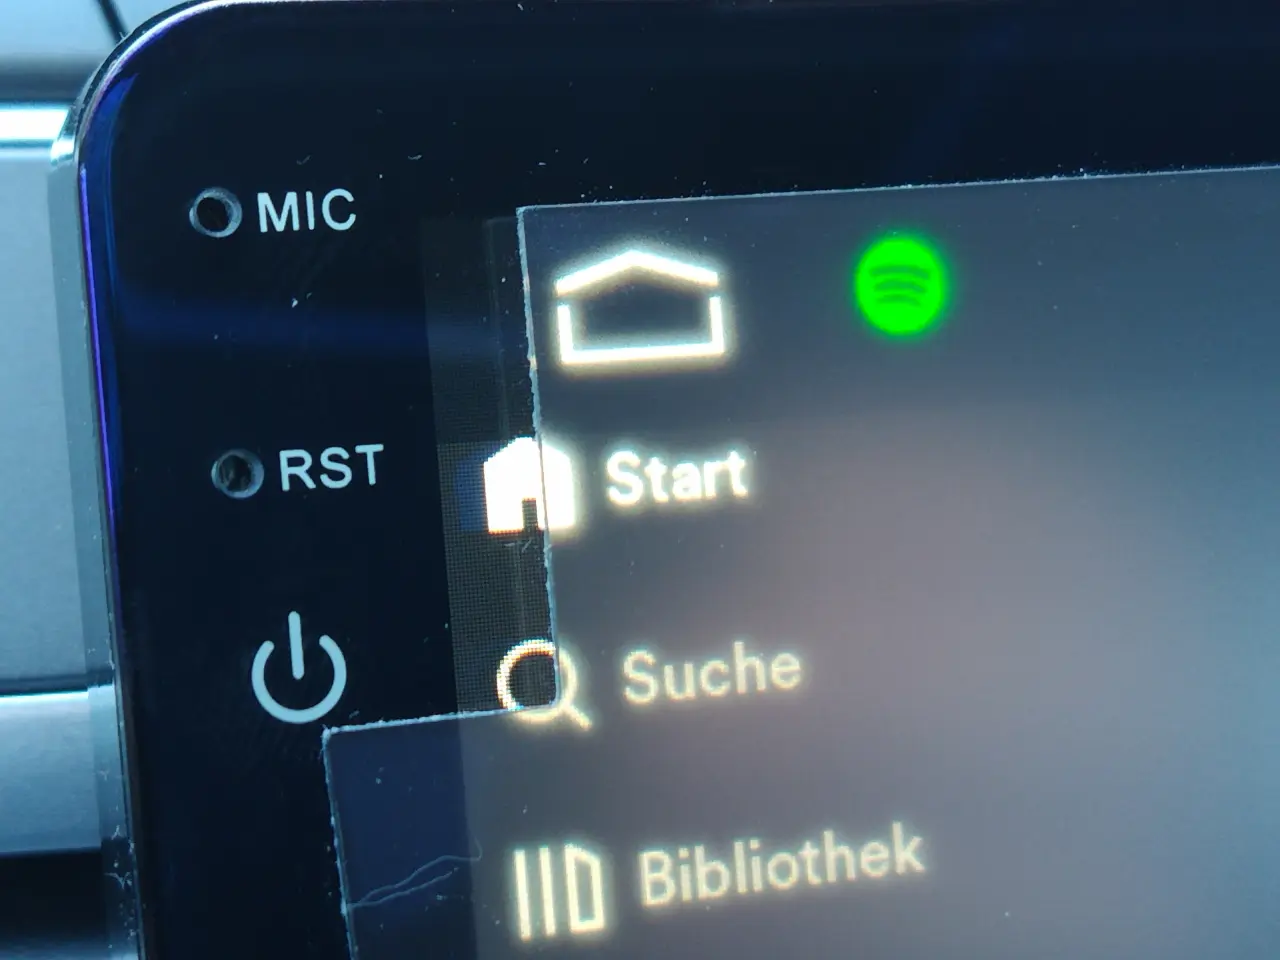
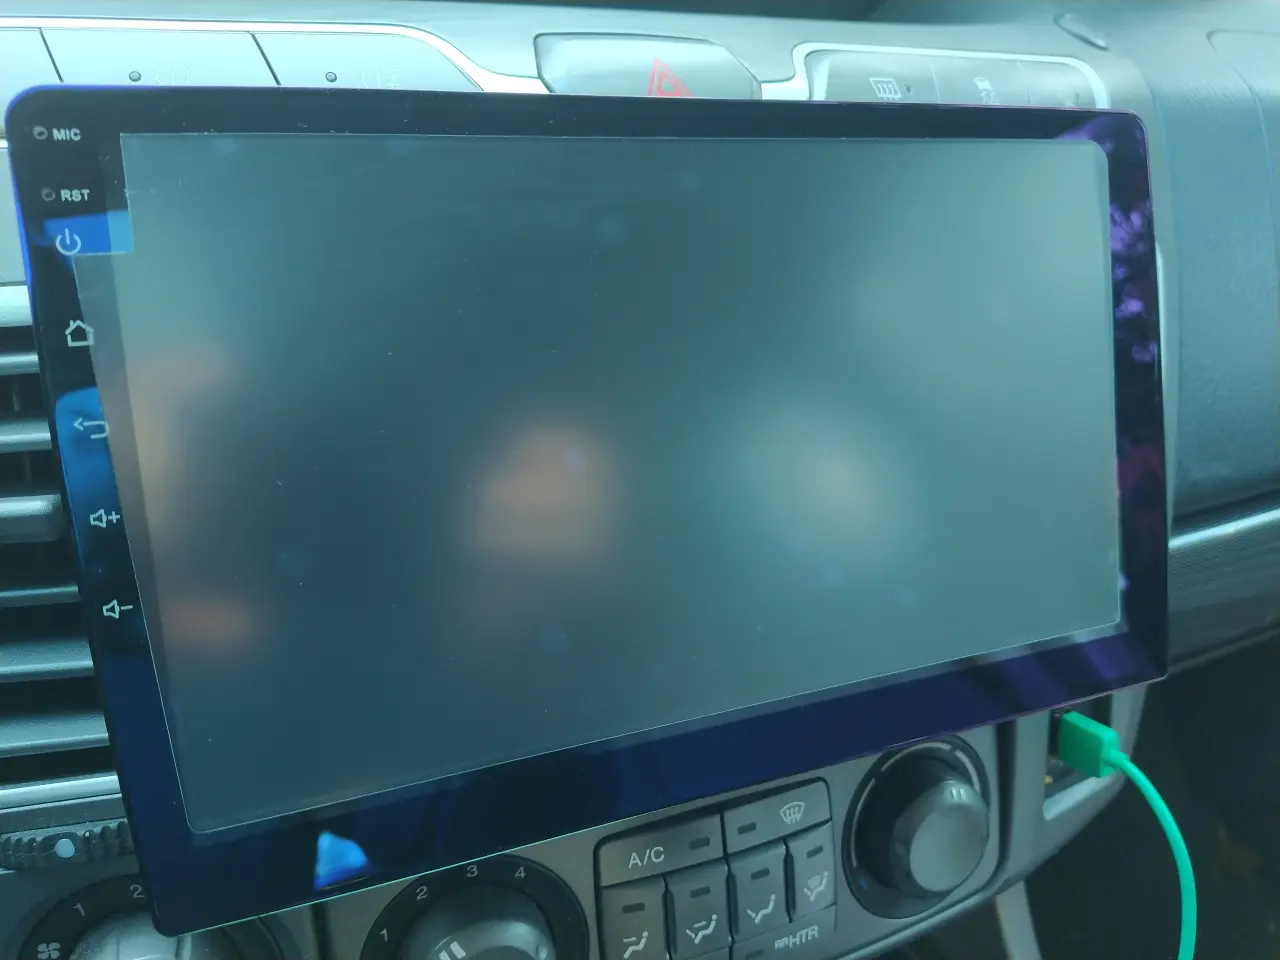
- 10″ OLED display, capacitive
- 1280 * 720
- 8 Core ARM SoC (Unisoc 7862, 1.8 GHz)
- 4 GB RAM
- 4G (LTE)
- WLAN
- BT 5.0
- GPS/Glonass/BeiDou (extremely accurate)
- 32 GB eMMC
- 2 x DSP with soundfield, etc.
- precise subwoofer control with all transfer frequencies for front and rear speakers
- Android Auto
- Apple Car Play
- picks up where you left off when you got out of the car
- 2 x USB (USB hub-capable)
- OBD connection (control/automate vehicle conformity functions)
- 2 AHD inputs for cameras
- 1 x AHD reversing camera included
- 2 analogue inputs
- 2 analogue video-out
- Optical-Out
- Coax-Out
- etc., pp
The customer rating on Ali?
4.9 stars! 🙂
You can buy ithere.
Upgrades
I gave the radio the following upgrades:
- TPMS, tyre pressure monitoring system, external sensors (15 EUR) (out of stock, identical alternative)
- Dual dashcam (HD only) (31 EUR)
- OBD-II dongle (BT) (5 EUR)(better alternative)
You don’t need the ODB-II dongle, as the instructions state that the device cannot receive ODB-II data via Bluetooth. For whatever reason. A USB dongle was recommended in other videos. I would definitely recommend one with ELM327, which is slightly larger, so it might be in the way in the footwell, but this can be solved with an ODB-II-Y adapter.
Unscrew the original socket, screw one of the adapter’s sockets into its place, plug the ODB-II dongle into the other and the adapter into the original socket. In this way, it is also possible for the workshop or the MOT to still be able to access the ODB interface without any problems, even if the radio is connected to it.
I can still retrofit as an option:
- Can bus and amp adapter for the various vehicles
- 360 degree camera (bird’s eye view of parking)
- DAB radio and an aerial adapter for it
- external DSP amplifier
- Steering wheel buttons
And, of course, everything that can be connected to / installed on an Android phone. For example, a thermal imaging camera that can recognise deer, wild boar or pedestrians at the side of the road at night.
Using the Can-Bus adapter and a car that can be controlled via it, you can control things like the heating. I don’t see why I should do this via a car radio, but perhaps the idea is to make your car smart. The plug & play connection for a factory-fitted amplifier in the vehicle is more interesting. In any case, this car radio also adapts to the most modern cars.
Apps
There are several apps that retrofit driver assistance systems and the like. No guarantee that they will work:
- ADAS AI safe driving (lane departure warning and distance warning)
- Waze Alternative to Google Maps, but also comes from Google
- Torque Pro OBI diagnostics and data visualisation with countless functions such as an assistant for fuel-saving driving)
- Auto Agent (OBI diagnosis and data visualisation)
- Radarbot: speed camera radar detector
- Droid Dashcam
- Dual Camera Video Recorder
- Fuelio: Refuelling app, logbook
- TuneIn (radio station, requires internet connection)
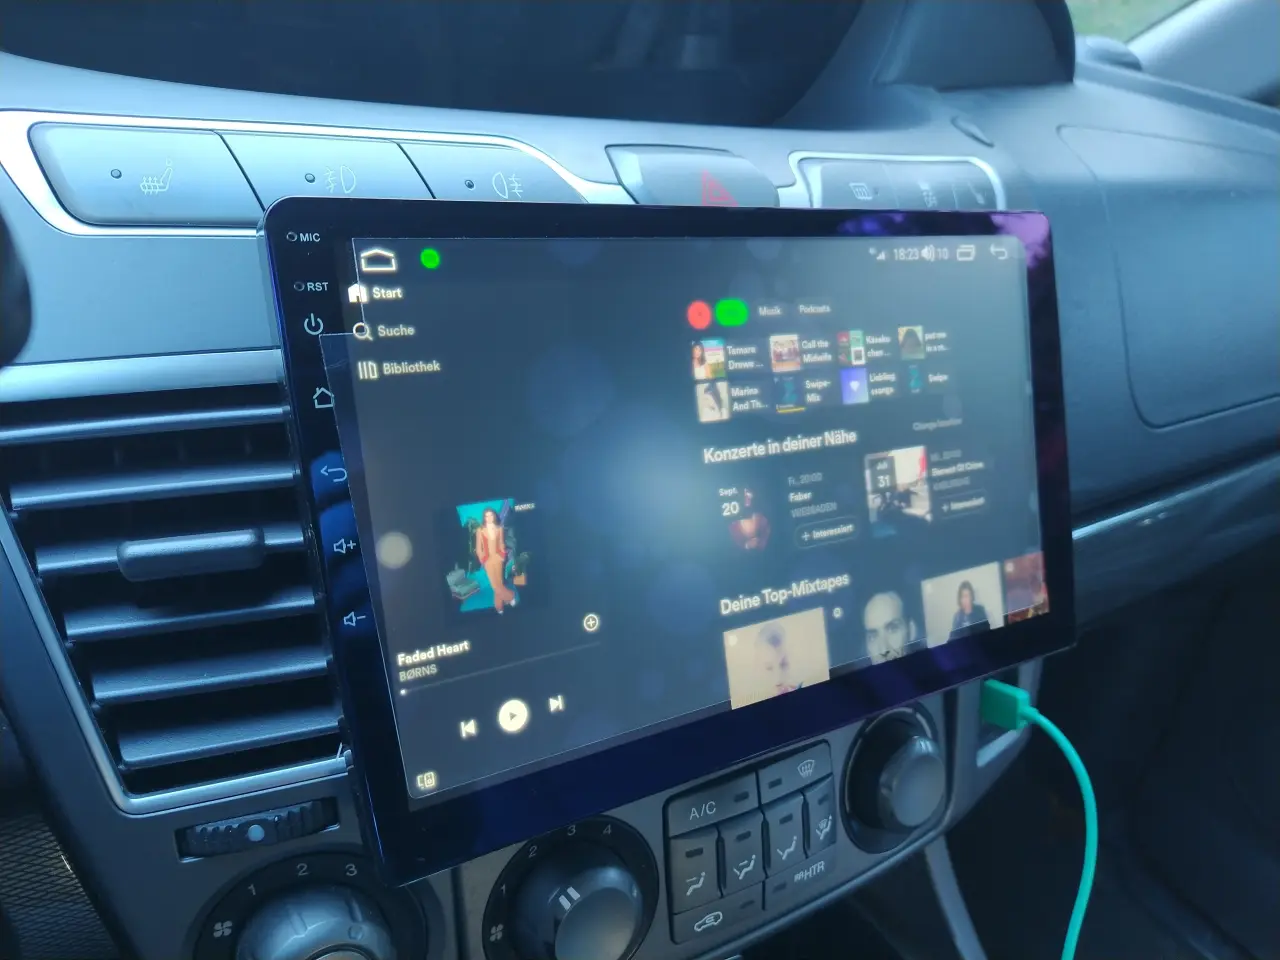
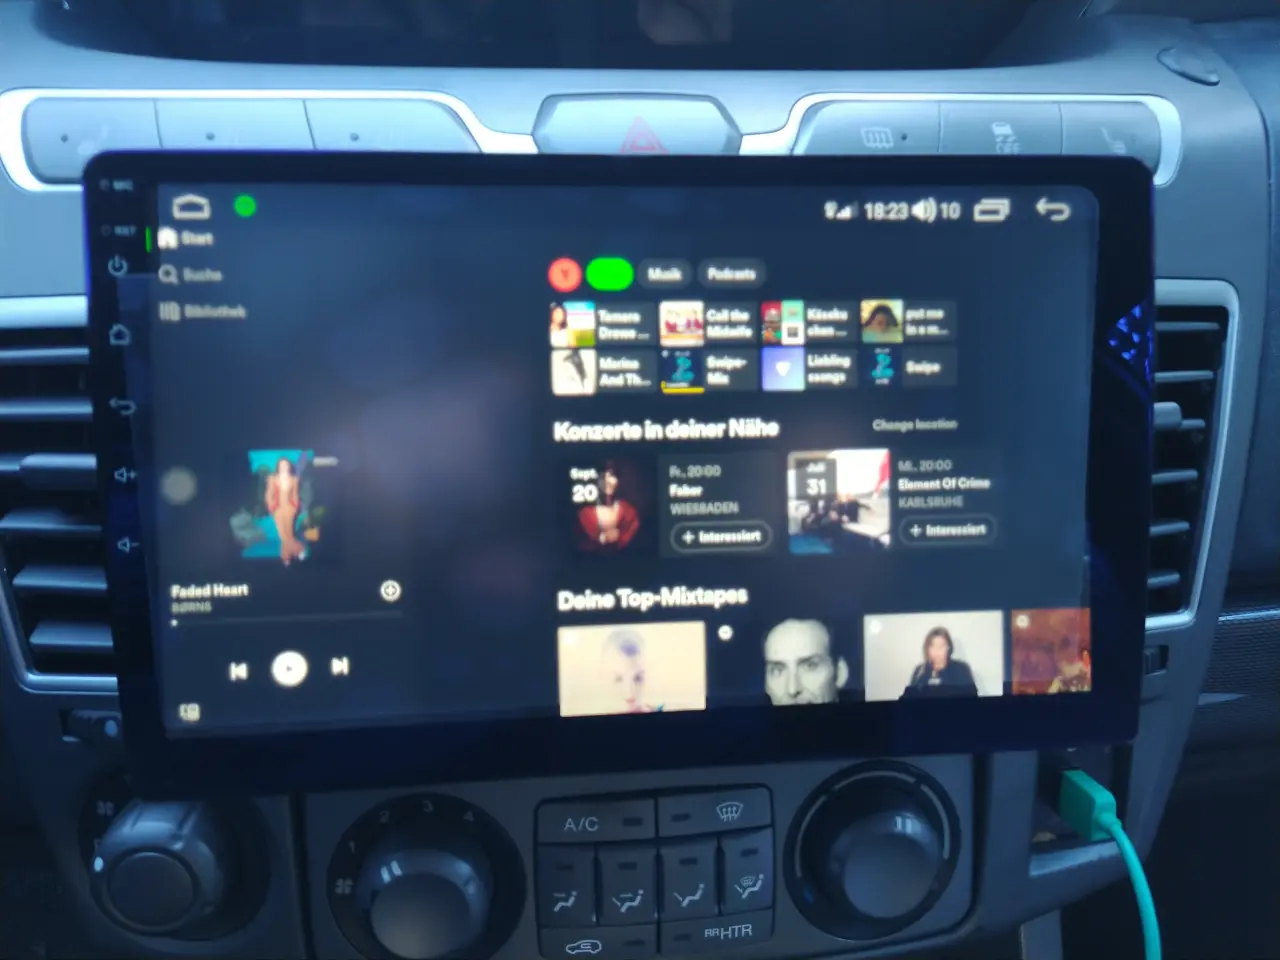
- Spotify (music streaming service)
- Copilot (chat assistant (AI), so you can get answers to more complex questions than with Google Assistant)
- WhatsApp or any other current messenger to which you can dictate chats via Google Assistant and have the answers read out to you.
Operation
Video instructions directly from Ekiy on their YouTube channel:
https://www.youtube.com/channel/UCIqkhYlXKjDbijIpZHfYdWg
Inner life
Disassembly video:
Delivery
Everything was delivered loose in a box that was packed especially for my complete order. There is no fancy sales box. Everything arrived safely and I didn’t have to pay any import tax or other duties. I ordered on 25 November and it was delivered on 12 December. Not bad for the volume of parcels at Christmas.
Tool
You’ll have some tools and supplies in the workshop, but if not, here are some things I would buy. Inexpensive tools and materials. No junk, but no expensive professional tools either.
Lever tool set – it’s worth its weight in gold and you can easily remove any panelling on your vehicle without damaging it.
Comprehensive bit set and ratchet screwdriver with socket spanners – you never know what you might have to remove from your car!
Simple multi-function tool – for working on the radio panel and creating openings
Hot glue gun – with plenty of power! To glue the radio to the panel.
Hot glue sticks – no experiments! Only from Pattex!
Cable tie set – to secure the cables properly
Fabric tape – to cushion the cable bundles so that they don’t rattle and rumble
Wago clamps – to connect cables easily and securely
Tools for subwoofer installation
Heat-shrink tubing set – to safely insulate the cables on the subwoofer
Wire end crimping pliers as a set – even though most connections on a subwoofer have lift terminals, I am a big fan of clean connections that rule out short circuits.
Crimping pliers set – for the correct and safe connection of cable lugs to the car battery (for the subwoofer)
Lashing eyes – to securely fasten the subwoofer
Lashing straps – to secure the subwoofer
10 mm² supply cable – the scrap supplied with the subwoofer is far too thin. However, you can use the fuse holder.
Damping elements – print out from TPU
Do you have a van like ours? Over five metres long? Then you won’t get there with the subwoofer’s cinch cable and need this 7.5 metre cinch cable.
The expansion
The panel was quickly removed, but there were no levers or recesses on the radio for unlocking it with one of those radio extraction tools. I fiddled and fiddled and fiddled, but the radio wouldn’t move an inch.
I looked through all the instructions published by Zenec and others. There was even one that described how to install it in a Rodius. But none that explained how to get the radio out again.
I tried calling Zenec in Switzerland, I tried calling their shop in Berlin. Nobody answered. I searched forums for information. I was told to simply push from the back. You have to remove the two panels on the left and right of the VW bus. Great. Well, we don’t have a VW Bus. You have to use a kitchen scraper to operate a lever between the radio and the frame. A kitchen scraper doesn’t even begin to fit in there. I didn’t feel any levers or hooks with a screwdriver, just bars.
I was completely annoyed. Really annoyed. I went into the cellar and took a large screwdriver and a hammer into the car.
Then I simply knocked out the four hooks on each side. The things put up more of a fight than I expected and the old car radio now looks like this on the sides too.
No, that’s not a loss! I offered it on forums five years ago for EUR 100, but nobody wanted it.
In principle. Unfortunately, a specialist company had previously installed the Zenic radio and made some … interesting solutions. Open, bare plugs are intended as power supply lines, aren’t they? The Zenec also came with all sorts of accessories flying around loose in the radio slot. So I first removed everything completely to get an overview.
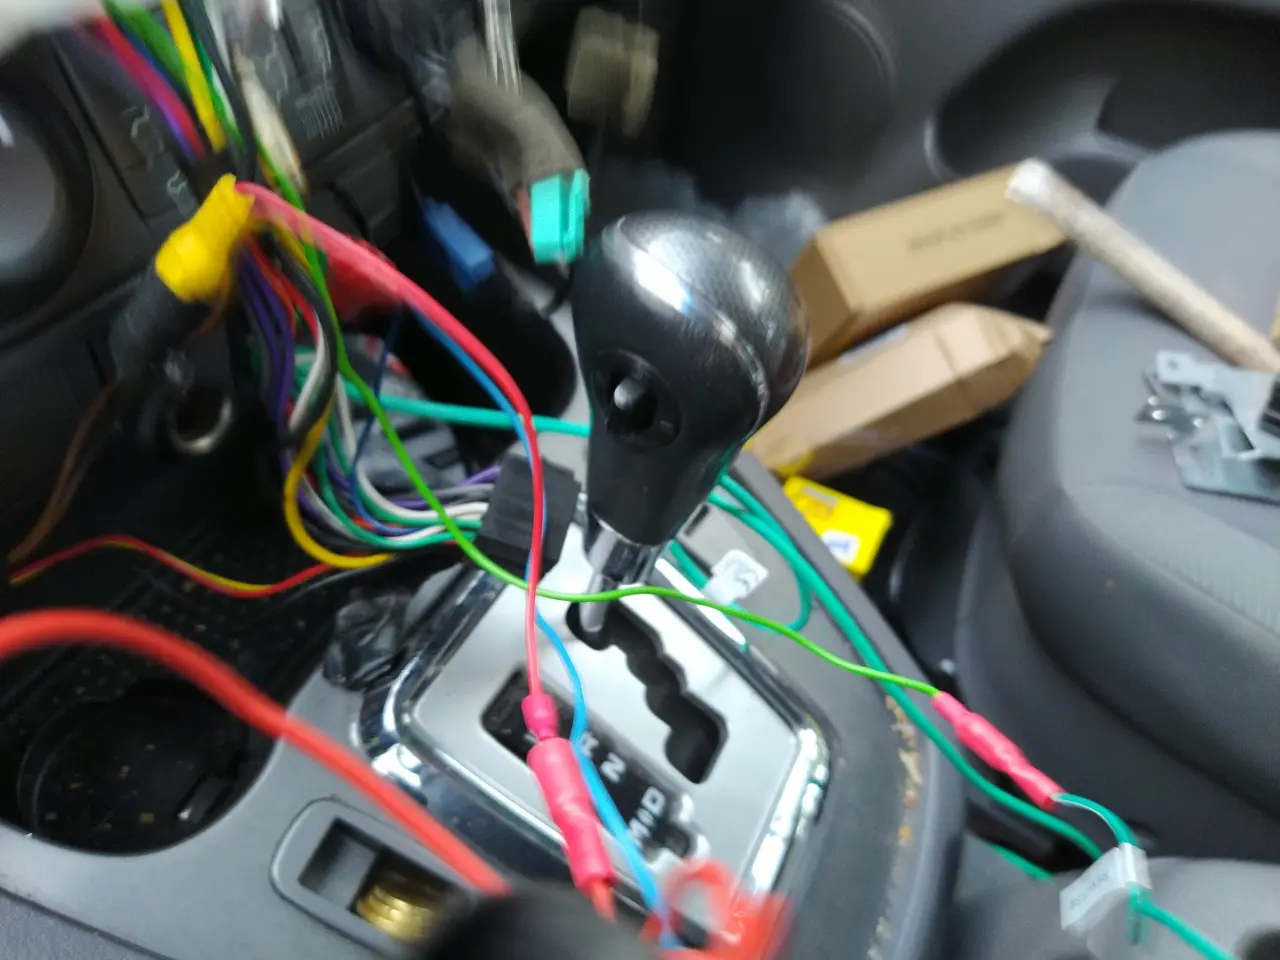
I had to tinker a lot more than I thought in order to restore the original condition that SsangYong intended. I was only able to use the usual ISO adapter. I took a few pictures so that I still knew which cables had what purpose after removing the old gaff.
Installation
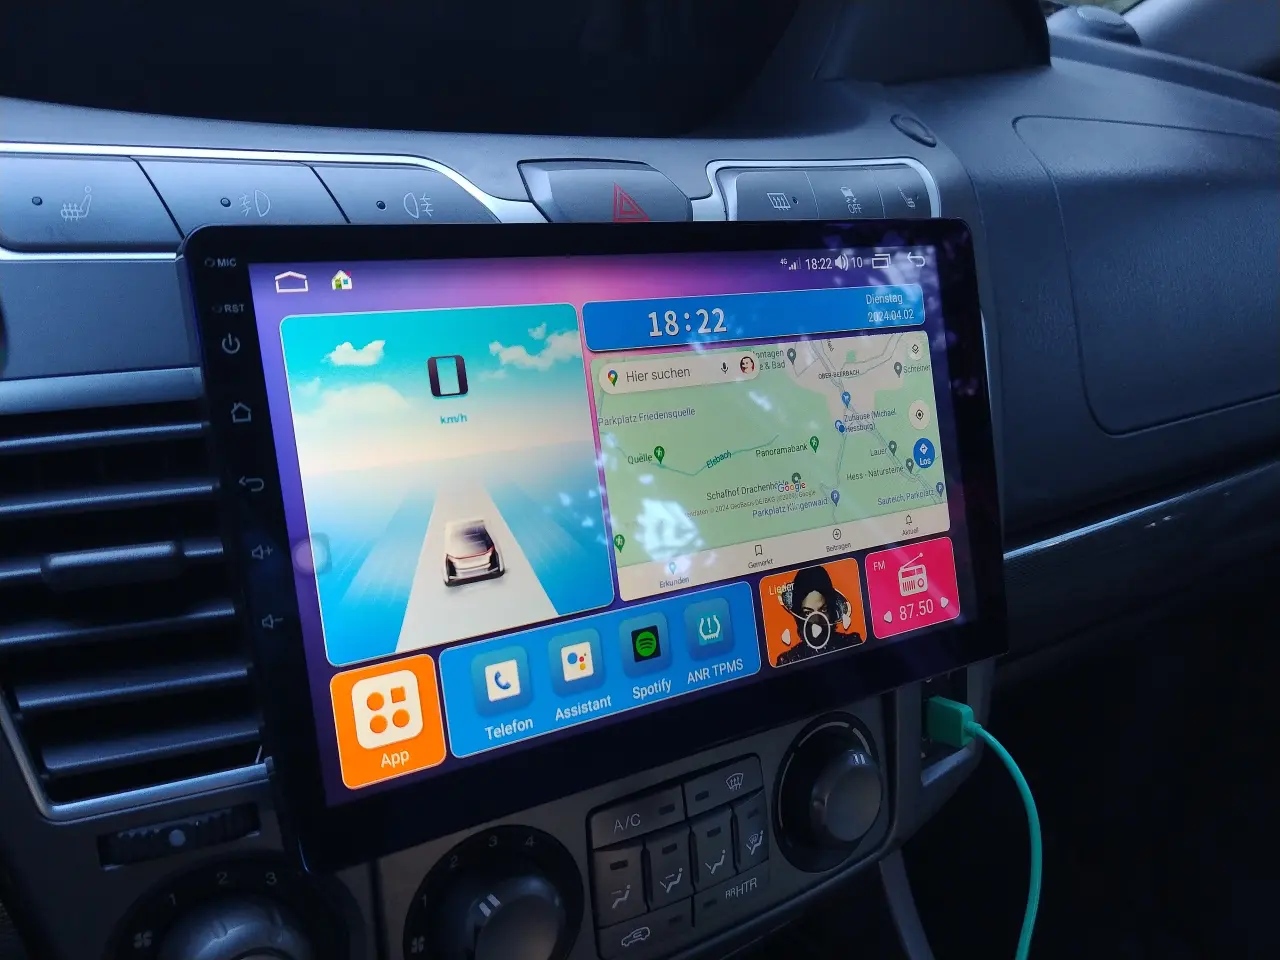
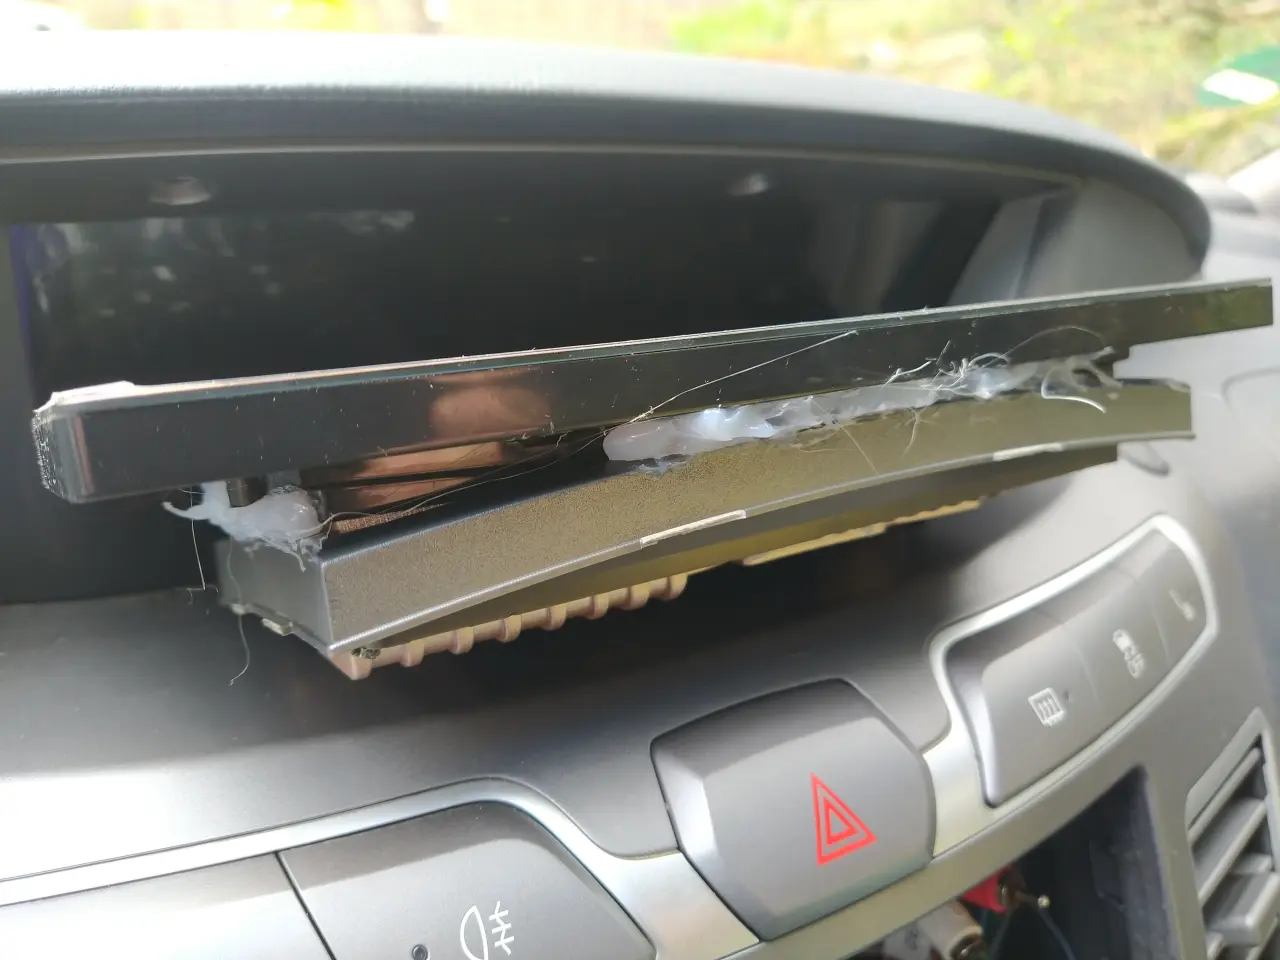
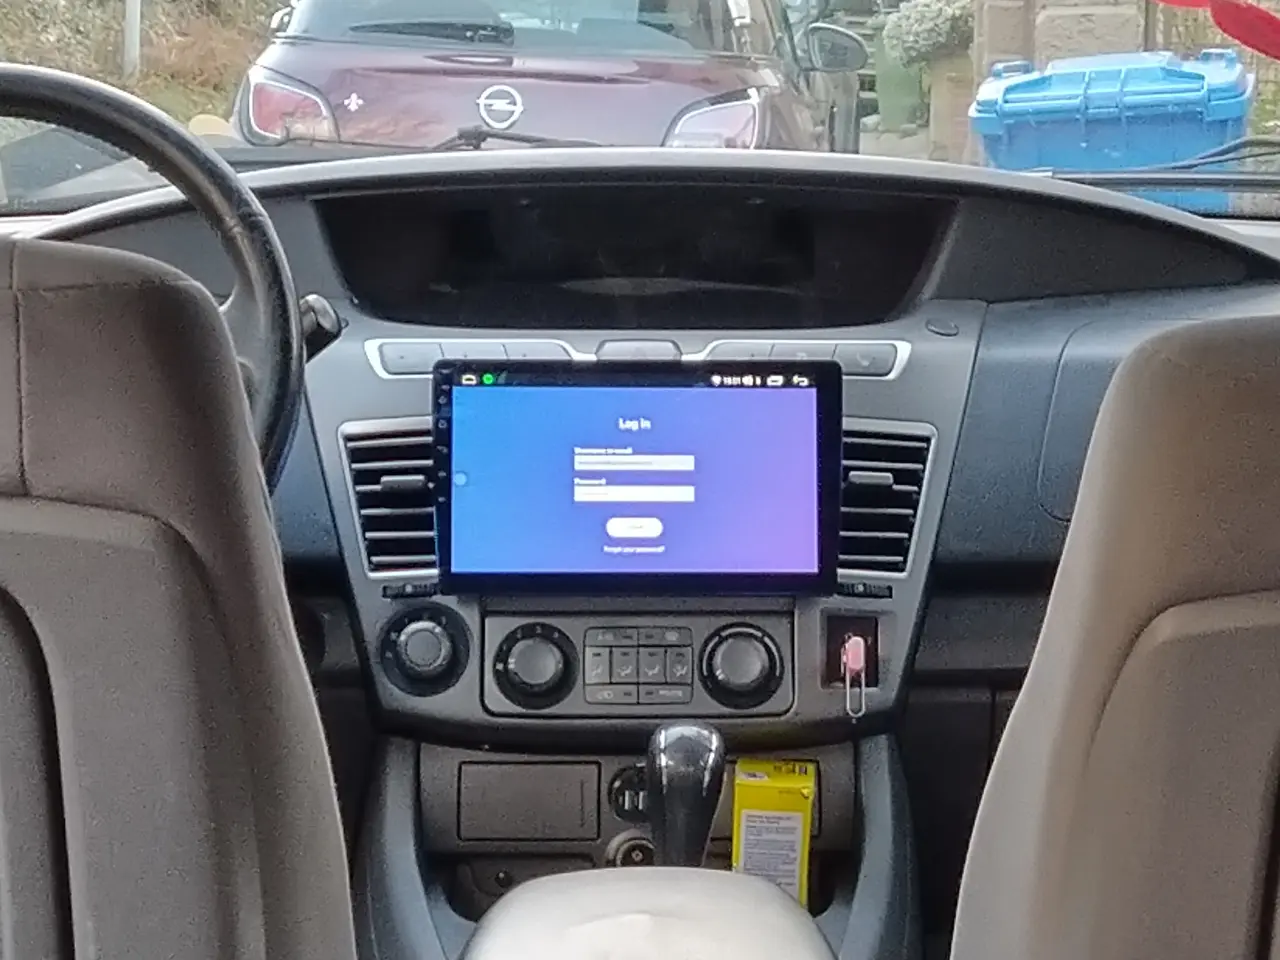
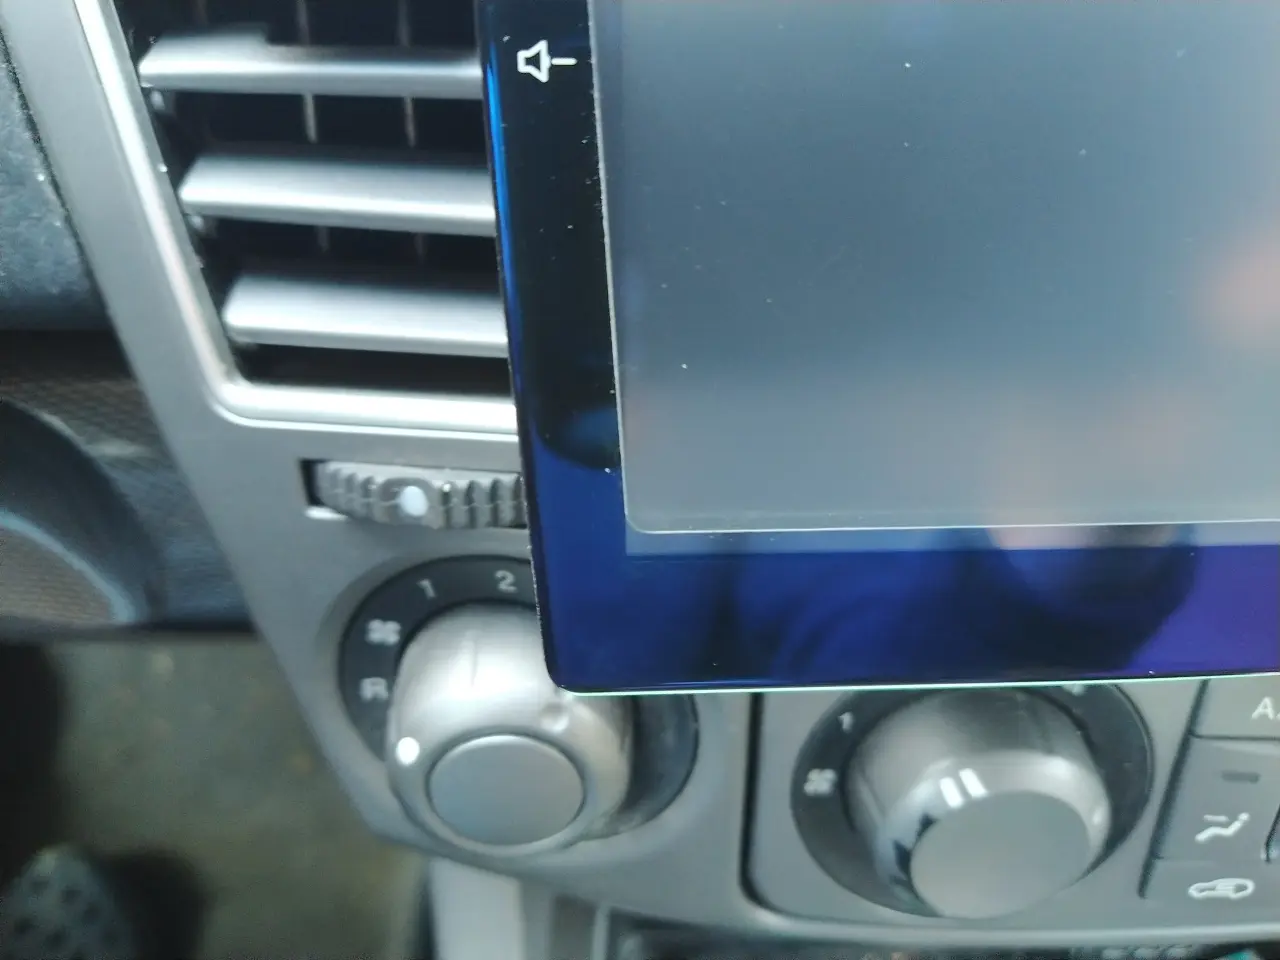
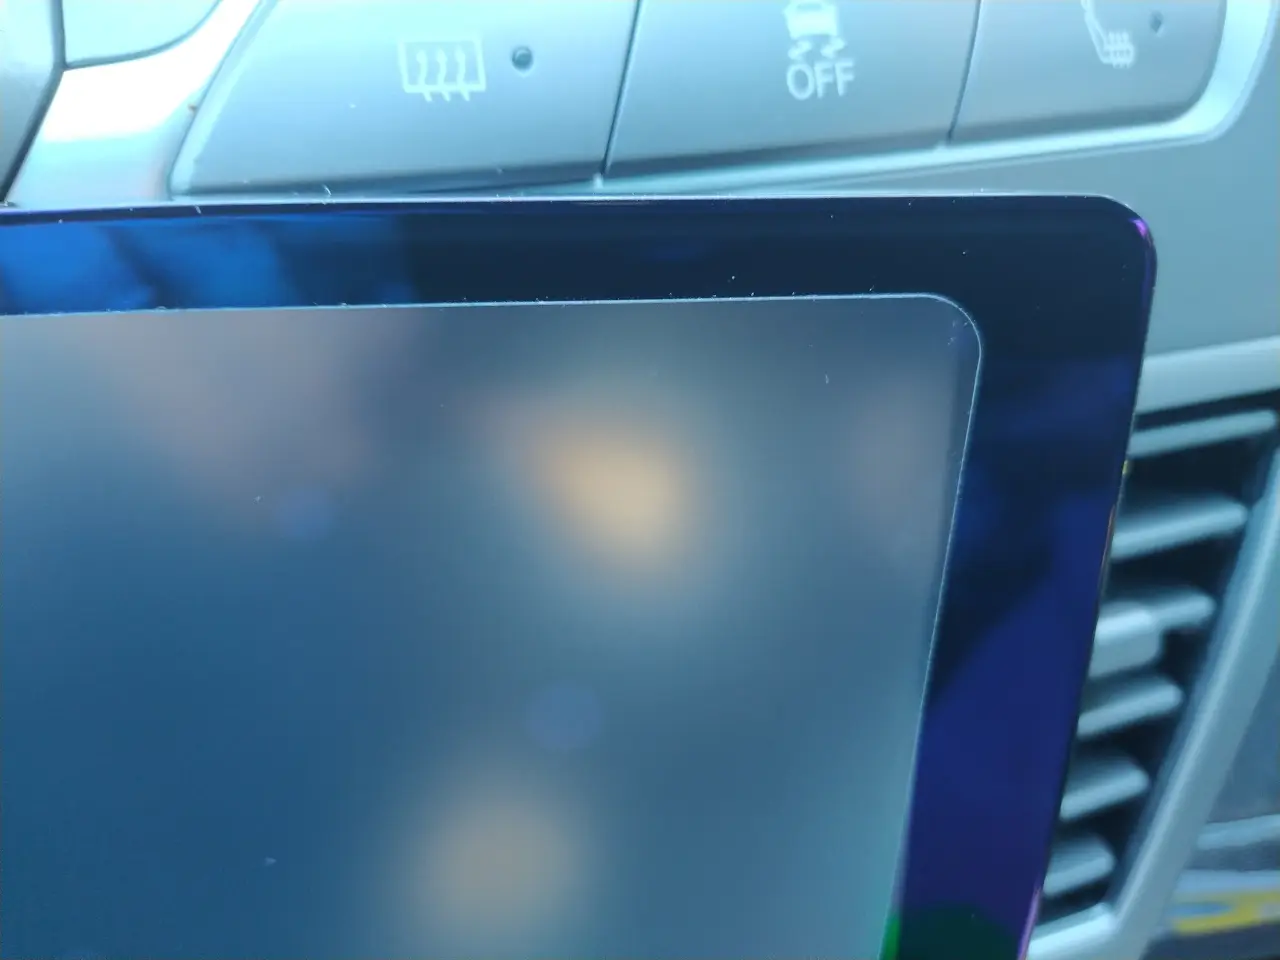
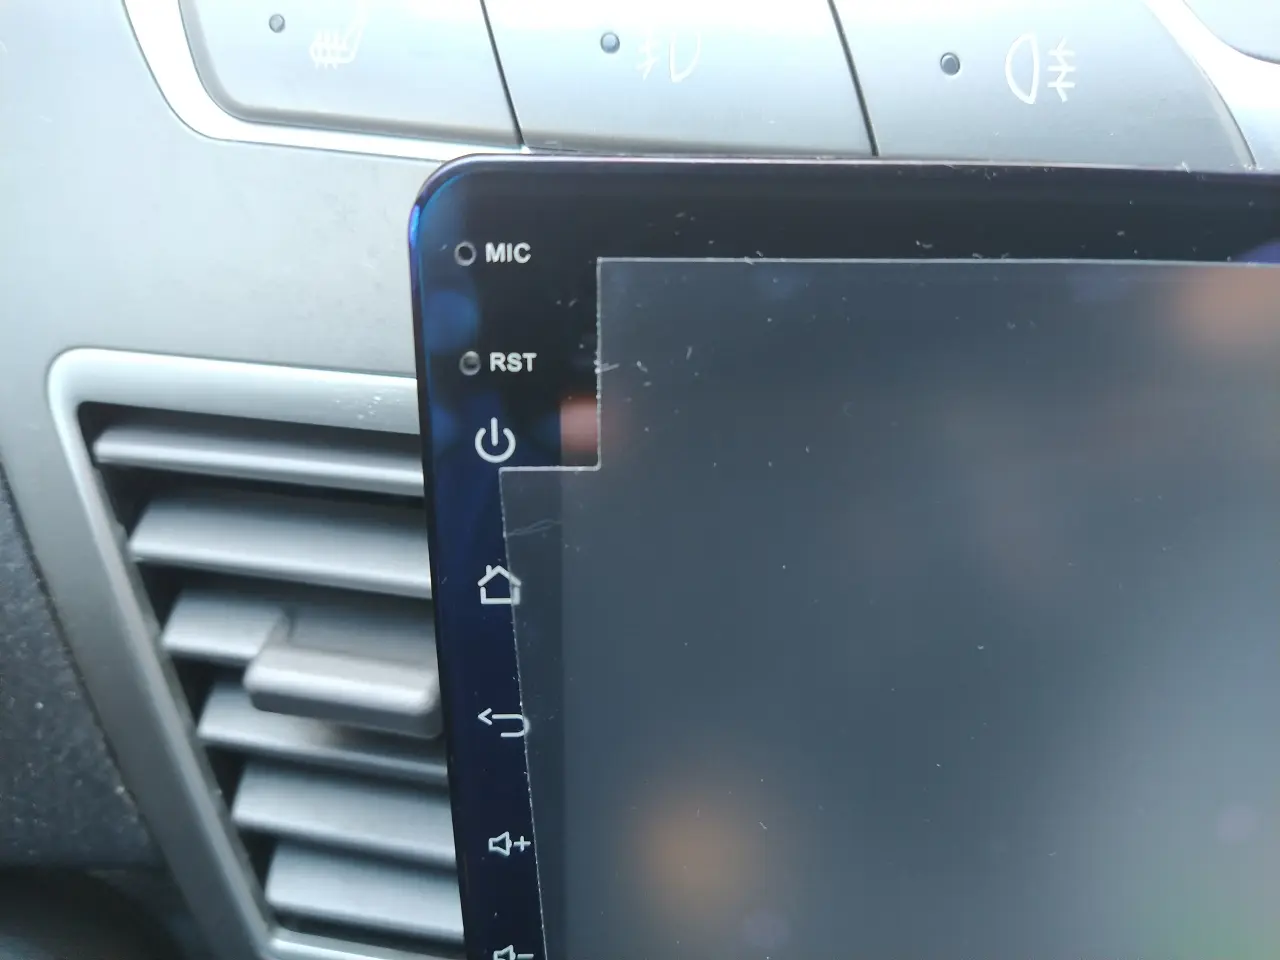
The radio protrudes over (in front of) the dashboard. There are air vents on the left and right, a row of switches at the top and the ventilation control at the bottom. A 10″ radio just fits into the Rodius without covering anything. You have to test this individually for your car.
The radio is very short, so it doesn’t go far enough into the double-DIN slot to fit in. Behind the display there is a metal housing that is only about the size of a 1-DIN radio slot. This makes it possible to move the radio in height if it is not purchased with a suitable installation frame.
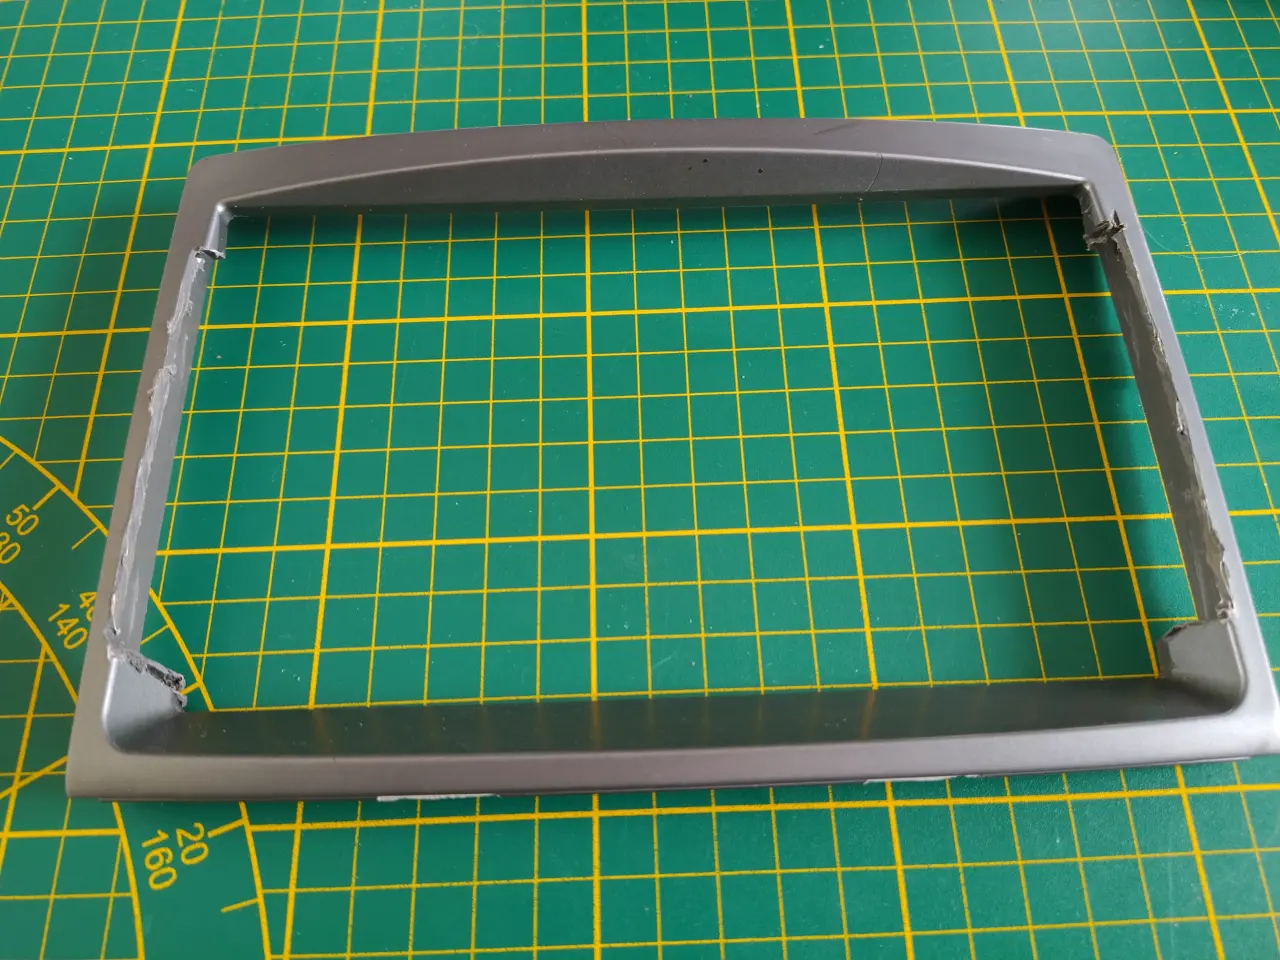
As mentioned before: there is no installation frame for the Rodius, so I had to tinker. I designed my own installation space to fit into the double DIN slot, but none of my printouts were fit for purpose. However, I found comments on the net that recommended gluing it in. Others remove the entire centre console panel and screw the radio in from behind with clips.
But the panel in the centre of the dashboard in the Rodius goes from the speedometer down to the heating control. In between there are buttons, nozzles and all that stuff. So the only option was to glue it in place.
Yes, well, you should be able to remove the radio again, right?
So I machined the radio cover of the Rodius with the Dremel and glued the radio into it with hot glue. It holds surprisingly well. Push the lugs of the original panel into the dashboard at the top, then snap them into place at the bottom. This should work with pretty much any car that has an original panel.
Double-DIN bezels are available for specific vehicles for between 20 and 80 EUR. In my opinion, they are all absolutely identical, so you can go for the cheapest one without hesitation.
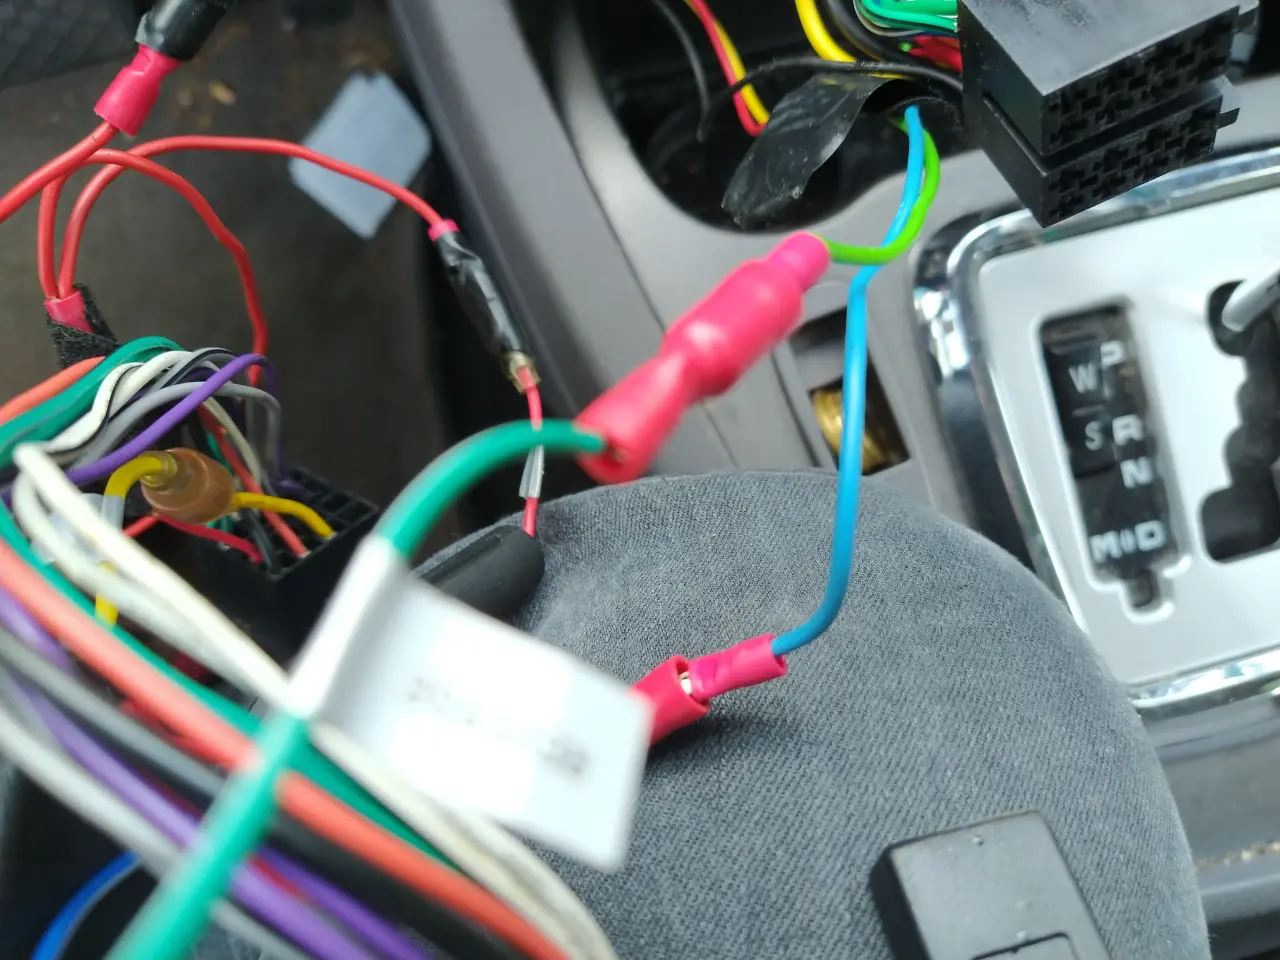
Electrical connection
The radio was easy to connect. If you are familiar with it, take a deep breath and take it one step at a time.

Interesting: You don’t need an ISO aerial adapter, you can plug the usual DIN aerial into the radio. This long plug must reach directly into the display! That’s crazy! At first I thought I would need a different adapter, but in the end everything fitted perfectly.
The original cables for the steering wheel buttons could be connected directly with Wago terminals and easily programmed in the radio.
I don’t know if and how I can connect the original reversing sensors to the radio. But that would really just be a gimmick. So I left it alone. The built-in microphone is excellent, so I didn’t connect the vehicle’s own microphone.
Password?
To access some functions, you need the password „ekiy123“.
The subwoofer
The subwoofer was annoying. Although the installation itself was nothing you wouldn’t expect, I only realised that the supply cable was only 1.5 mm² „thick“ when I installed the subwoofer I had bought.
The fuse supplied with the connection set, which you have to connect directly to the car battery, was 50 A and the fuse in the subwoofer was 20 A. So I ordered a 10 mm² cable with a length of 10 metres from Amazon. Yes, you can argue that the 10 mm² is too small, but I reckon that the amplifier doesn’t draw anywhere near the power that you would extrapolate from the music output.
I also ordered a 7.5 metre cinch cable. The Rodius is 5.13 metres long. The supplied audio cable to the subwoofer was only five metres long. In fact, you need quite a few metres, as you have to run the cables from the centre of the dashboard all the way to the back.
Cable routing
Required cables to the rear:
- 1x 10 mm² subwoofer power supply
- 1x RCA cables of the subwoofer signal
- 1x control line (switch-on signal) of the subwoofer (otherwise it will drain the battery!)
- 1x volume control of the subwoofer (optional)
- Rear view camera cable
Each individual cable, from the power supply (plus cable) of the subwoofer to the cables of the dashcams, is first laid loosely from the radio. Once this is done, bundle the cables and attach them to the points and in the cable ducts provided by the car manufacturer. In the Rodius, these are located in the sills under the doors.
I ended up installing two cameras in the rear (the old reversing camera on the Zenec was fritted). I mounted one in the rear window and the second in the designated place next to the licence plate light. The latter serves as a reversing camera and the one in the rear window as a rear dashcam to capture more of the traffic.
I laid the cables for the cameras behind the upper panelling of the doors, as this made the route a little shorter than if I had laid them around the bottom.
Test run
And the sound? My wife listened to it during the installation phase without the subwoofer and said that it already sounded so much better than the Zenec. The EQ was even set to flat. 🙂
She complained that the radio was too big. As is common today, it stands in front of the dashboard like a foreign object. That’s just the way it is.
Finished sound
In the evening, she did the final inspection. As much as she nagged beforehand, I feared her judgement.
She switches on the radio.
The music is playing.
She stares at the radio with a petrified face and her eyes get moist.
Once she had regained her composure, she tried out all the sound settings the radio had to offer. And that’s a lot!
So the effort of installing it was worth it after all.
Protective film
In this installation position, the radio reflects like hell! So an anti-glare film was needed. This is available from Brotect on Amazon. I am semi-satisfied. It’s smaller than the radio’s display, makes the picture blurred, but also has a good anti-glare effect.
Conclusion
Everything runs so incredibly smoothly on the Ekiy and you can install any app you want. As it also has 4G and Wi-Fi, you don’t even need a mobile phone. Oh yes: Android Auto and Apple Car Play also work fully automatically. The sound is excellent and offers many setting options. This car radio really is a flagship – and for a comparatively low price.