
The Artillery X3 Plus is the successor to the well-known and popular Sidewinder X2. It is of course faster and better equipped than the X2. But what can the new 3D printer really do?

Inhalt
Influencer?
I’m not a professional, glossy influencer who wants or needs to sell people something. I don’t want to be one either. Geekbuying wrote to me for some unknown reason and asked if I would like to test a printer. I chose the Sidewinder X3 Plus because I had some problems with it after buying the Sidewinder X2 and already regretted not buying the X3 Plus.
I own three printers that I bought myself, but I’ve been a beginner in this field for years. Of course I modded my first printer, the Anycubic i3 Mega, but I’m not a hobbyist. I want to print with the printers and not tinker with them as an end in itself. Reliability and ease of use are clearly my top priorities.
These are also my premises for this test. Geekbuying did not set any conditions for the transfer of the printer. I was simply asked to publish the article within 20 days.
Shortly after shipping, the printer was removed from Geekbuying’s programme and I received the Creality Ender-3 V3 KE instead, whose test had priority. However, I don’t want to withhold my opinion of the Artillery Sidewinder X3 Plus from you.
Confusion
Artillery is currently confusing its own fans. The Sidewinder X3 Pro and the larger Sidewinder X3 Plus were not even on the market when Artillery announced the X4 Plus. What’s going on?
According to my previous information, there are actually two new series at Artillery. One, the Sidewinder X3, serves the entry-level market and the other, the Sidewinder X4, serves the high-end market. The Sidewinder X2 is currently on sale.

The name Sidewinder now seems to be used for all Artillery printers. The names Hornet and Genius seem to be history.
Unboxing
How? Unboxing and installation? That’s really 2010s! I thought so too, but people specifically asked me about it. They wanted everything from unboxing and installation to the first print to be explained in a beginner-friendly way so that they knew what to expect after the purchase.
Preliminary remark: I have just recently moved my printers to the KBZ, the former cat meeting centre.
Everything is only half set up and I’m still sharing the space with the cats, so there will be the odd cat hair in the odd photo. As I mentioned before, I’m not a glossy influencer with my own semi-professional studio.
Packaging
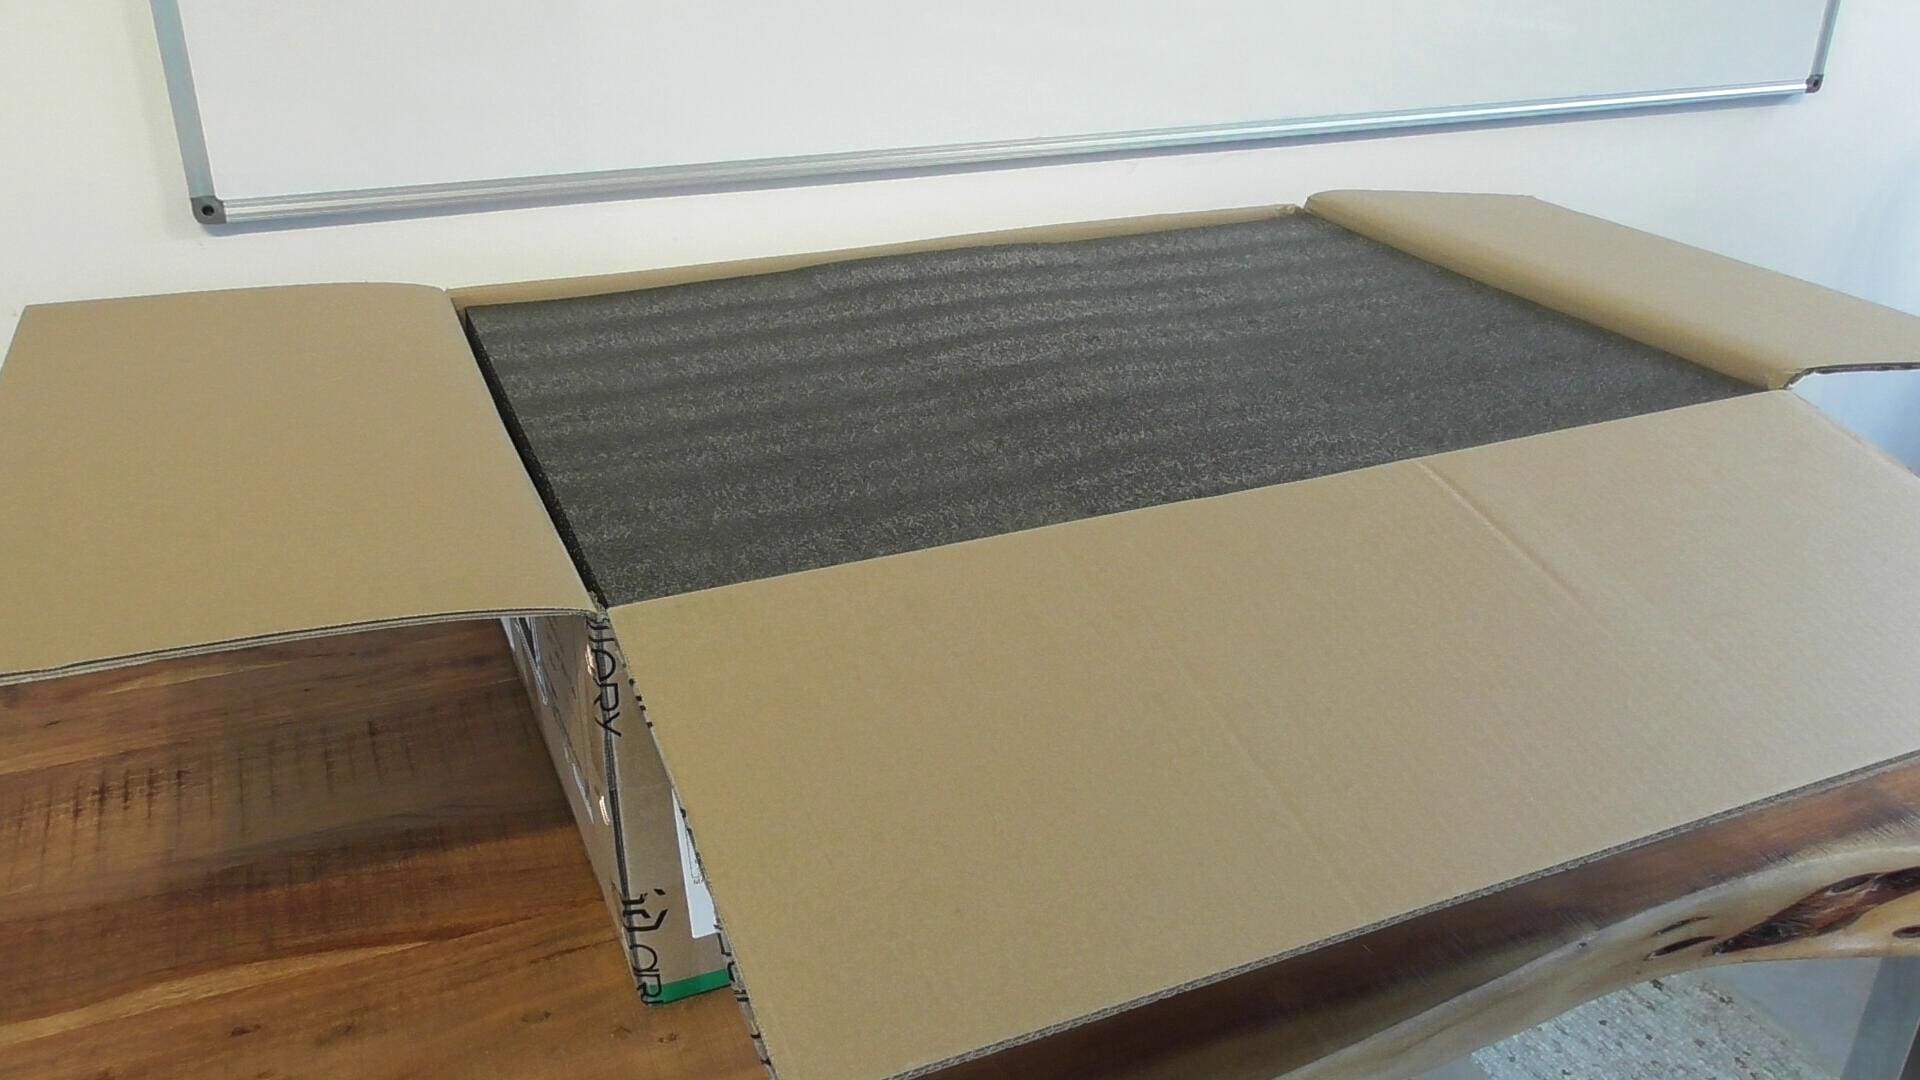
As you would expect from Artillery, the Sidewinder X3 Plus is packed very securely ex works. It was shipped by Geekbuying in the original packaging from a European warehouse.

The packaging is very reminiscent of its predecessor X2 or the packaging from Creality. And why not? It protects the printer perfectly and you can still easily remove all the individual parts. Some manufacturers pack their printers so badly that you have to search for the small parts in the box. However, Artillery has, as always, done a good job.
The illustrated instructions and the bag of accessories are the first things that catch the eye.
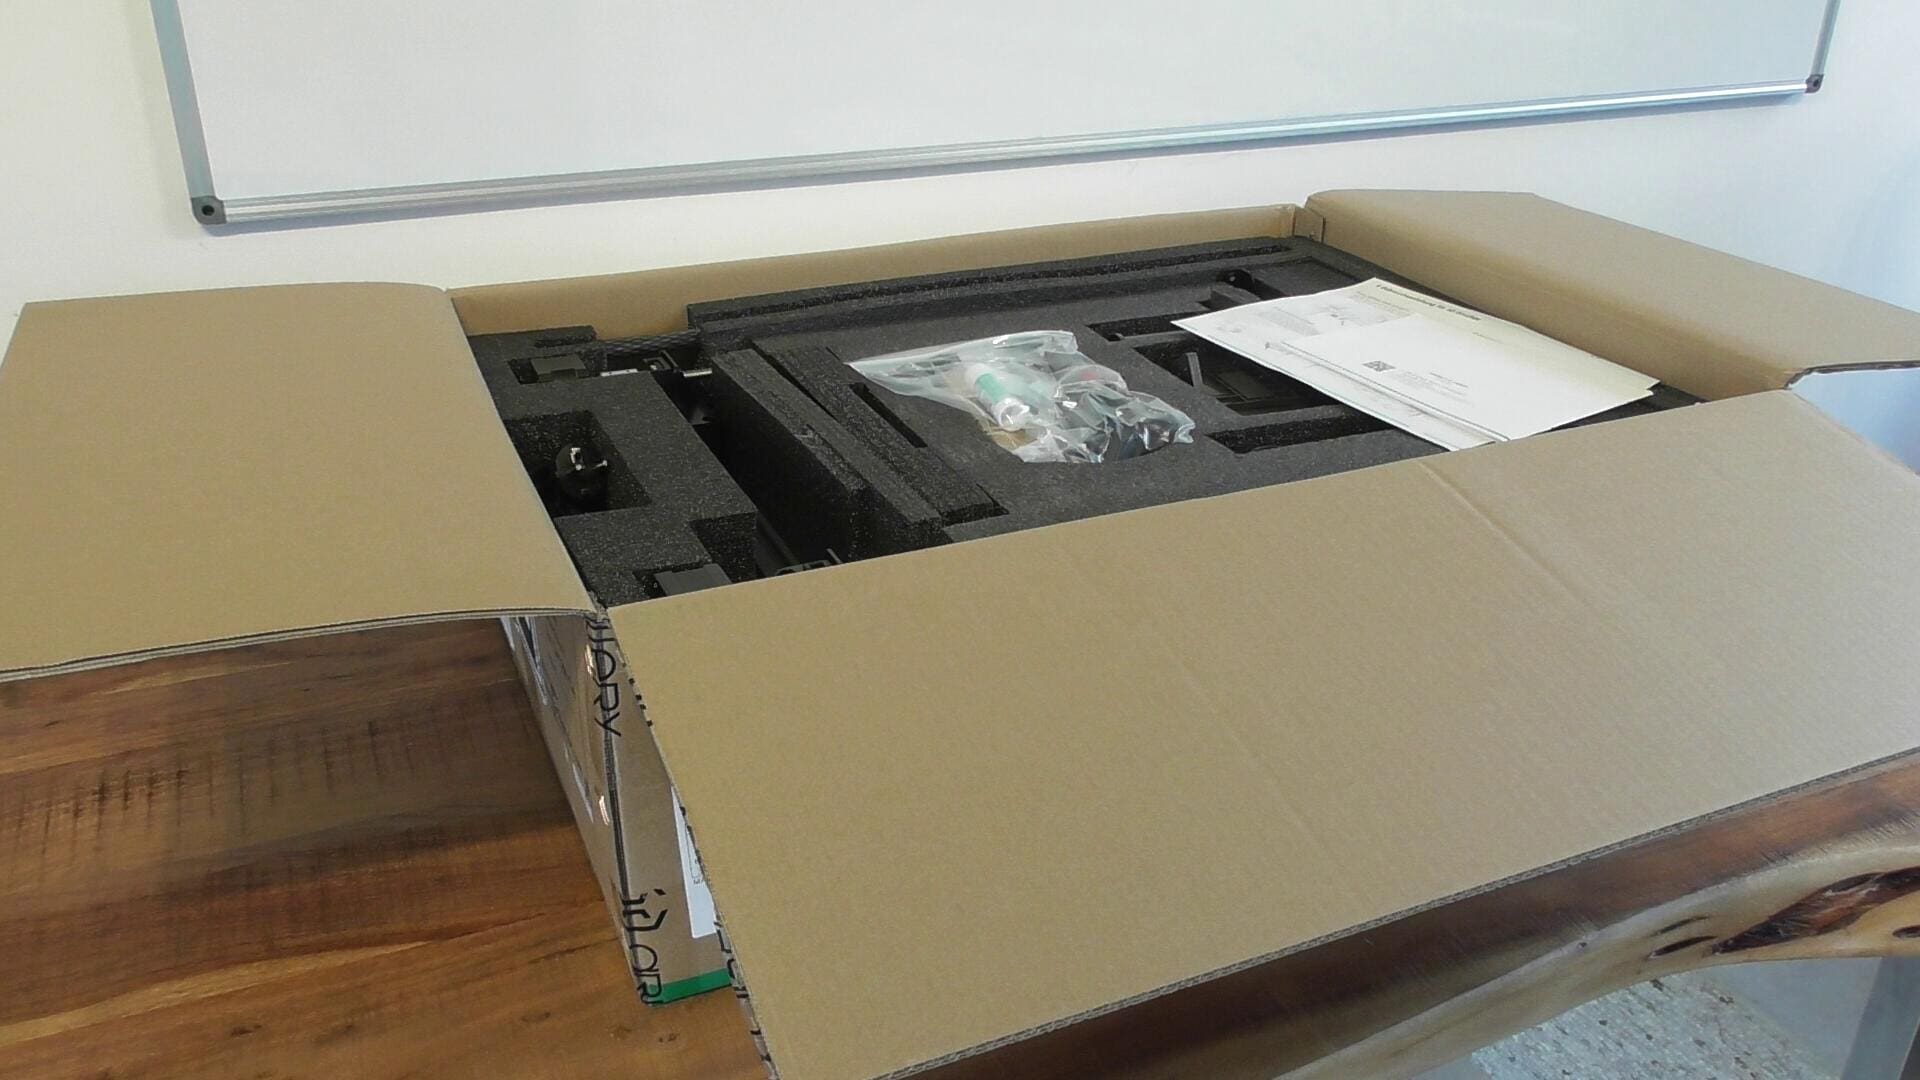
The instructions are written in (poor but understandable) German and English. The printer is therefore intended for the DACH market.
Supplied accessories
The accessories supplied are hardly any different from those of other printers. Let’s take a look at them in detail.
Glue stick

Personally, I think it’s a bad habit to mess up your PEI plate with a glue stick, but unfortunately the manufacturers always include one.
Tool

The included tool is of simple quality, but sufficient to assemble and maintain the printer. You don’t need your own tool, but it doesn’t hurt either. The Allen keys do not have a round head that allows them to be inserted into the screw head at an angle, but this is not necessary as you can easily reach every screw on the printer.
Accessories
The box contains attachments, screws, spare parts and cable ties. The screws come in labelled individual bags so that nothing can be mixed up during assembly.
- USB-A to USB-C cable
- Filament pliers
- mSD card reader with USB-A connection and microSD card already inserted
- Replacement PTFE hose
- Replacement nozzle
- Replacement ribbon connection cable for the print head
- Scraper
- a few metres of white high-speed PLA
Add-on parts
- Filament wiper
- Filament sensor
- Z-axis supports in carbon look
- 4.3″ full colour display
- Display holder (magnetic)
- Filament roll holder
- Y-Z-axis frame („portal“)
- X-axis frame (housing) with heating bed and PEI plate
Assembly
What can you expect when assembling the printer? If you don’t have the famous two left hands, it’s quick and easy.
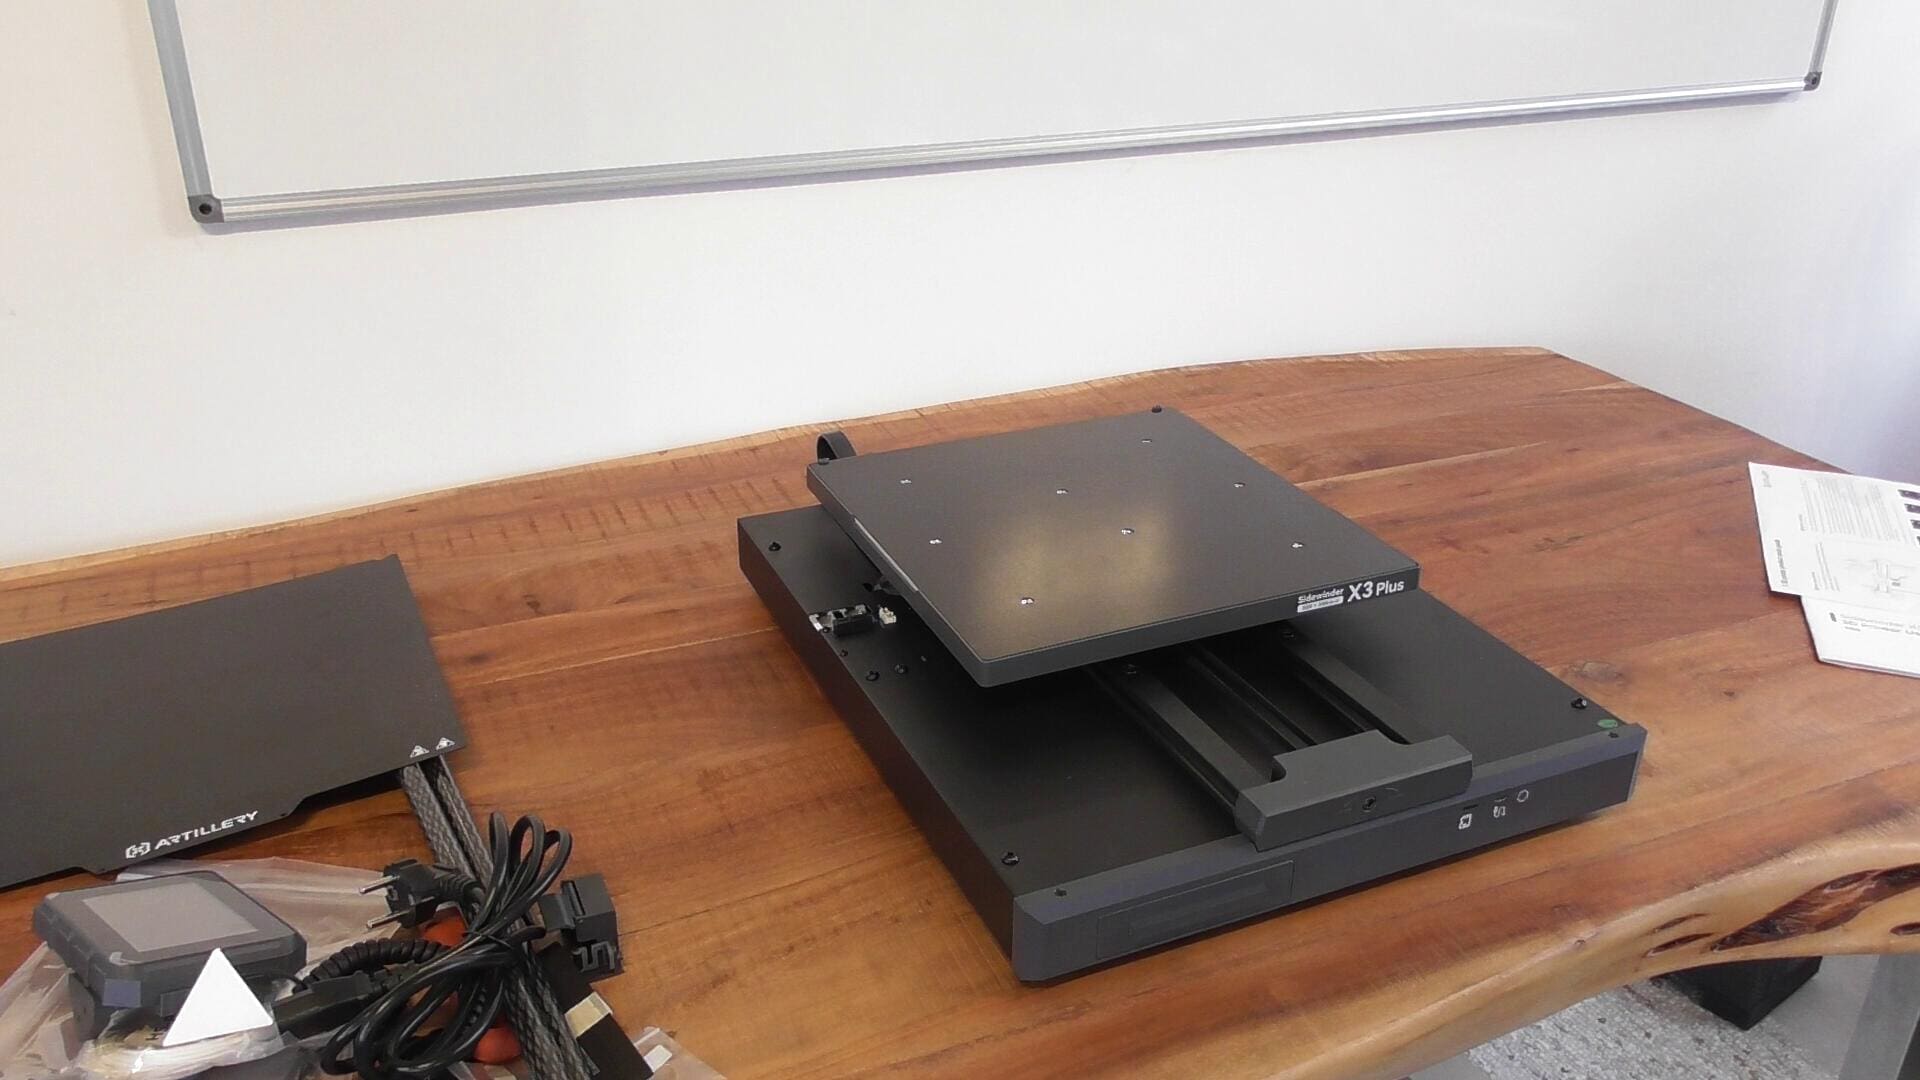
Wedding
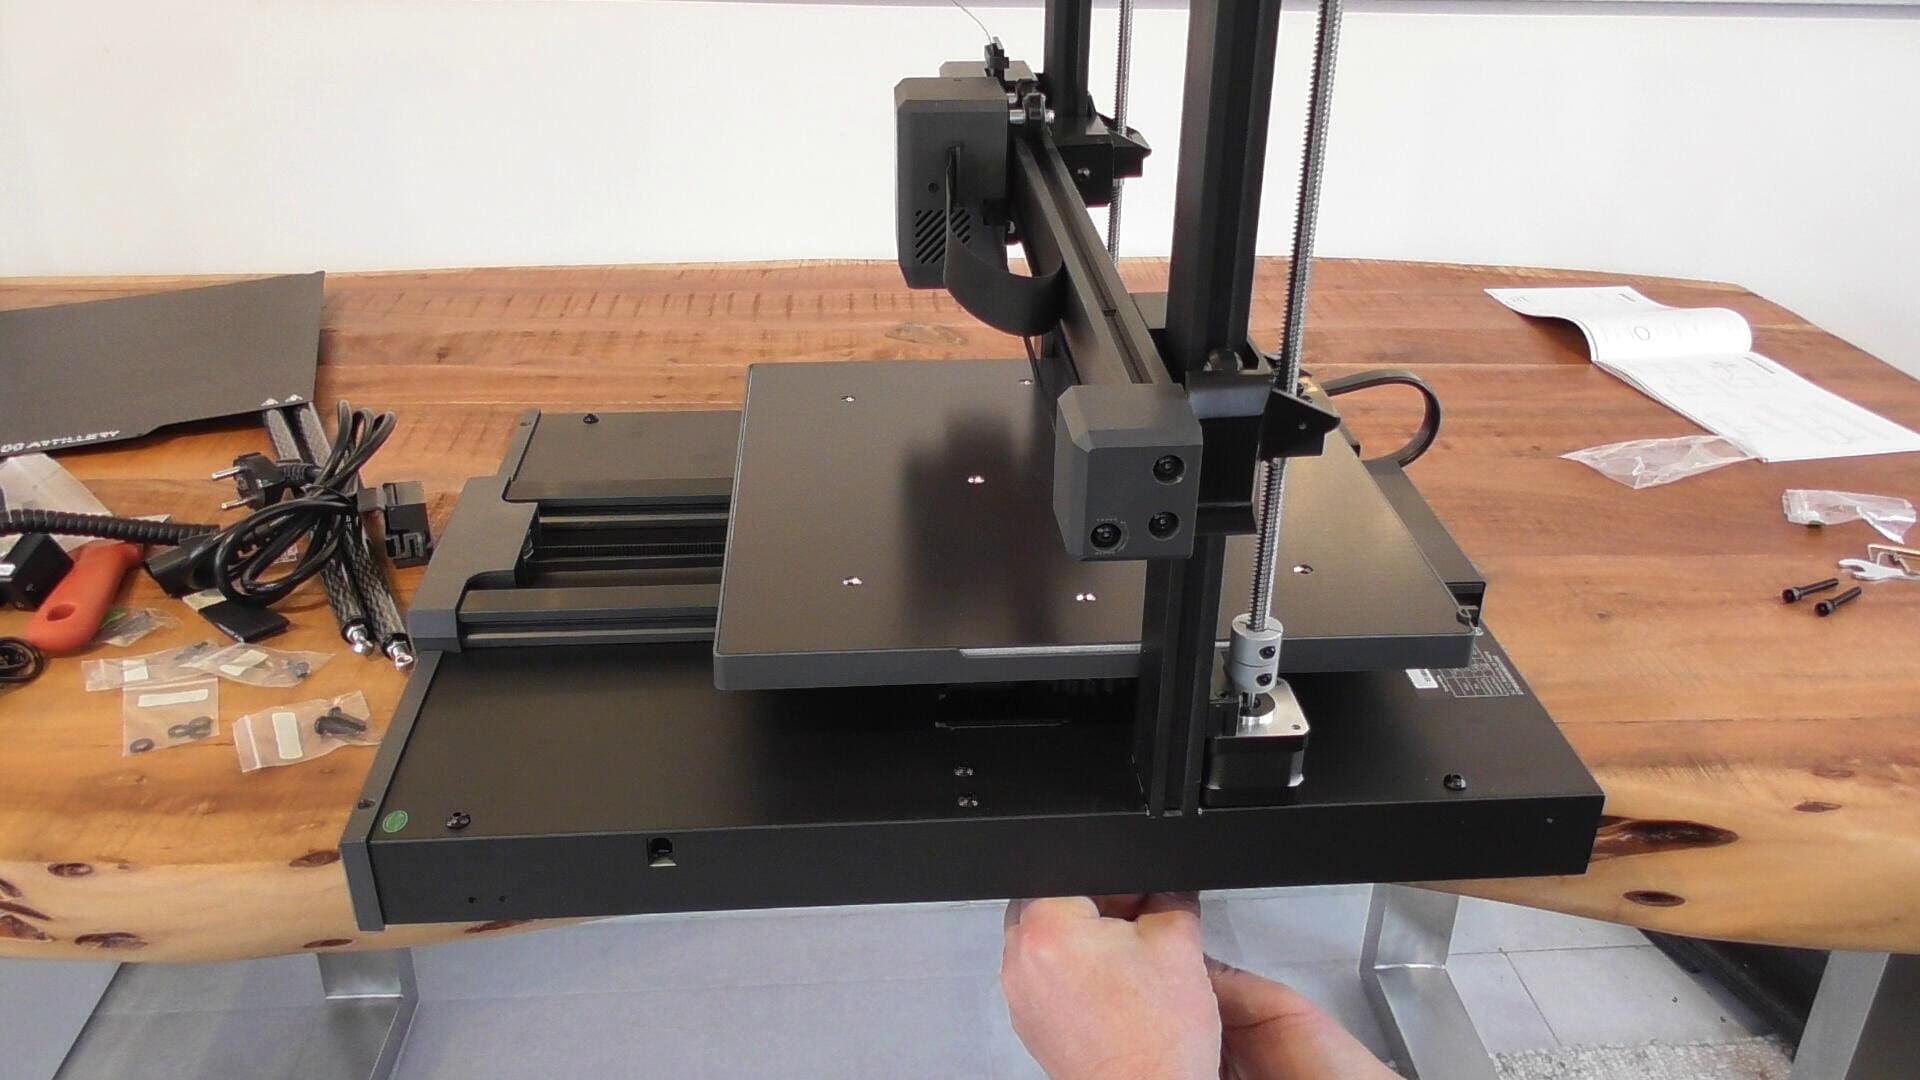
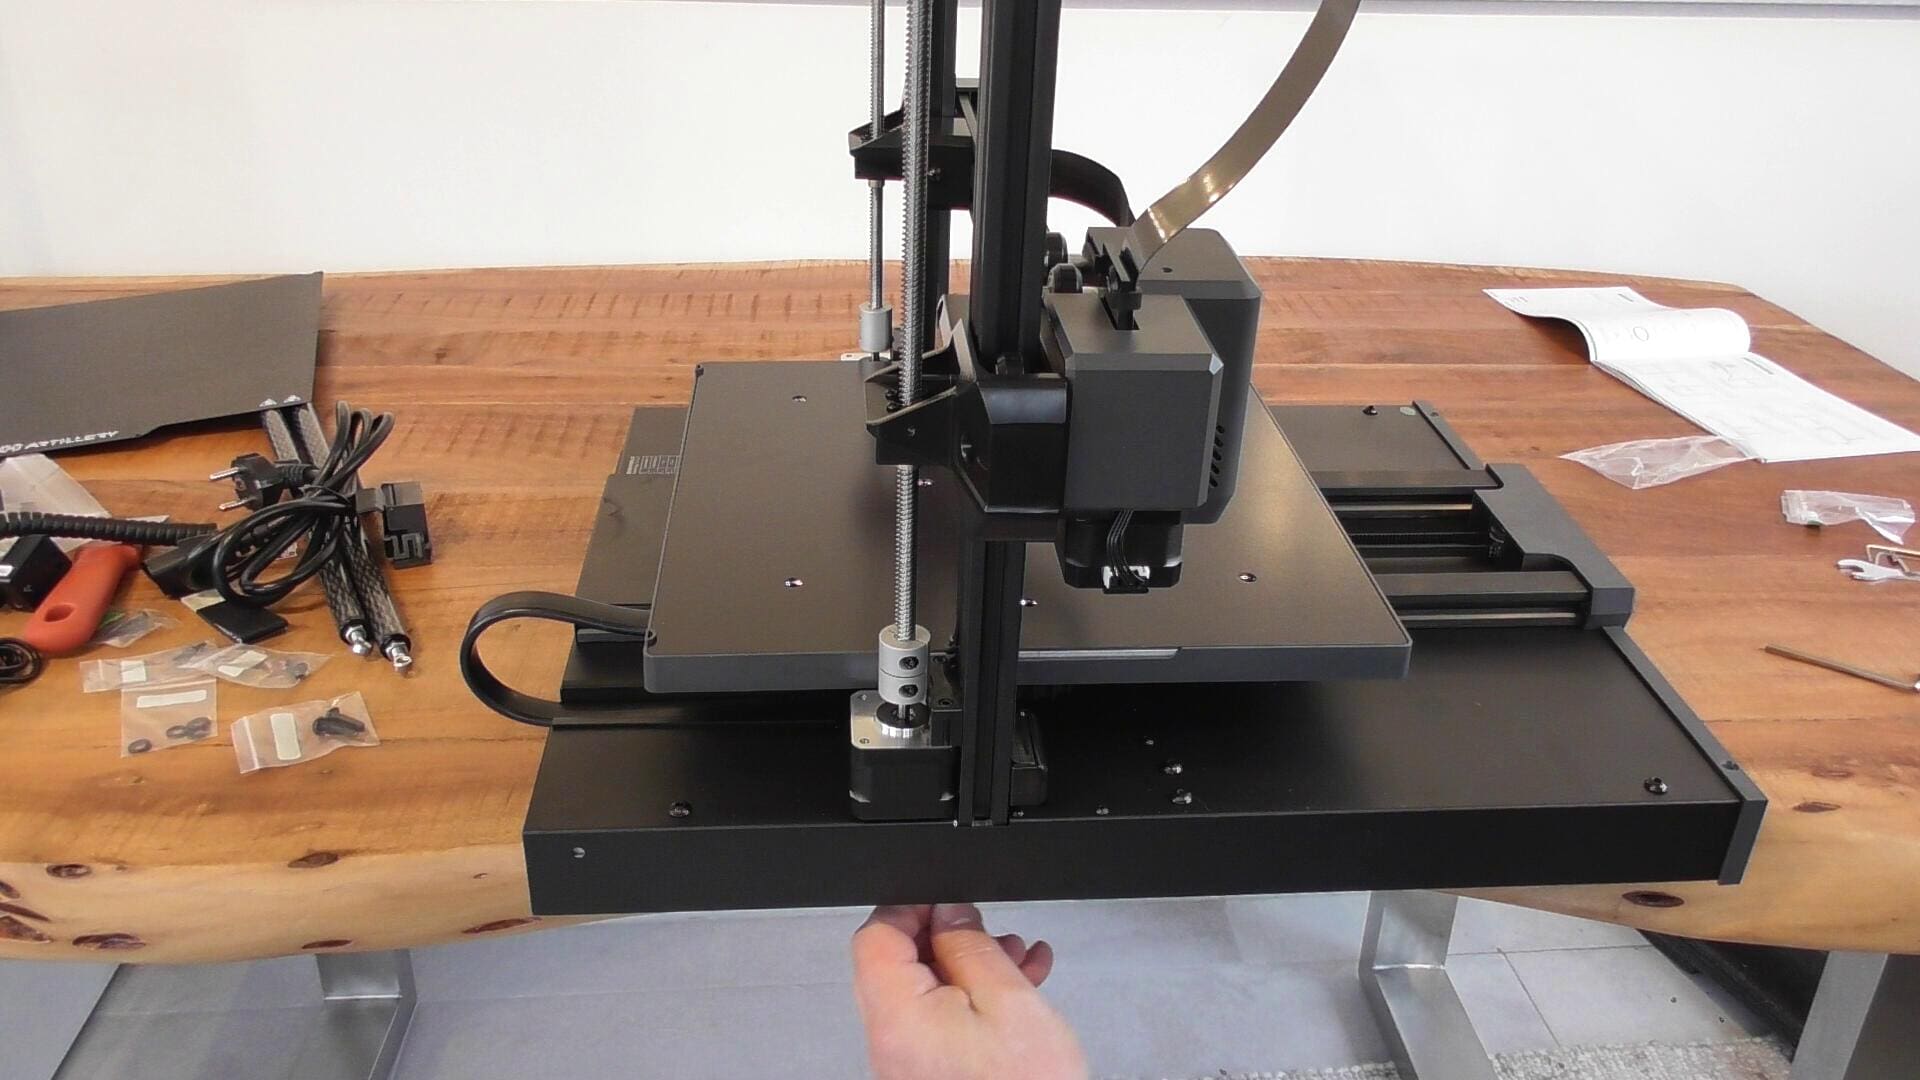
The assembly is almost as easy as that of the X2. You place the pre-assembled Y-Z frame („portal“) on the lower part of the housing and connect the two with the four long screws. Two on each side.
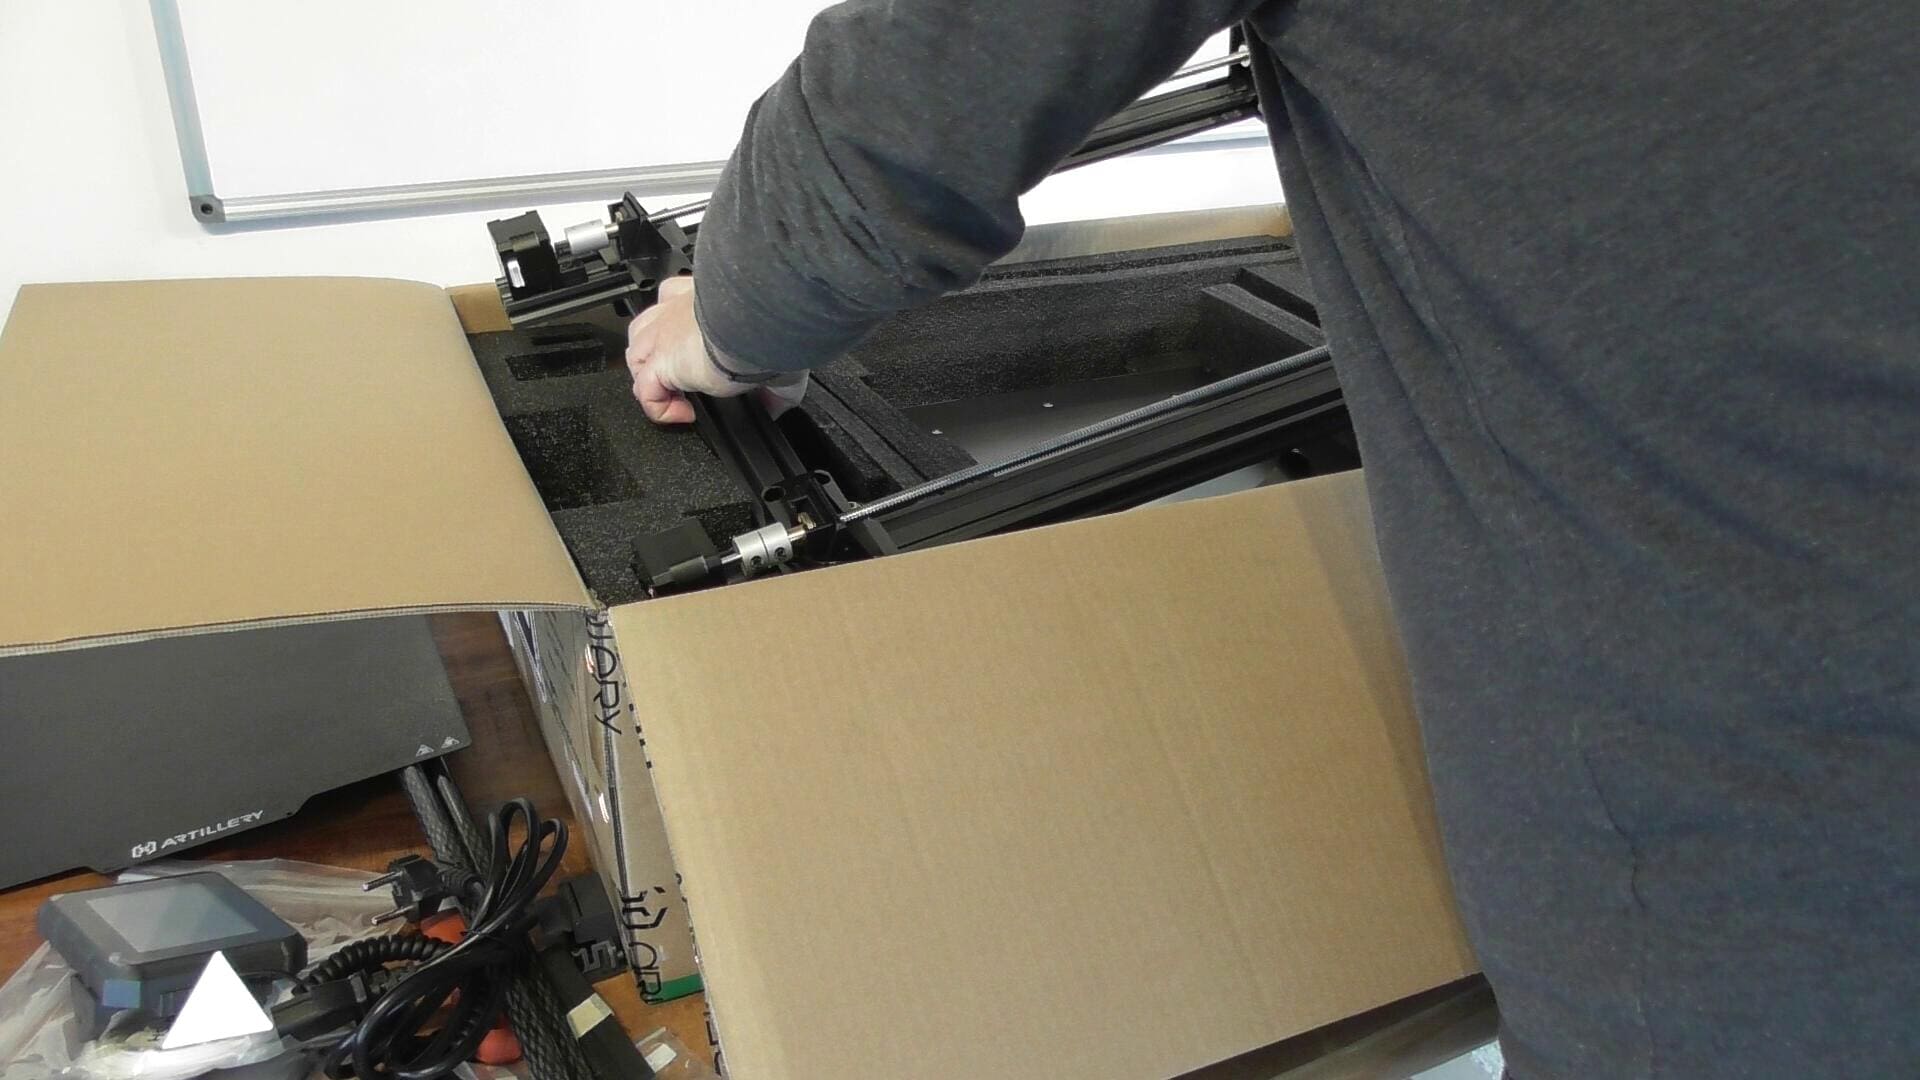
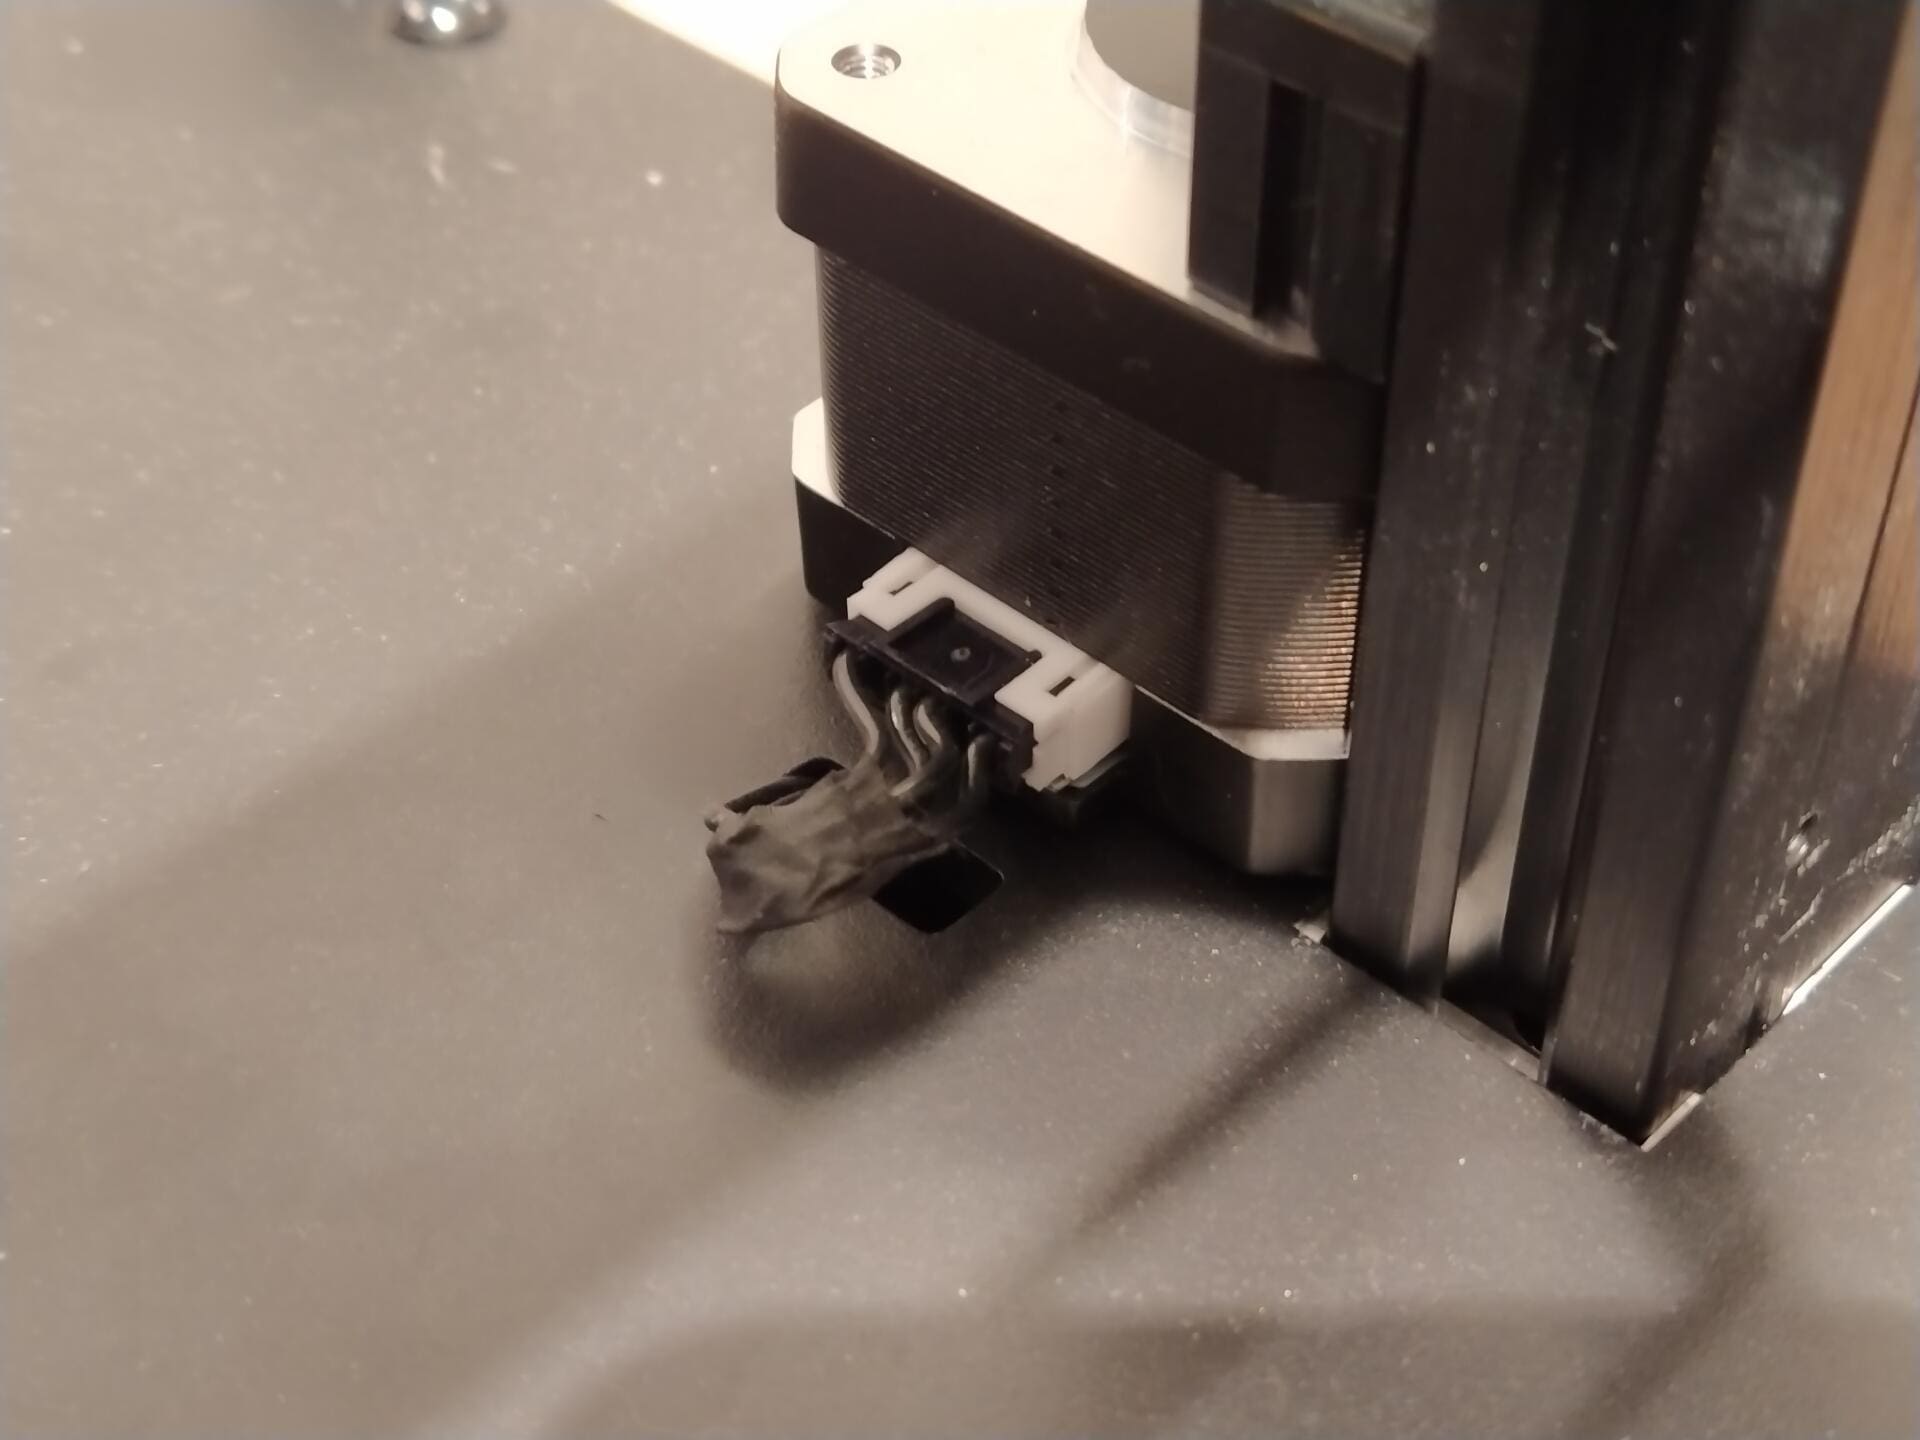
Care must be taken not to pinch the cables of the stepper motors, which protrude from the portal and the housing.
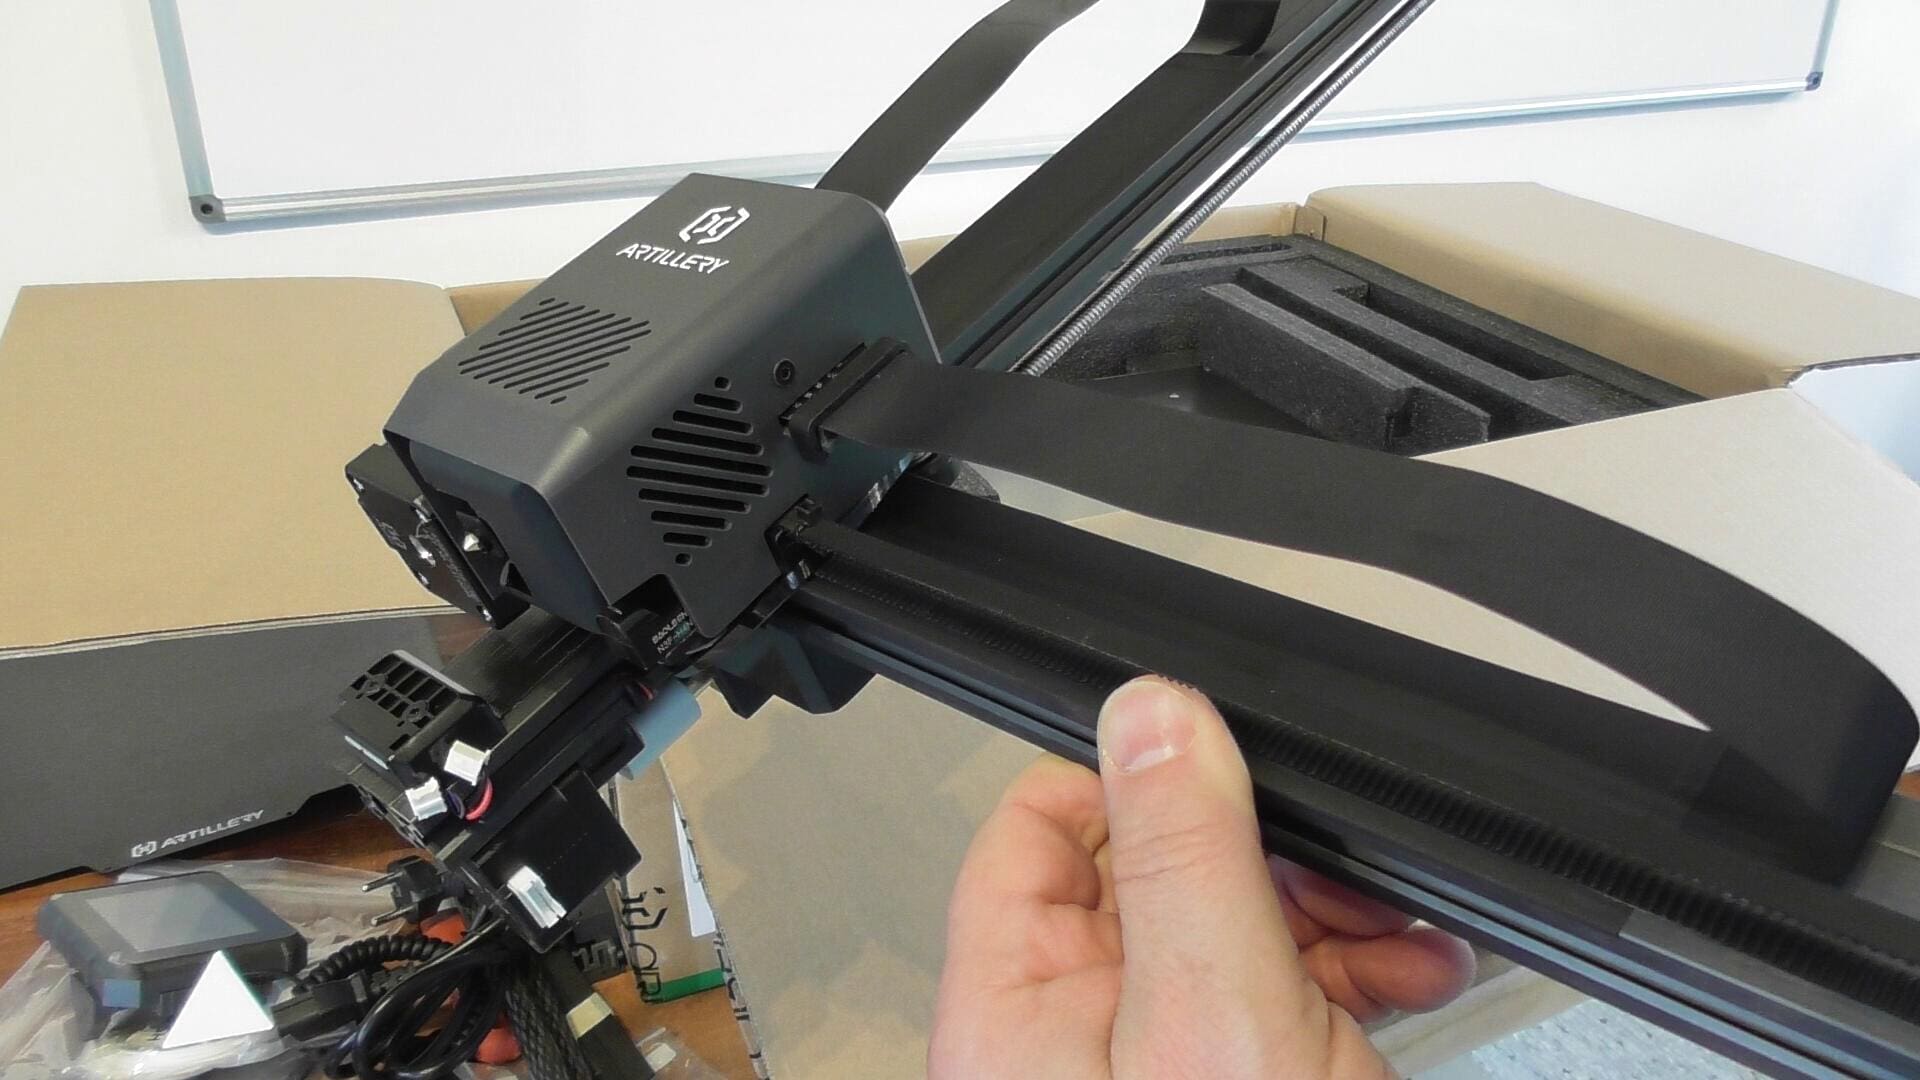
In this picture you can see what I mean.
To marry the gantry to the base, we place the printer sideways a little beyond the edge of the table.
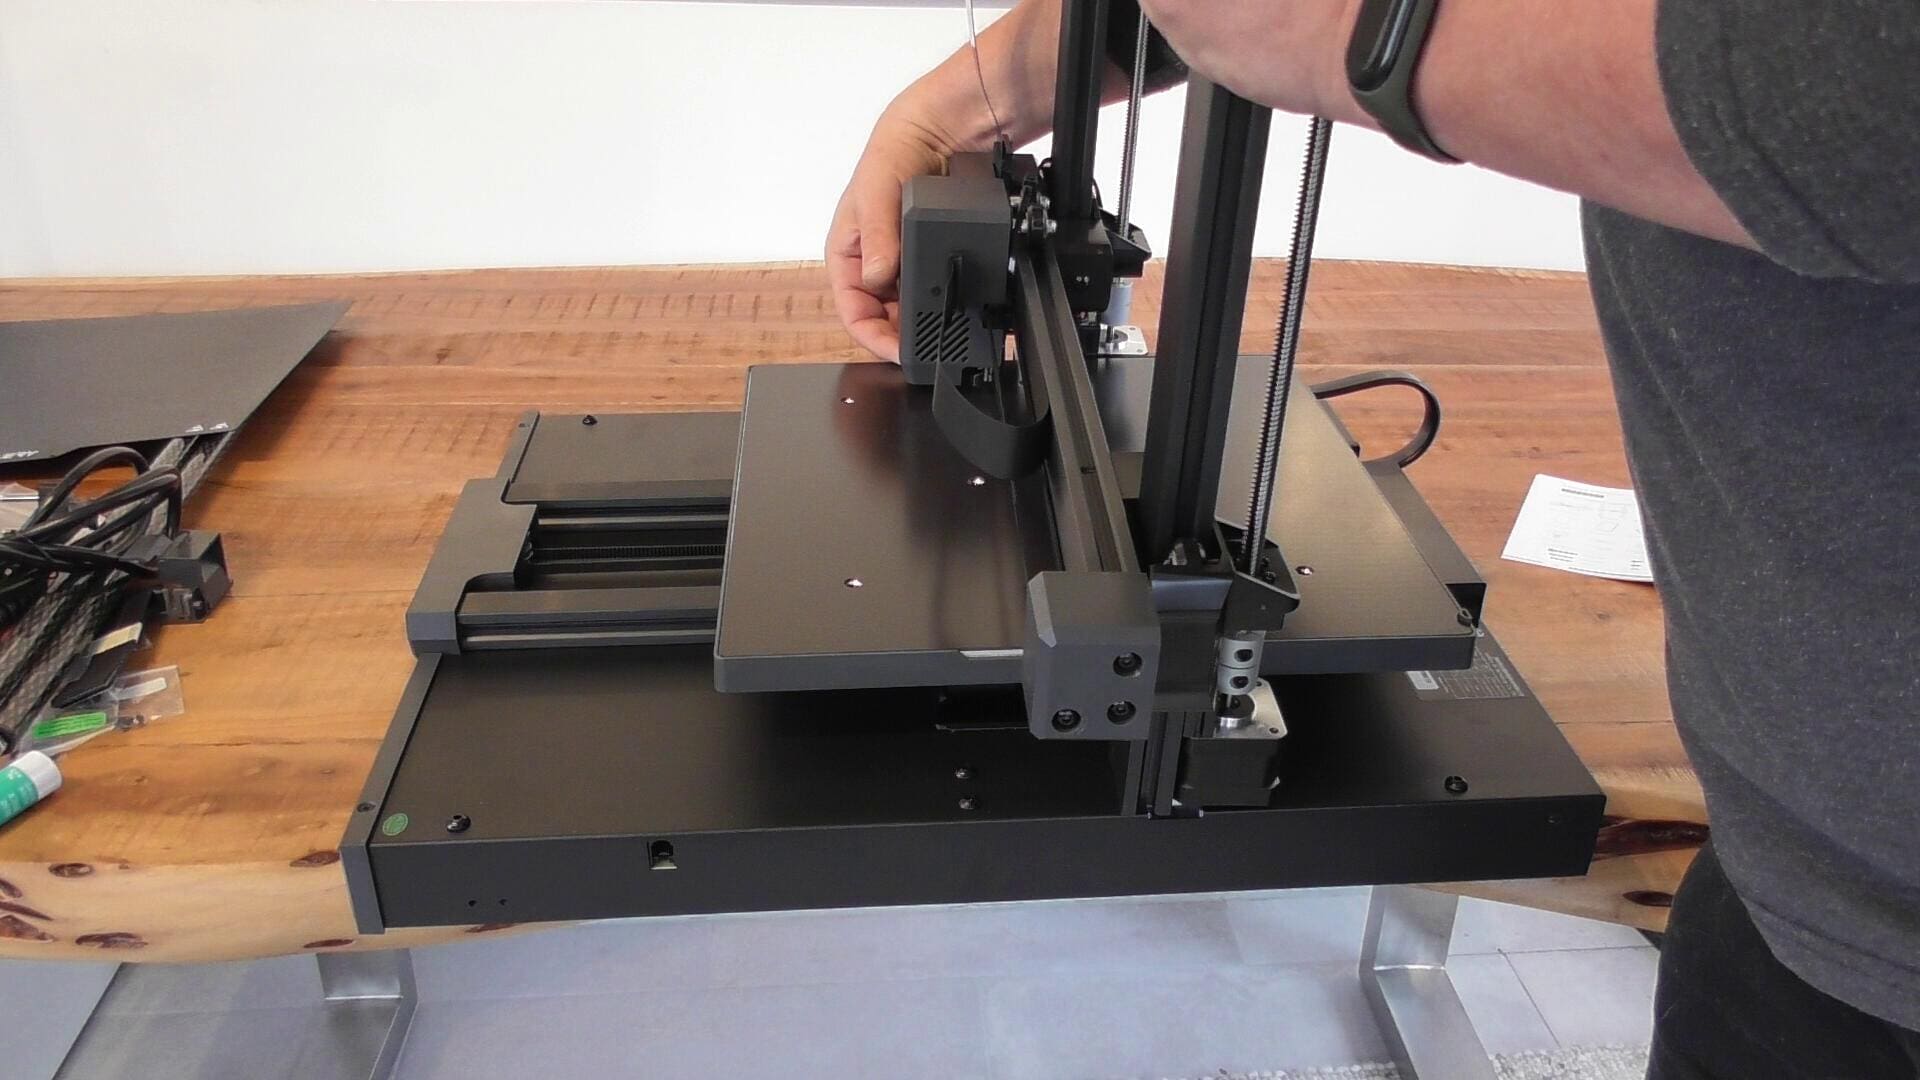
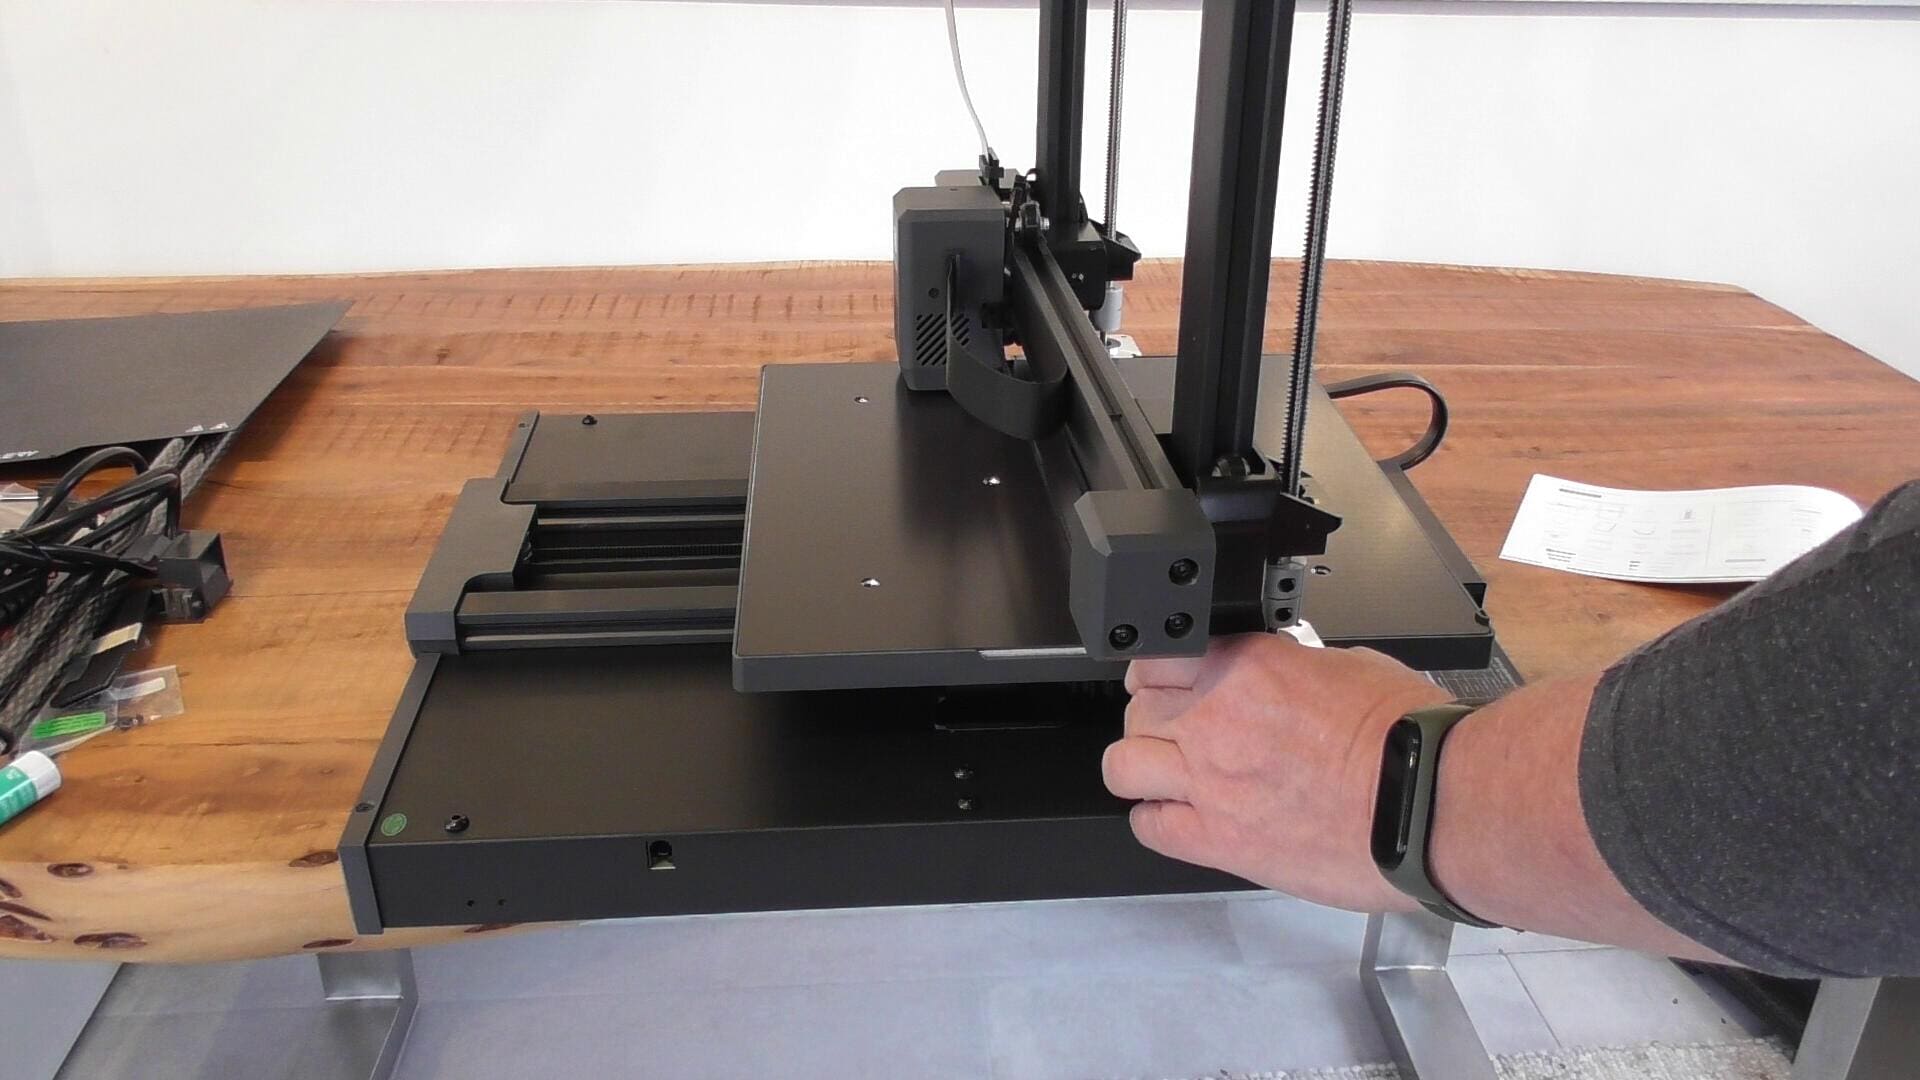
Now the two parts are already holding together reasonably well, we push the screws through from below and tighten them hand-tight.
We repeat the whole process on the other side. The gantry must be mounted at an exactly right angle, which is actually guaranteed by the design and the connection. However, a check with a good stop angle can do no harm.
Assembly video
Artillery has recently published an assembly video in which everything is shown in detail.
Plug
Now we plug the four plugs into the corresponding sockets.
Left side:

Right side:
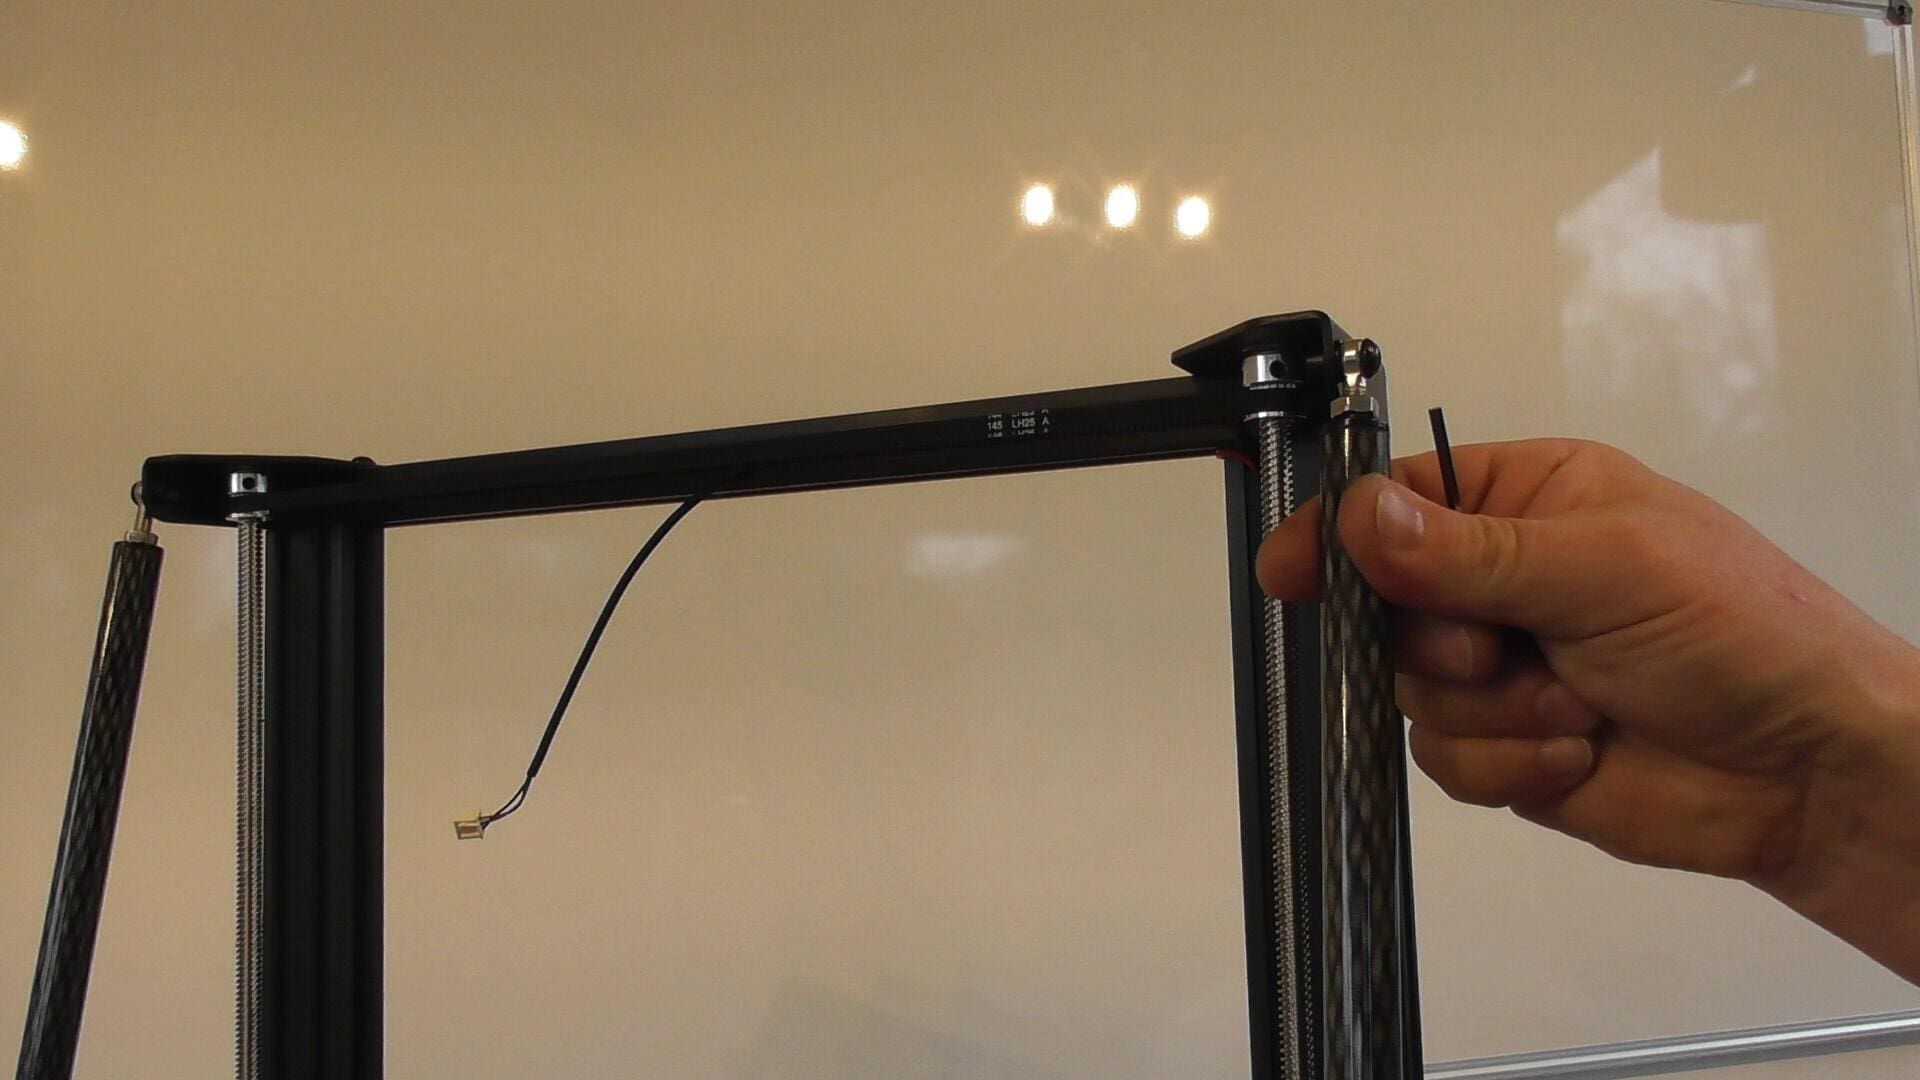
Struts
Now to the struts. These are exactly what the predecessor X2 lacks and will probably be retrofitted by most owners, as otherwise the printing precision of the X2 decreases rapidly with increasing component height if the filament roll is also located on the cross strut.
On the Sidewinder X3 Plus, they are particularly visually appealing. The pattern is reminiscent of carbon, really beautifully made.
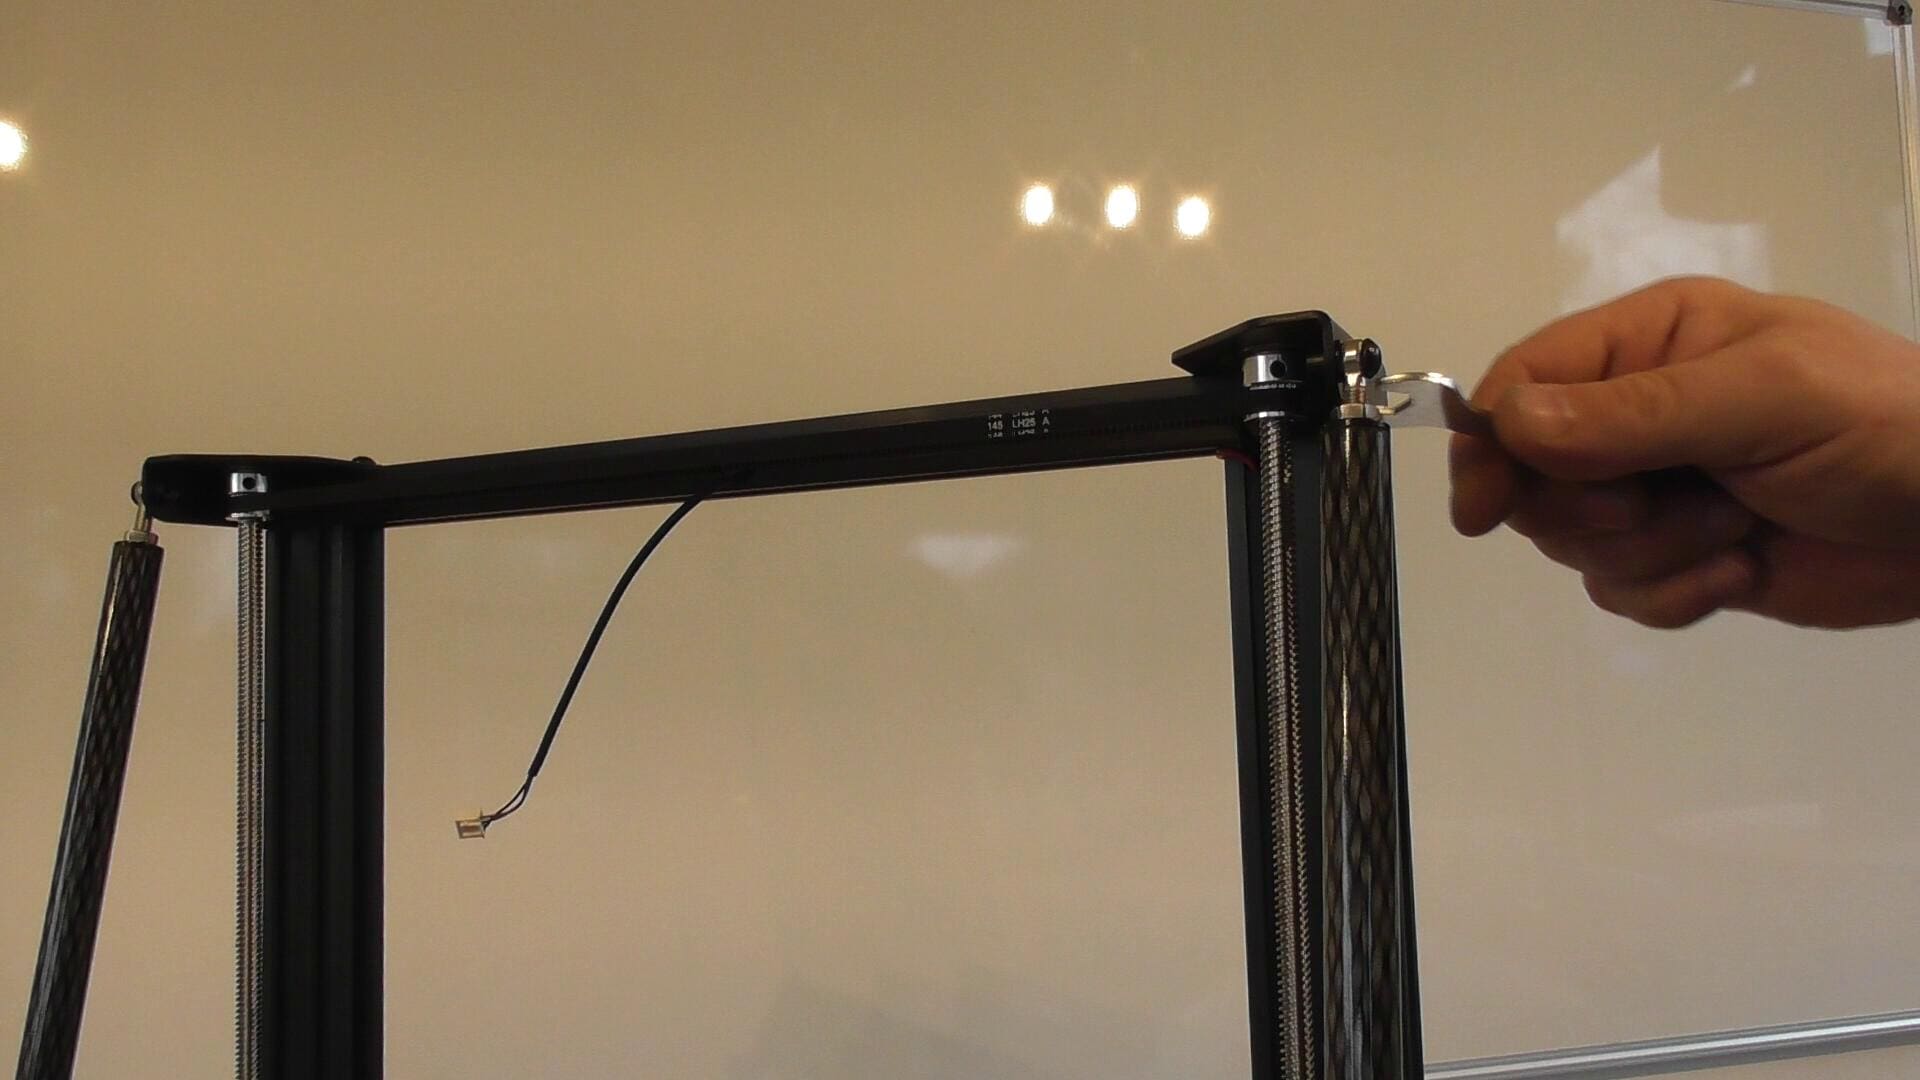
My urgent installation recommendation:
- The printer must be placed on a flat, horizontal tabletop.
- The struts are screwed on at the bottom first.
- Now turn the heads with the eyes so far (bottom and top) out of the strut until it is exactly in line with the top hole.
- Never pull or push on the portal! Not even „only minimally“! Not at all!
- If everything fits, screw the heads firmly to the frame at the top and bottom.
- Now turn the struts first in one direction and then in the other until you feel resistance.
- Adjust the centre of the two resistances.
- Tighten the lock nuts
It is important to find the exact centre so that the strut neither pulls on the Z-axis nor pushes it away. The two lock nuts on each strut are used to finalise the setting.

That was the installation of the printer frame. Now you can pull and push on the portal as much as you like, it won’t move another millimetre. The entire printer construction is very robust and rigid. It has to be for this large printing space.
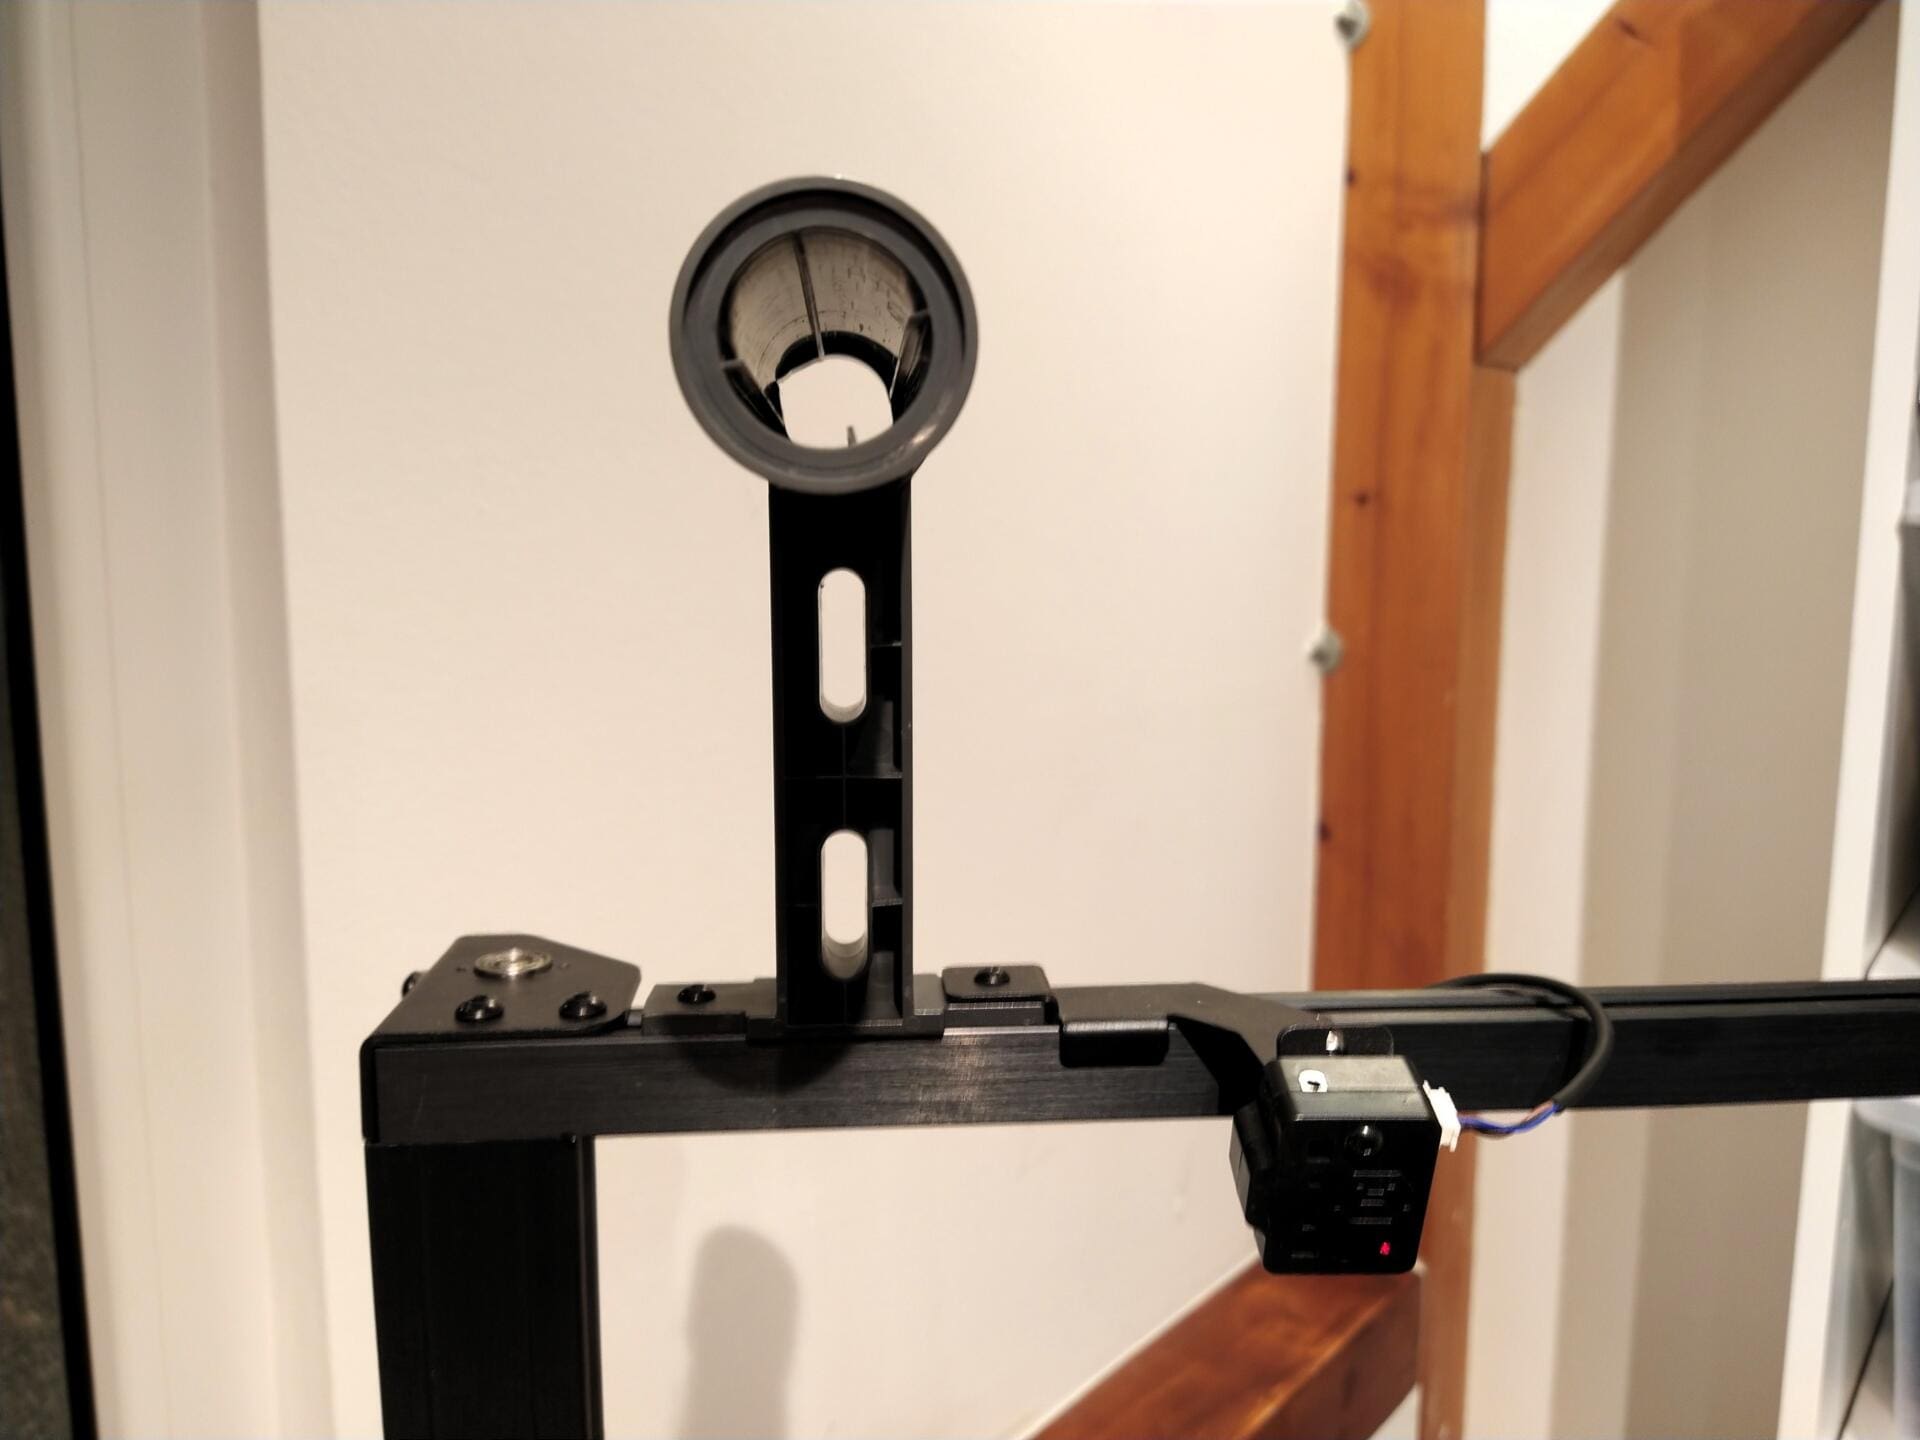
Filament holder
The axle is simply plugged onto the filament holder. The construction is first screwed on with the left-hand screw. The filament sensor is screwed to its holder and then attached to the frame with the right-hand screw of the filament holder. Plug the cable into the sensor and you’re done.
Filament wiper
The filament wiper is installed on the print bed with two screws.
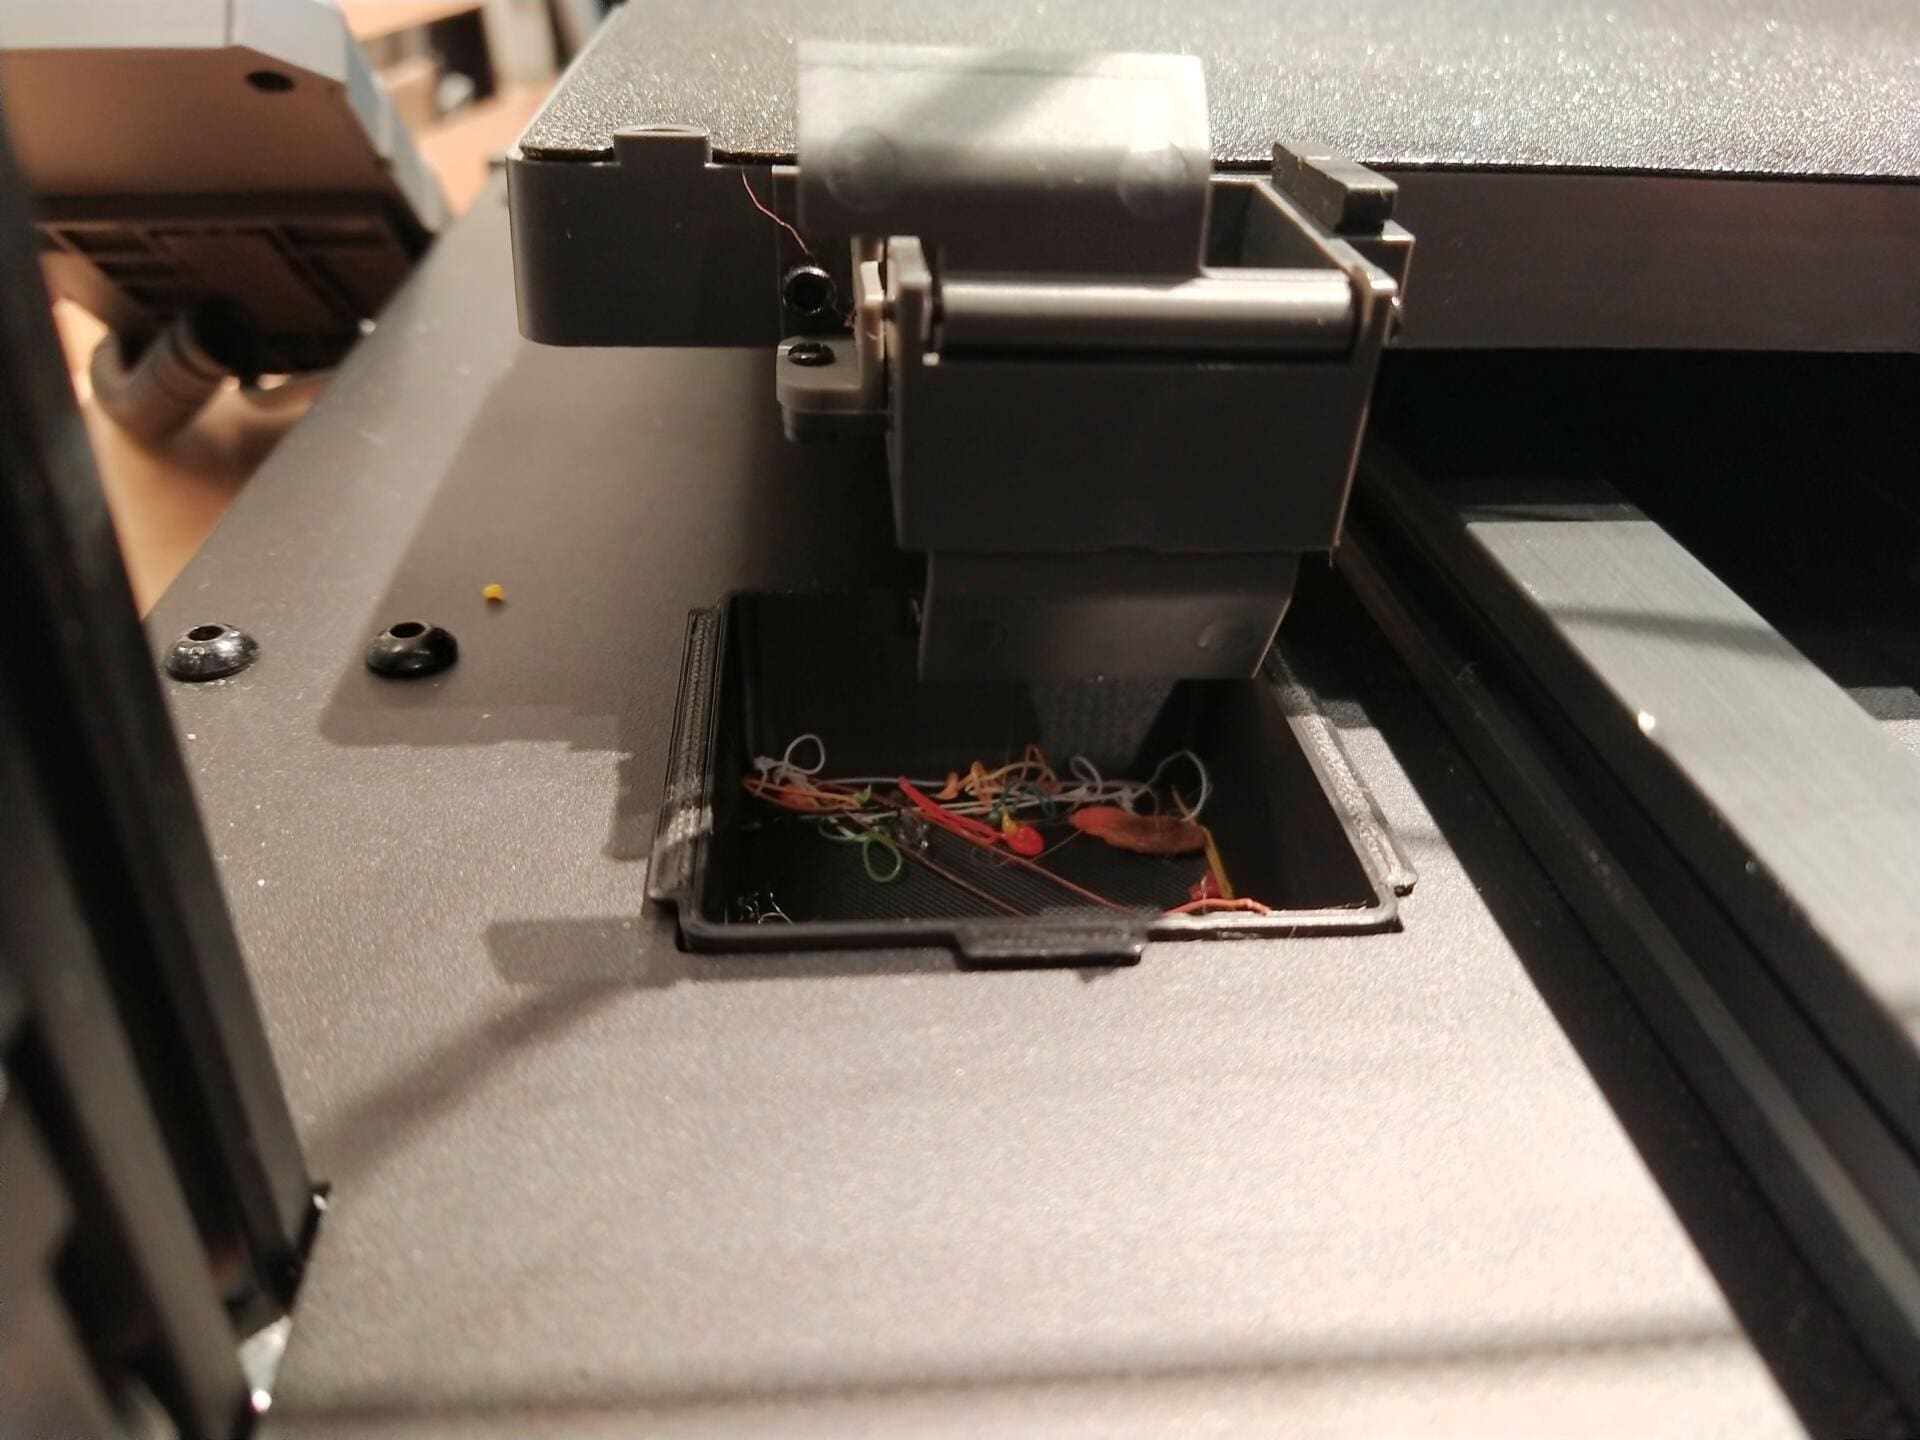
A filament scraper is a good thing, the nozzle is cleaned before printing – if you use the Artillery Slicer. Otherwise you have to insert the Gcode „G12 C2“ manually into the start Gcode of the printer in the slicer.
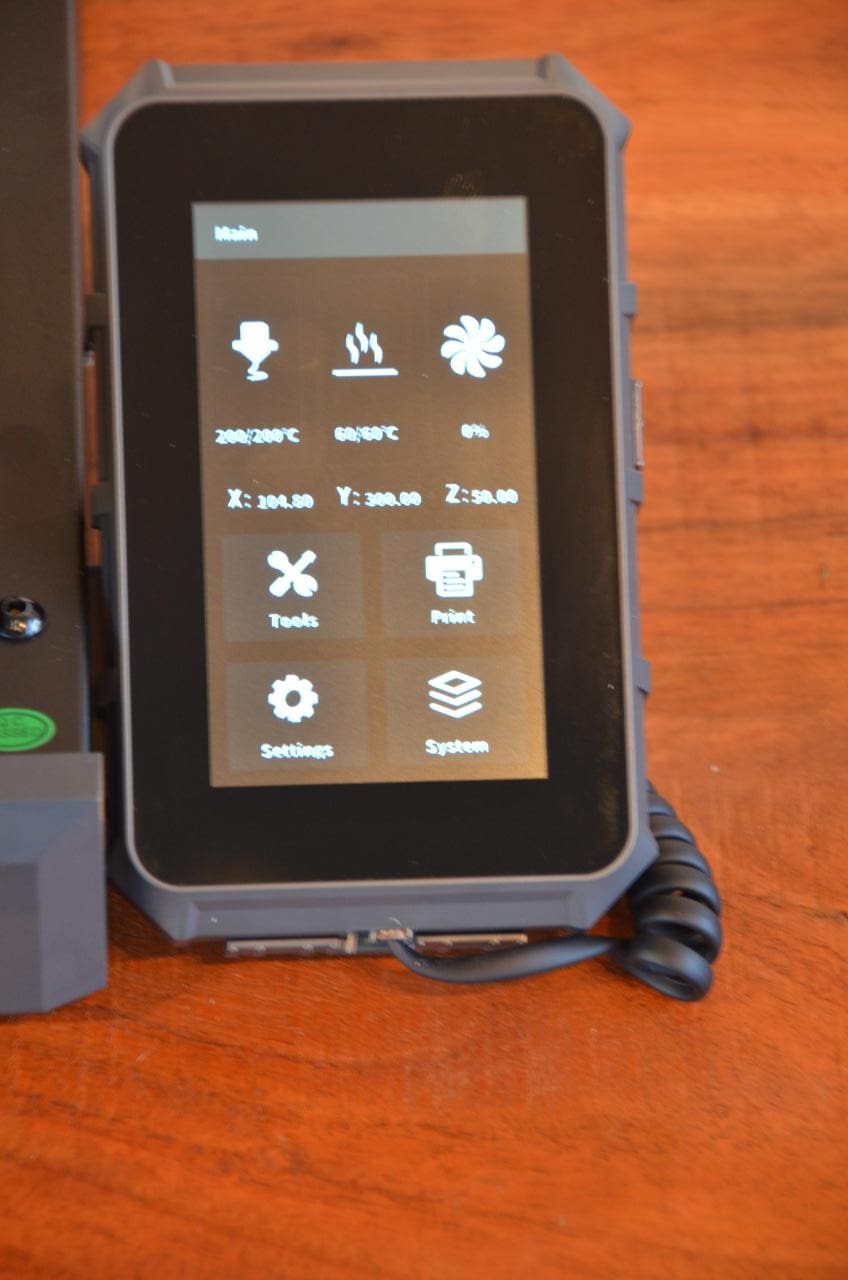
Display
The cable is already plugged into the screen. We quickly screw the holder to the side of the base, plug the cable into the device and place the screen on the holder. It is held here magnetically.
Final inspection
Artillery recommends a final inspection after assembly.
Checking the bearings
We check the rollers and the play on the print head and bed.
- Wobble test: is there any play on the head or bed?
- Do the head and bed move easily enough? A little resistance is normal.
- Rotation test: Can you move everything by turning a roller with your finger, or does it spin?
It may be necessary to loosen or tighten the eccentric shafts on the guide rollers using the tool provided. Everything worked for me. Except for one thing: the tension of the bed drive belt. It was too loose. It should only be possible to push the belt in by about four to five millimetres on one side.
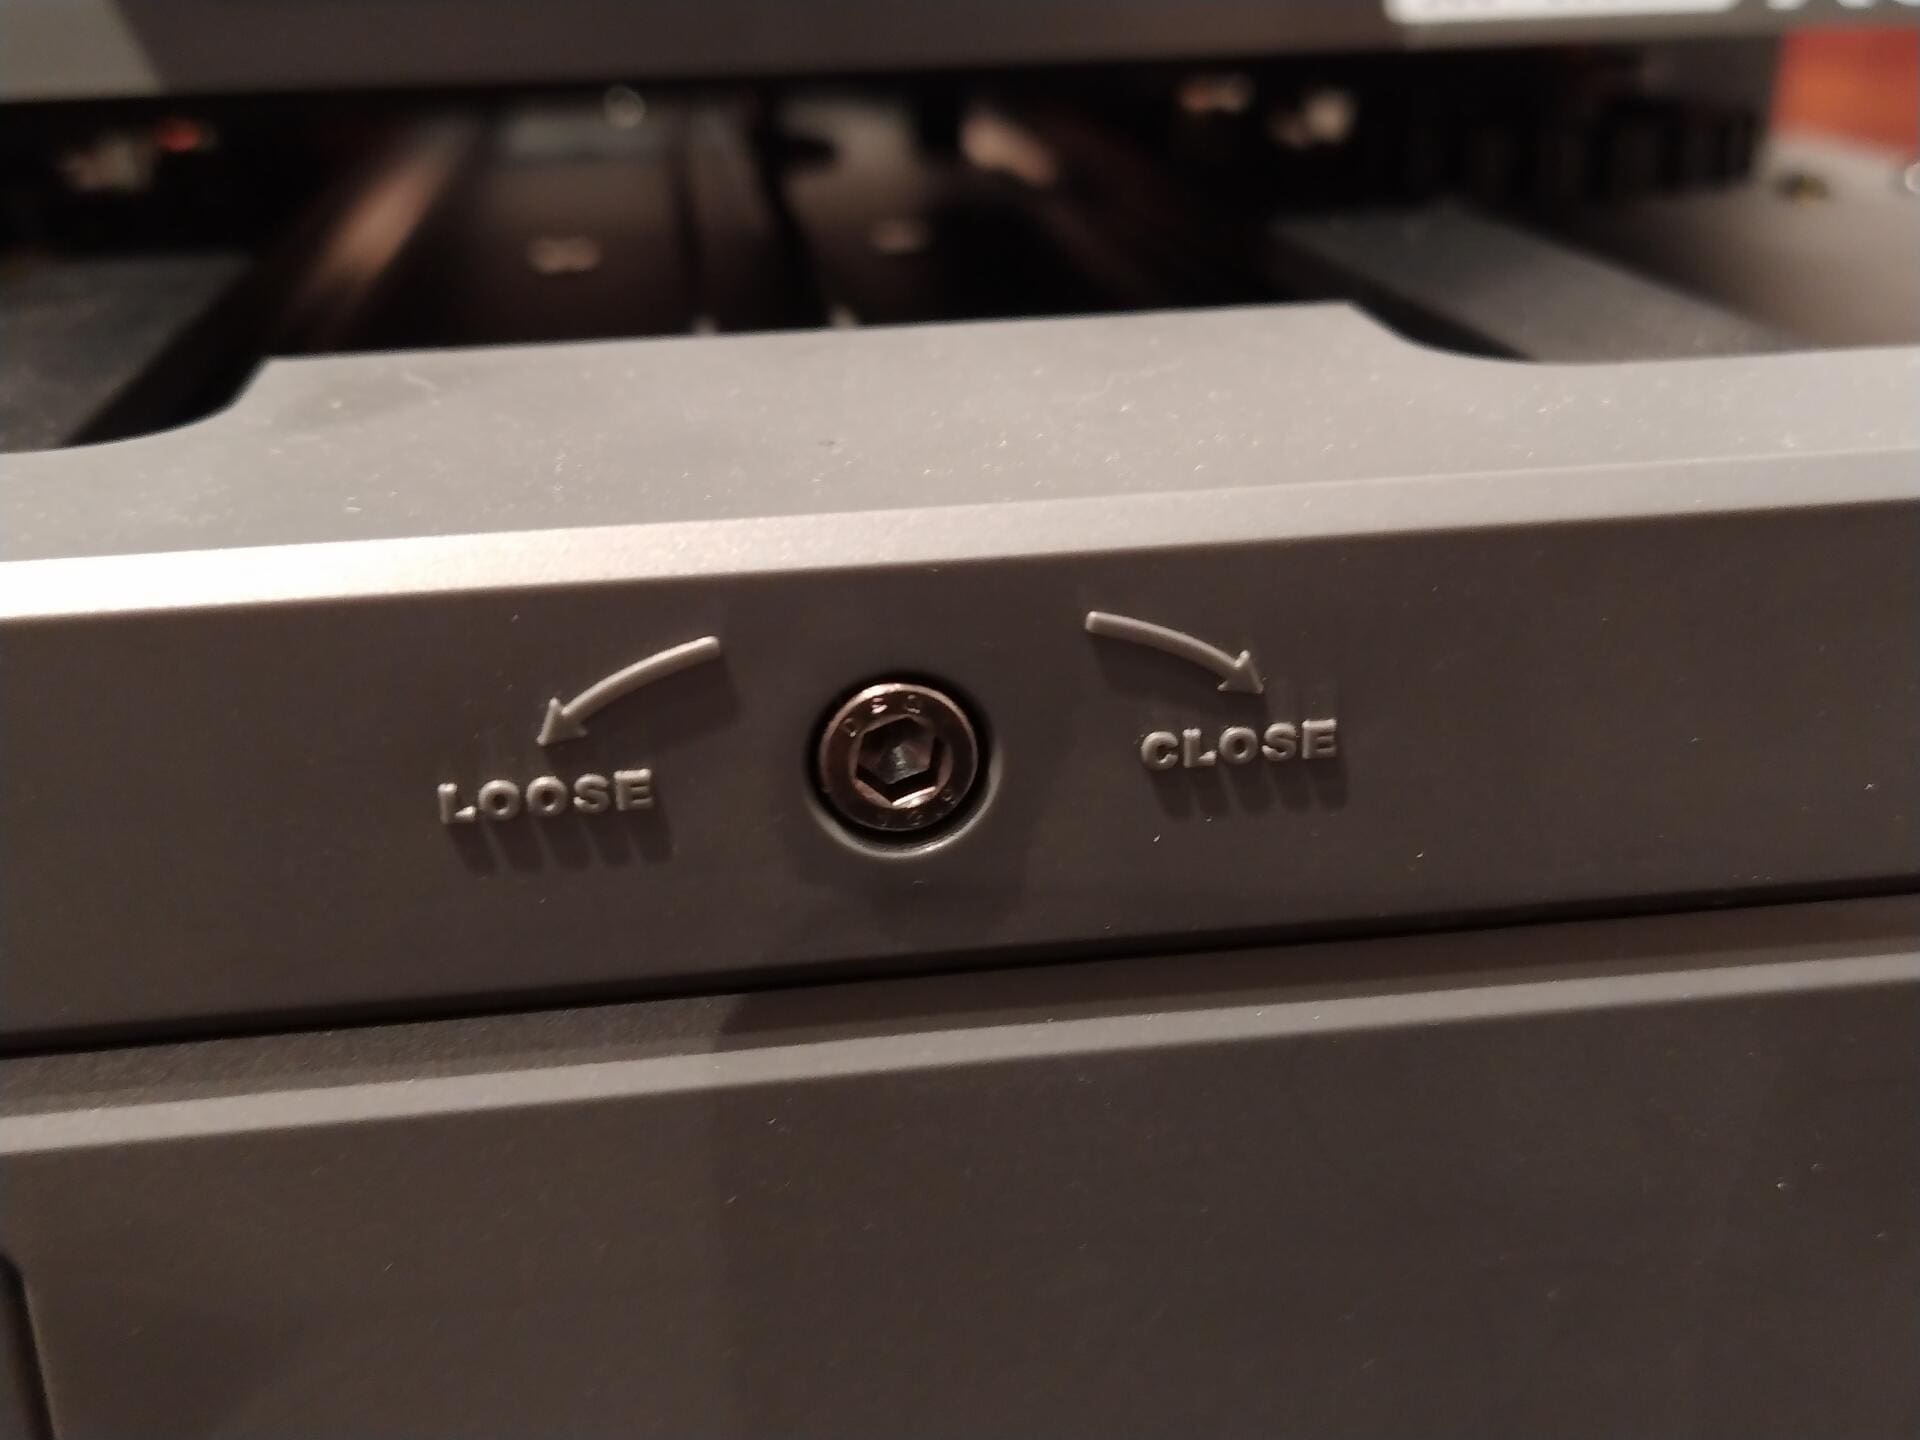
It can be readjusted at the front using one of the Allen keys.
Adjusting a wobbly bed
The procedure is similar for every 3D printer. Such an error should not occur from the factory, but after many, many hours of printing, the rollers must be readjusted or replaced. To do this, loosen all the levelling screws under the bed, remove the bed and put it to one side. Now you can access the eccentric shafts of the wheels. But as before: we don’t need to worry about that today. Nevertheless, we wiggle the bed. There must be no play to the left or right.
Adjusting the print head
I wasn’t the only one who had installed the print head incorrectly; I also saw this error in pictures in forums. The adjustment is quick, but I have written a separate article about it.
The printer in detail
Let’s take a closer look at the assembled printer.
Design
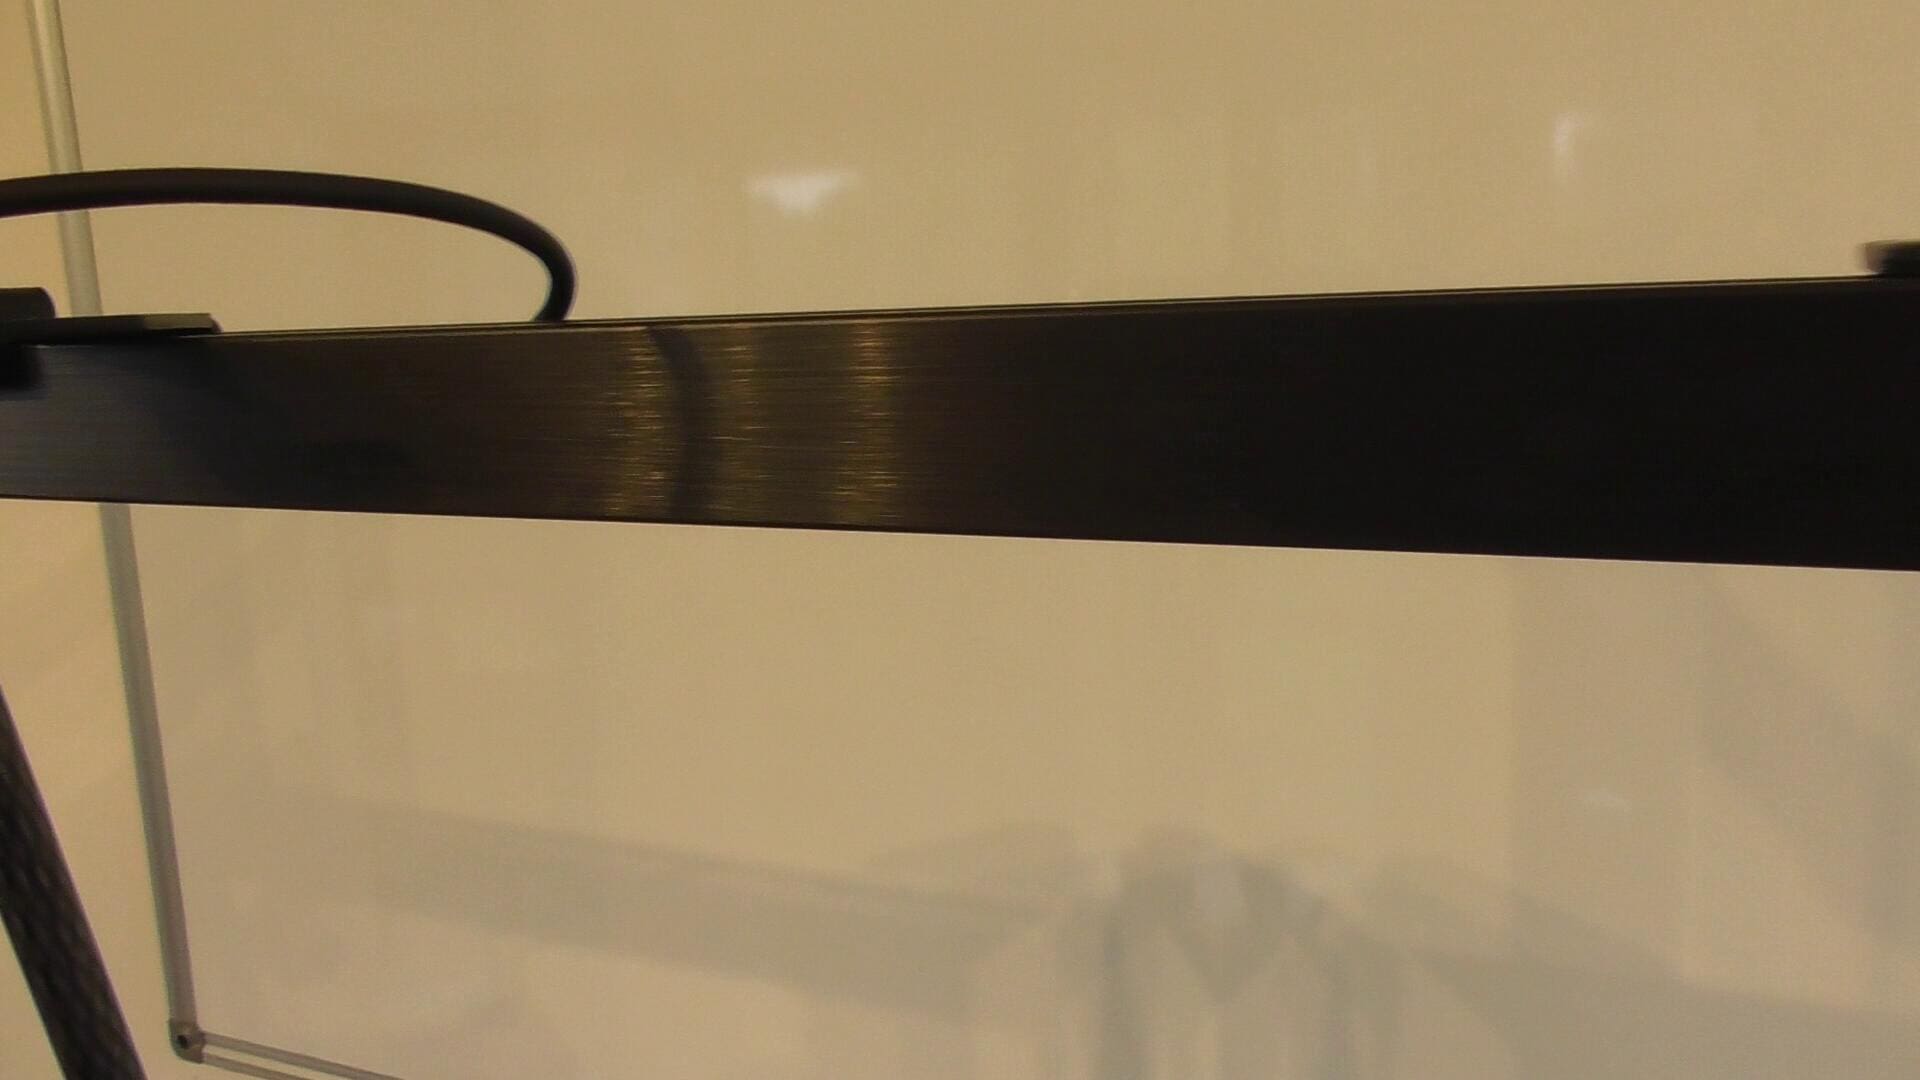
The first noticeable difference to the X2, apart from the much more modern and high-quality design with a classy, brushed look, is that the cross brace of the portal is now also made of aluminium. This gives the entire construction a very robust impression, even if it looks rather delicate for such a large printer.
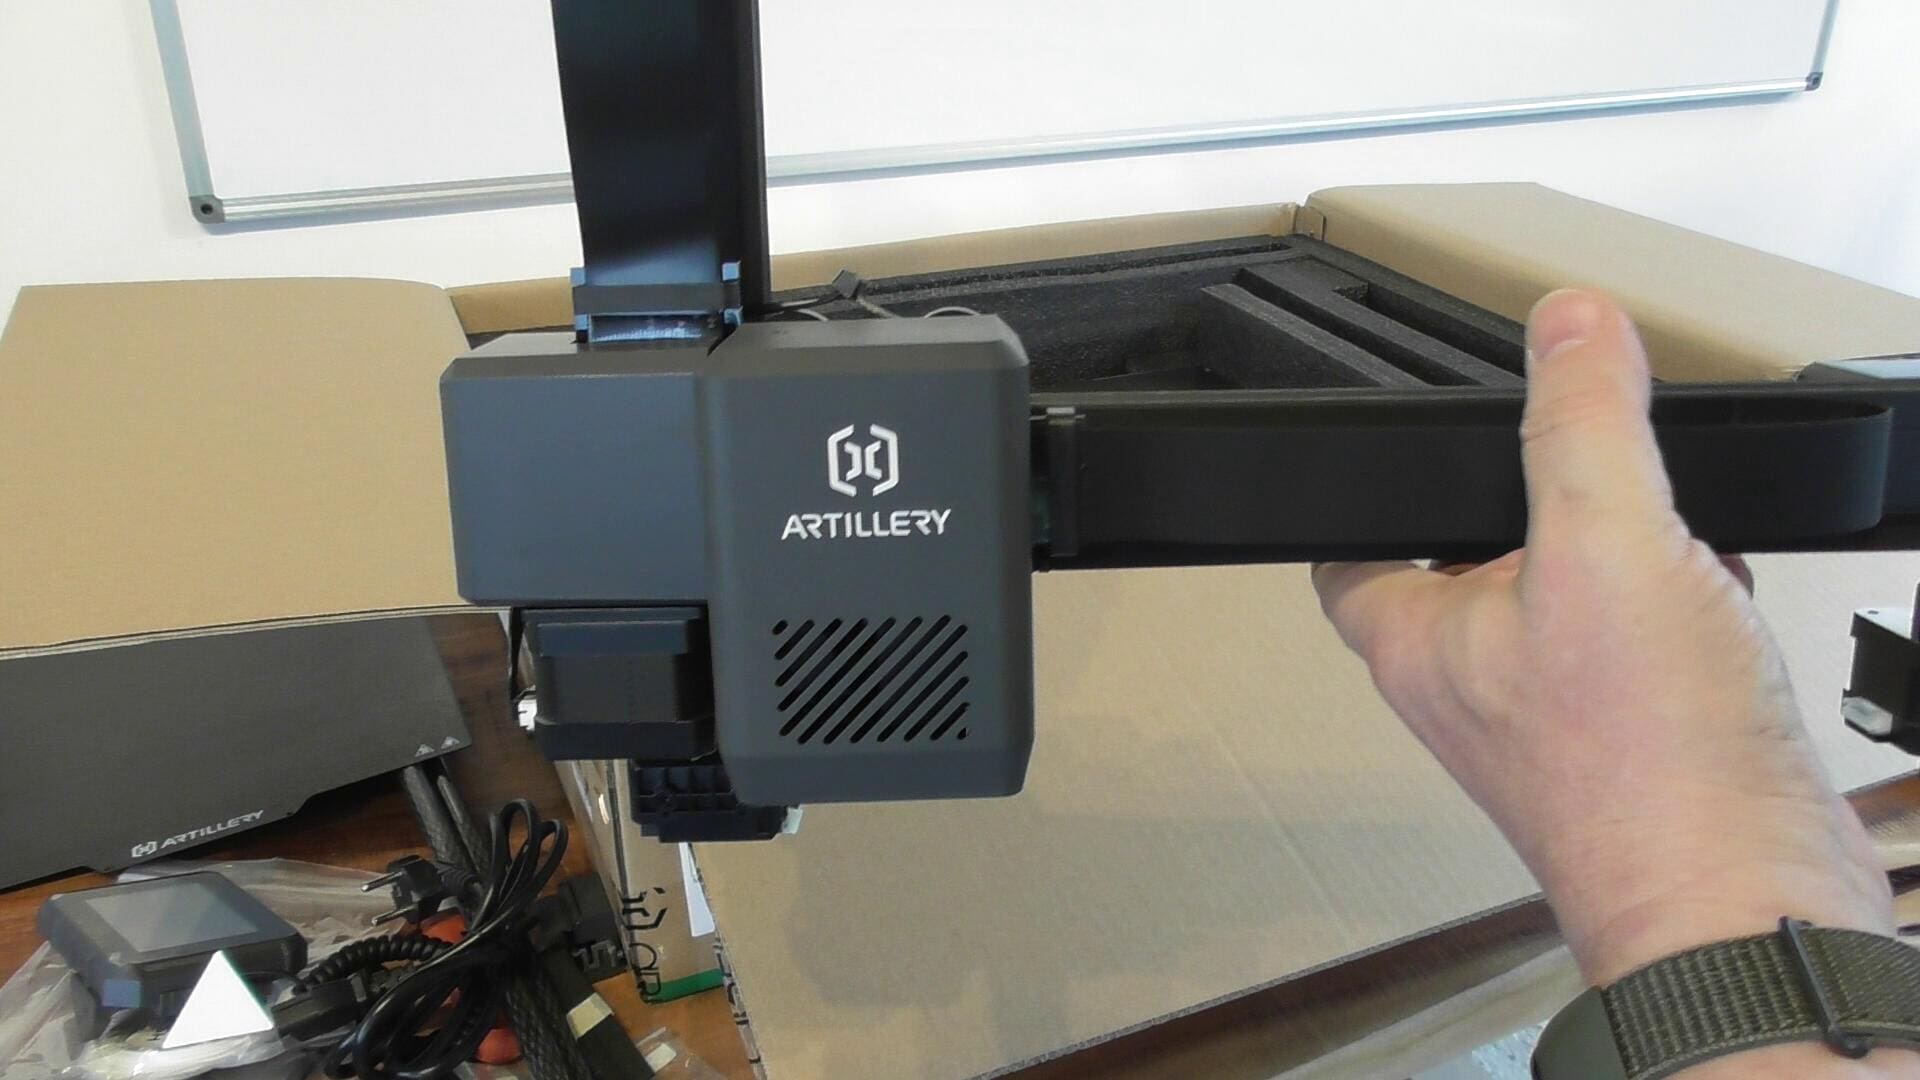
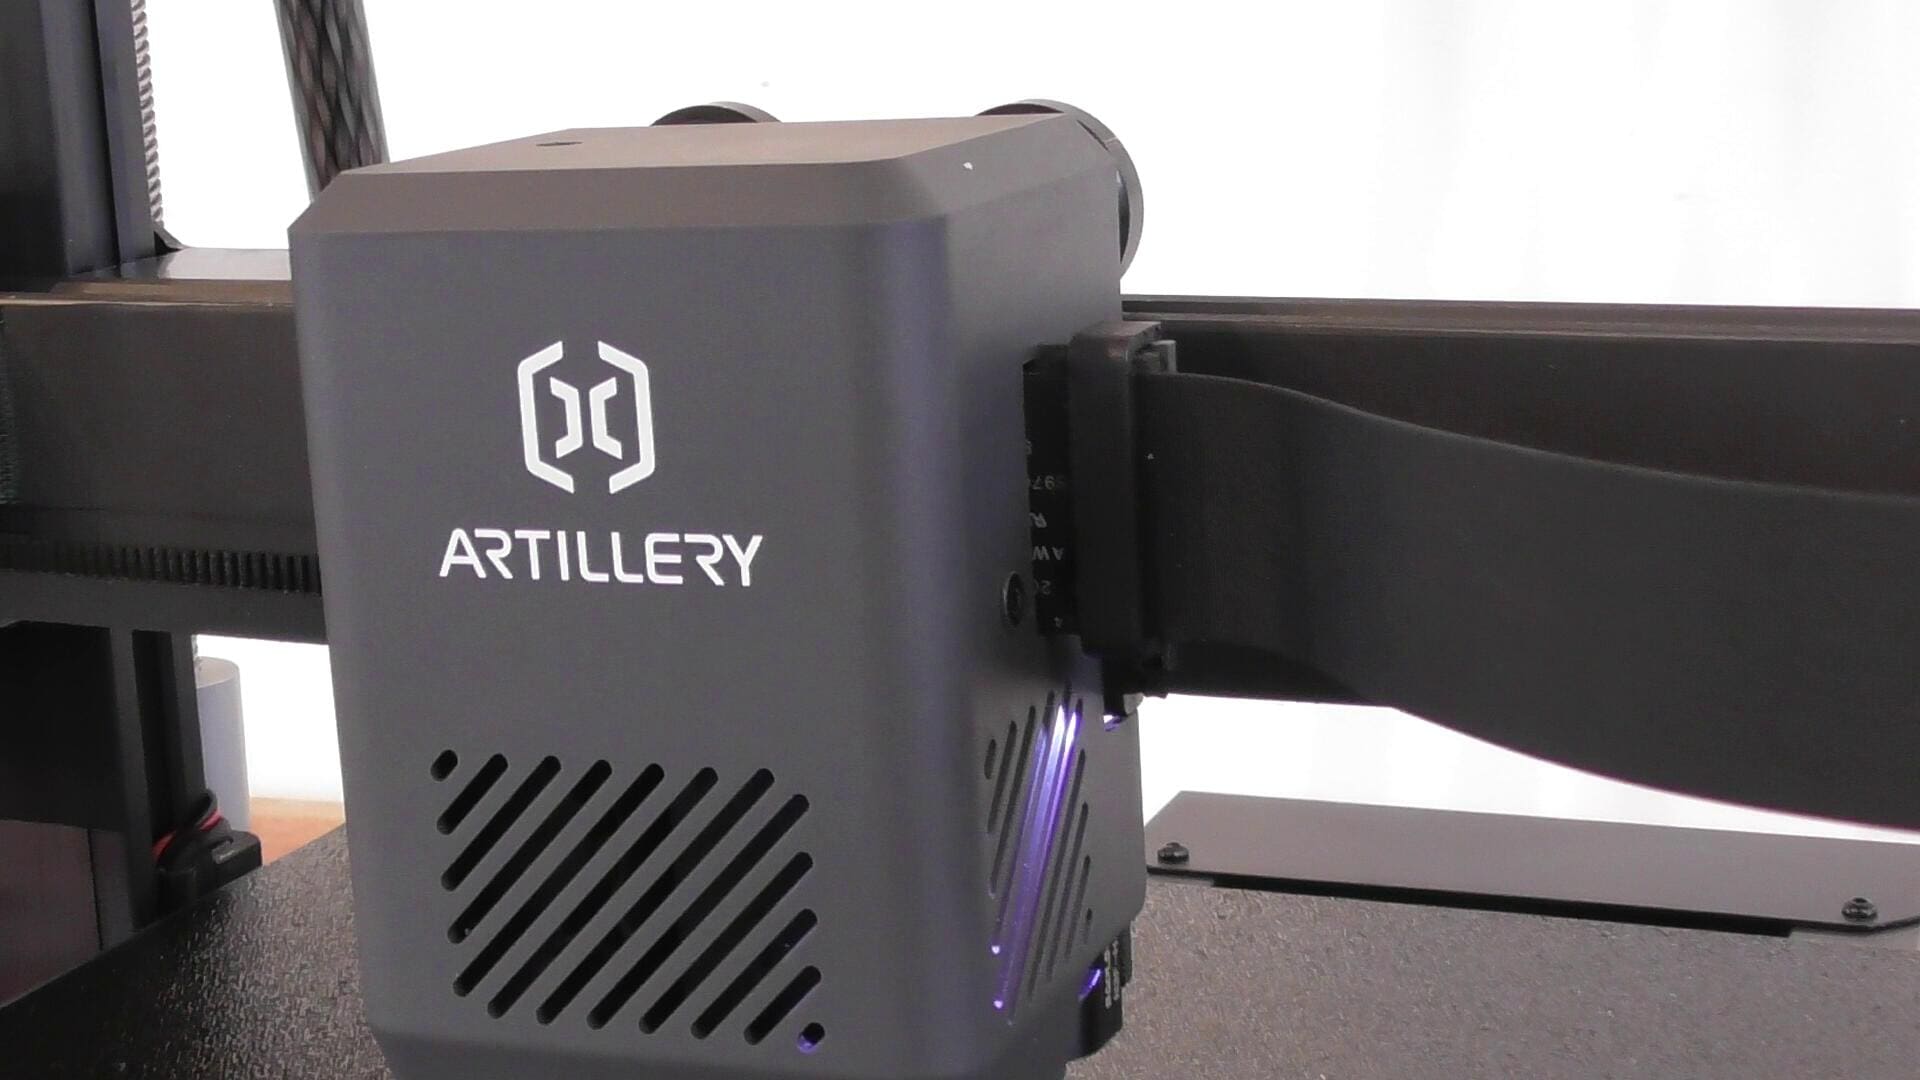
Artillery has unmistakably modelled its design on the legendary stereo systems from Braun. The print head has no visible round fan and a very clean look. Together with the brushed look and the carbon-look rods, the printer now looks much more grown-up.

Volume
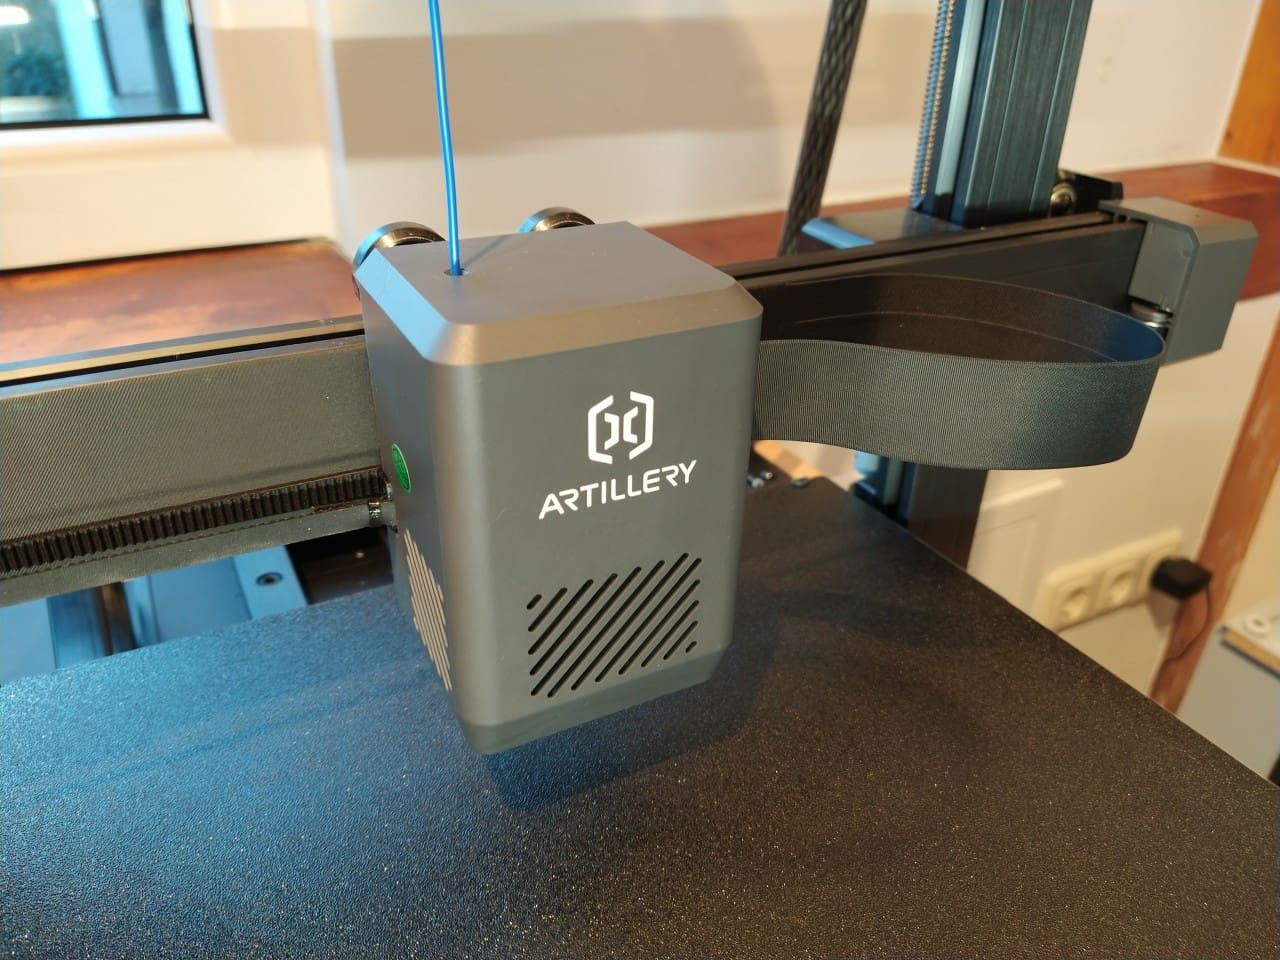
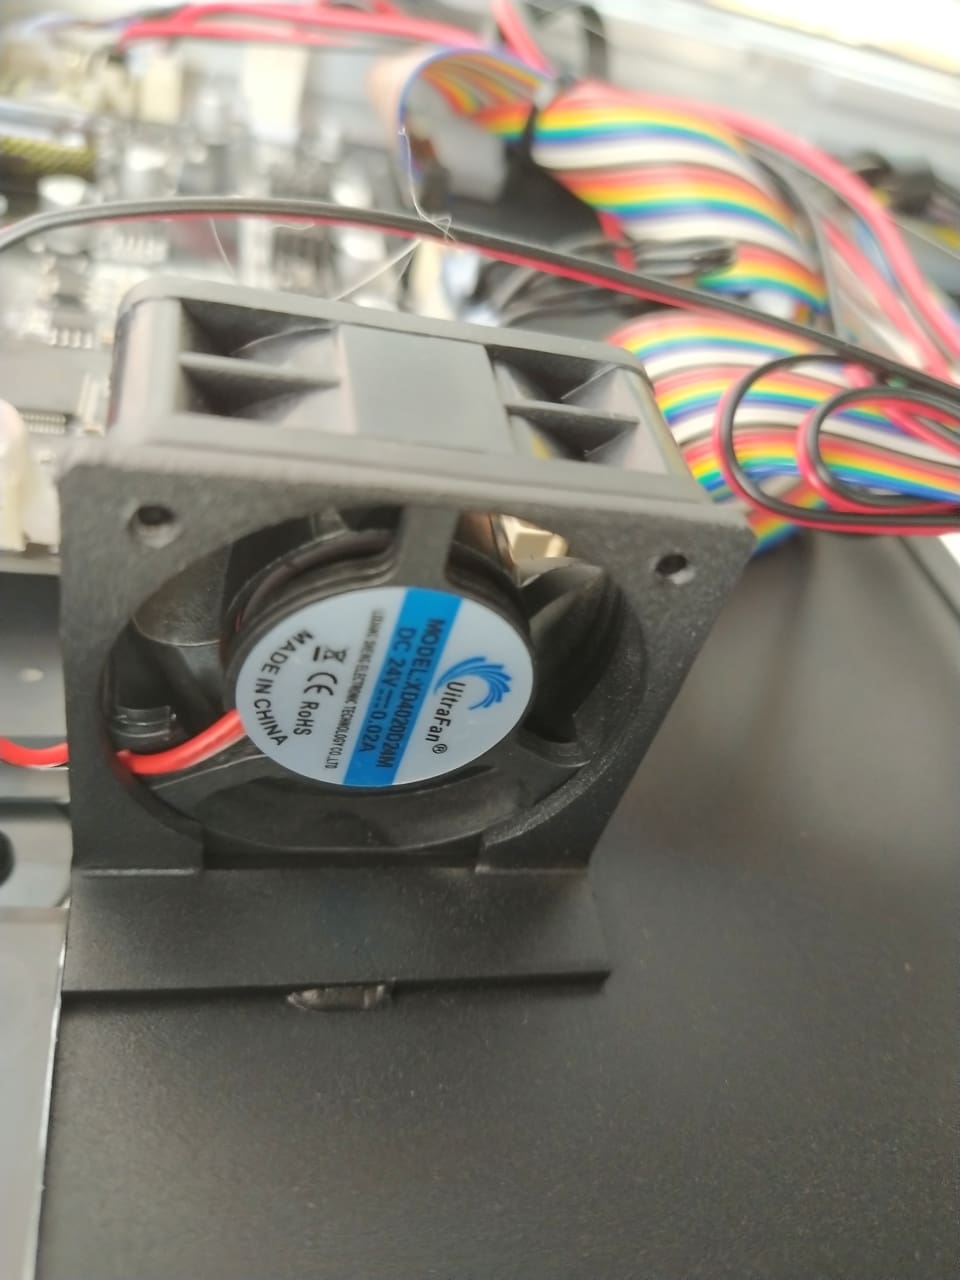
However, depending on the fan speed, the nicer design of the ventilation openings produces clearly audible, whistling noises. The design should have been more functional here.
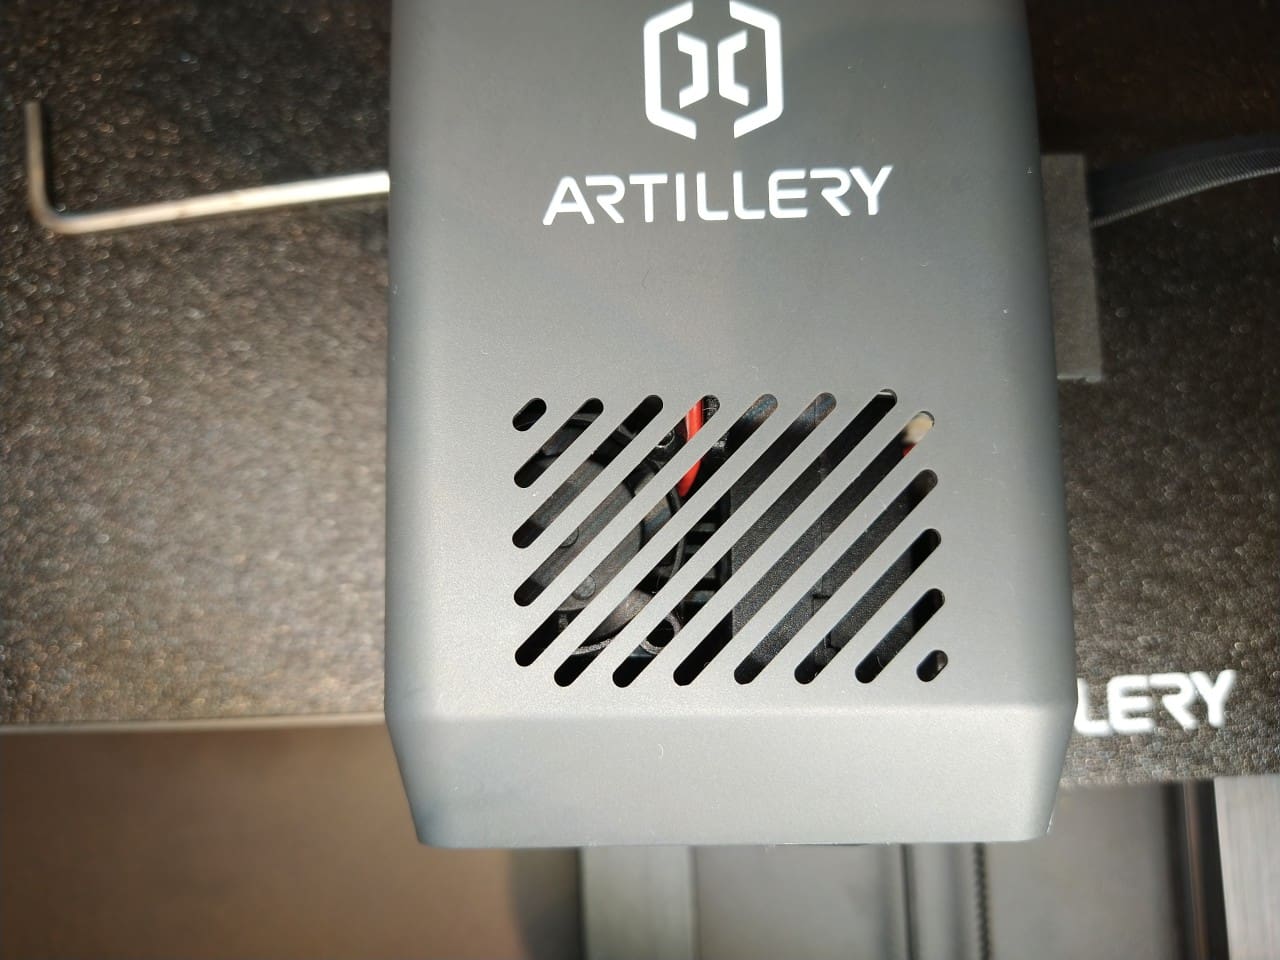
If you take a closer look at the print head, you can see that the hotend fan is partially covered. Well thought out, badly done.
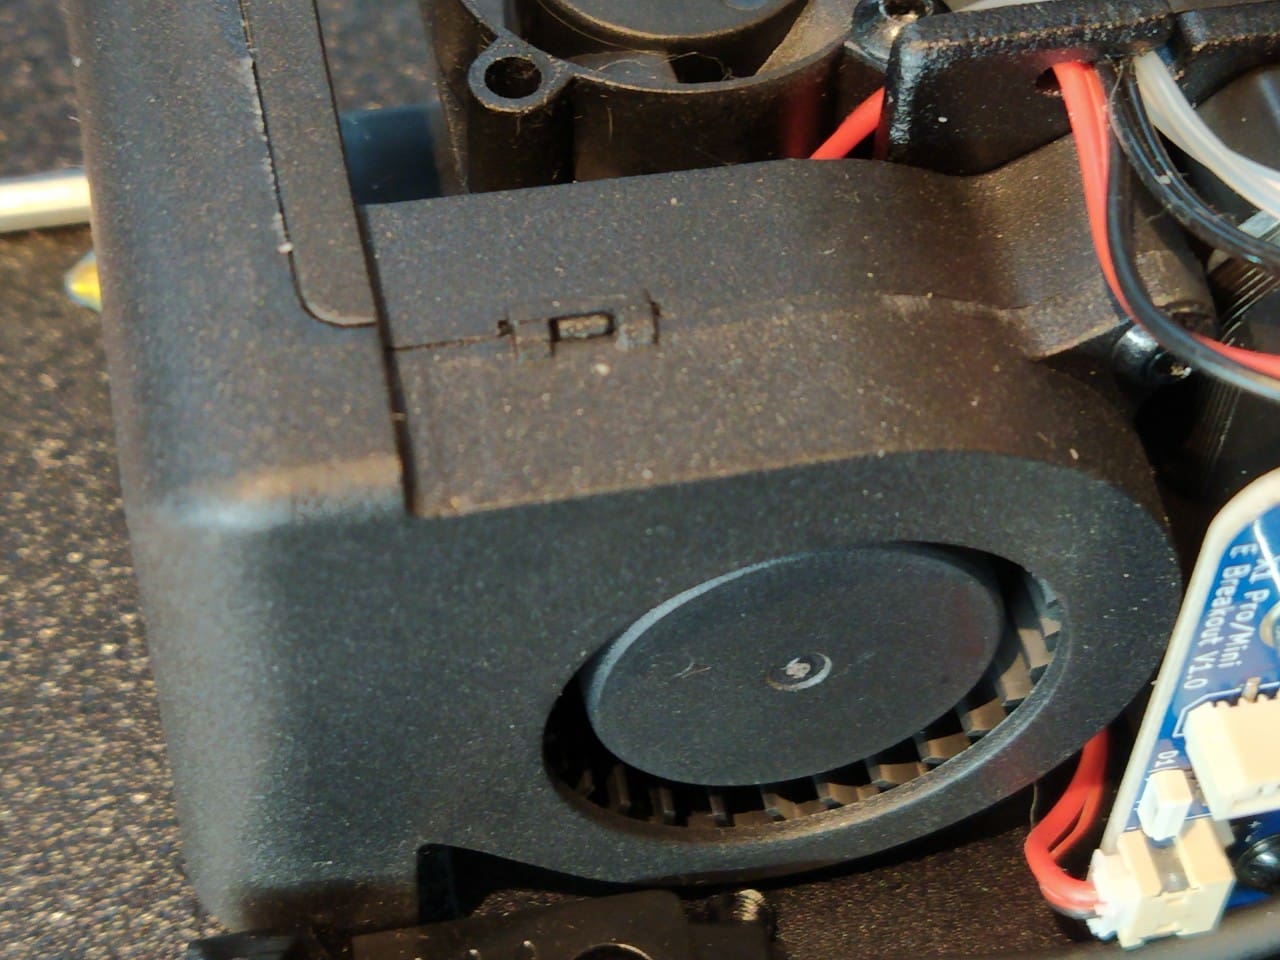
The component fan is so powerful and blows so steeply downwards that in places it plays like a pan flute in the infill of the print object.
The power supply fan is also constantly audible, even when idling. This is the case with many 3D printers, whereby the wind noise is more annoying than the actual fan noise. The fan sounds subjectively inappropriately „hollow“ for the design of the printer. It is simply not a „valuable noise“.
I don’t notice the advertised low noise level of the Siderwinder X3 Plus. Owners of a Sidewinder X2 will be disappointed in this respect, as it impresses with its extremely restrained background noise.

Front panel
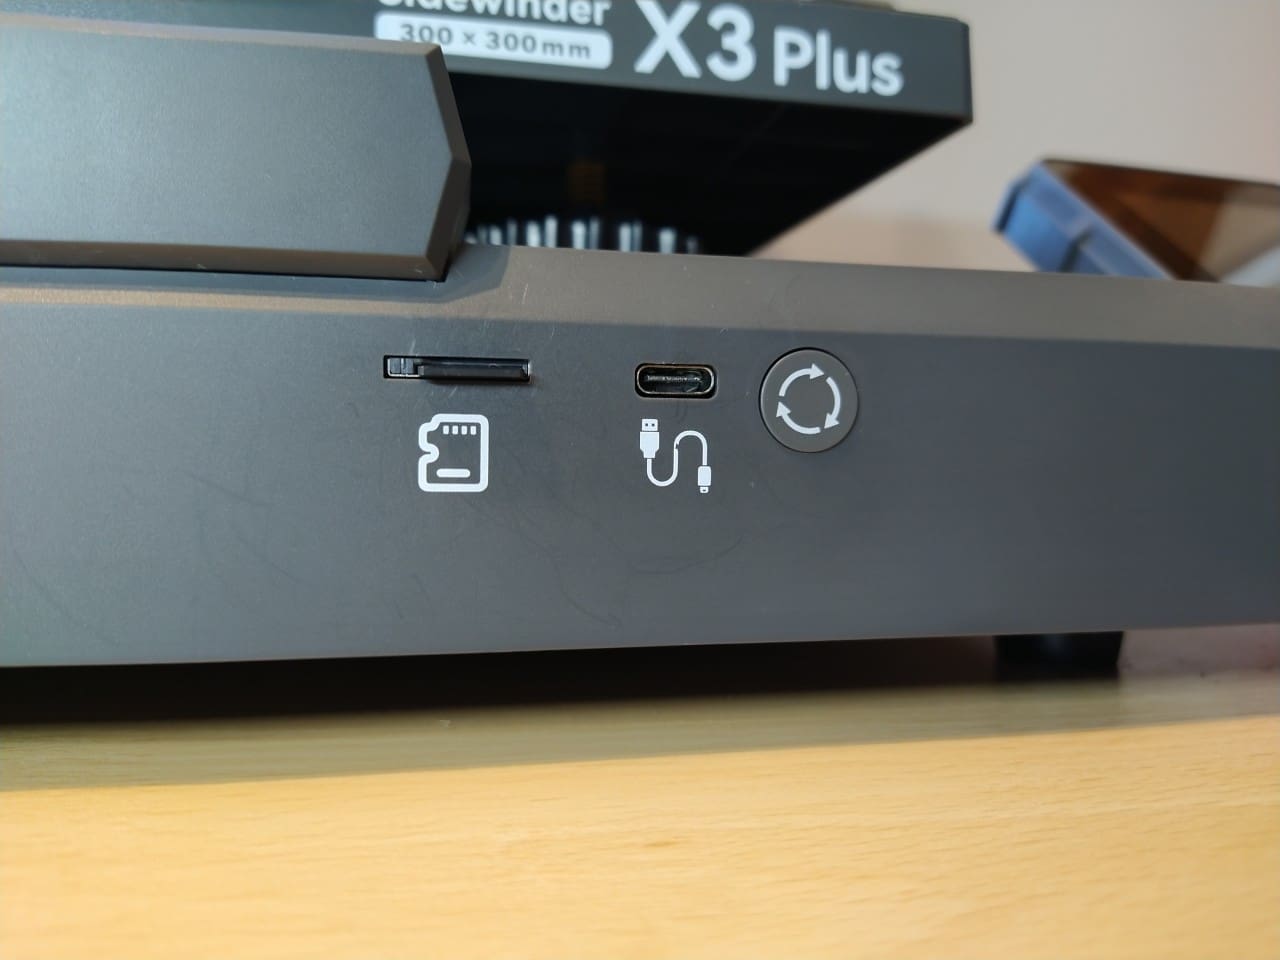
The only way to get print files to the printer is the micro SD card slot, the USB-A port for a USB stick, which the X2 still had, has been omitted without replacement. Are microSD card slots actually suitable for continuous use? I have my doubts and miss the good old USB-A port from the old X2.
You can connect a computer (or a Raspberry with Octoprint) via the USB-C port, which works smoothly and is a much more modern solution than the ancient USB-B port on other printers.
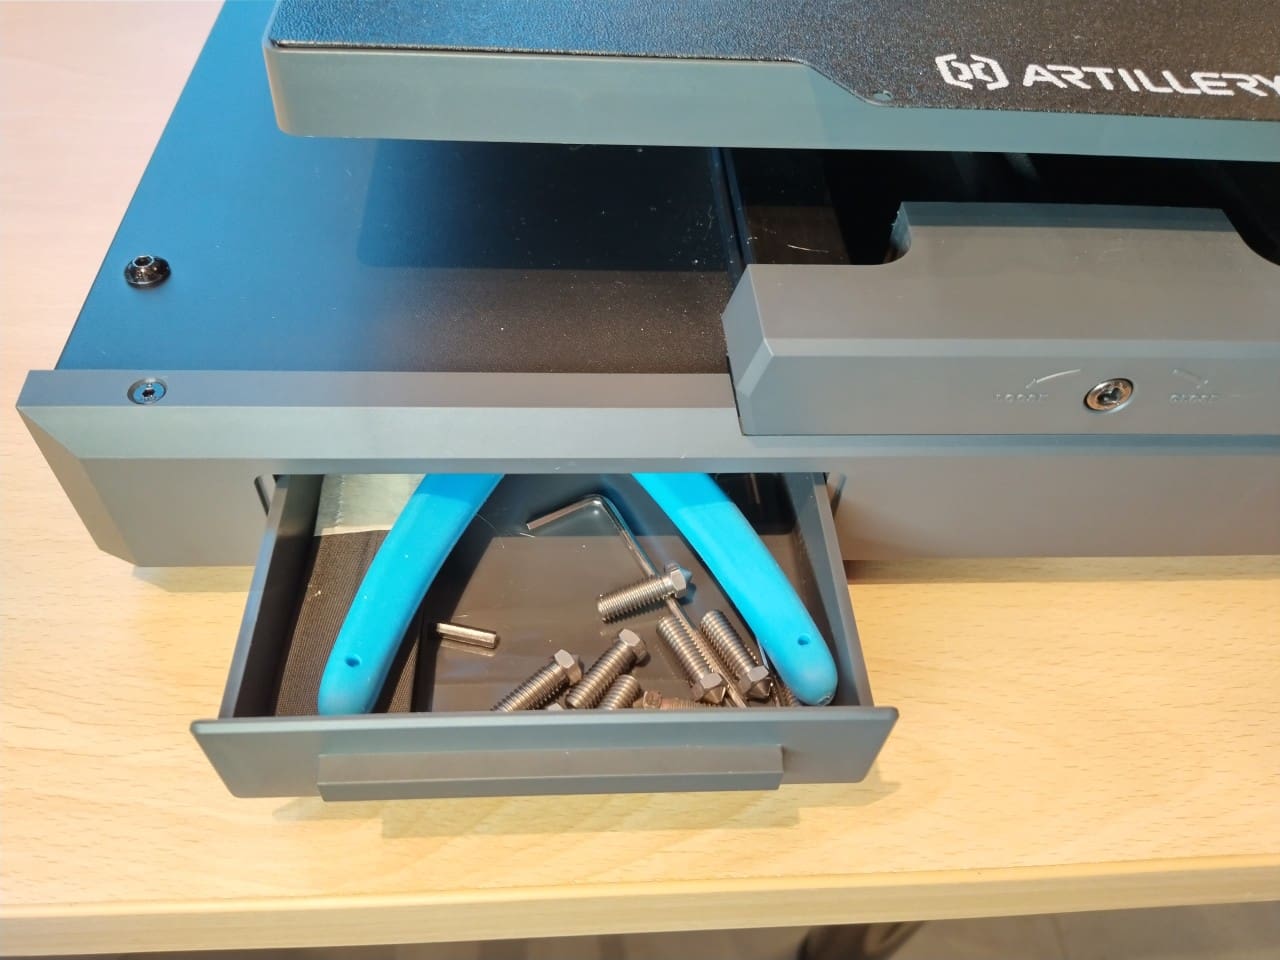
A reset button is handy as an emergency stop button in case something goes wrong. Every printer should have one.
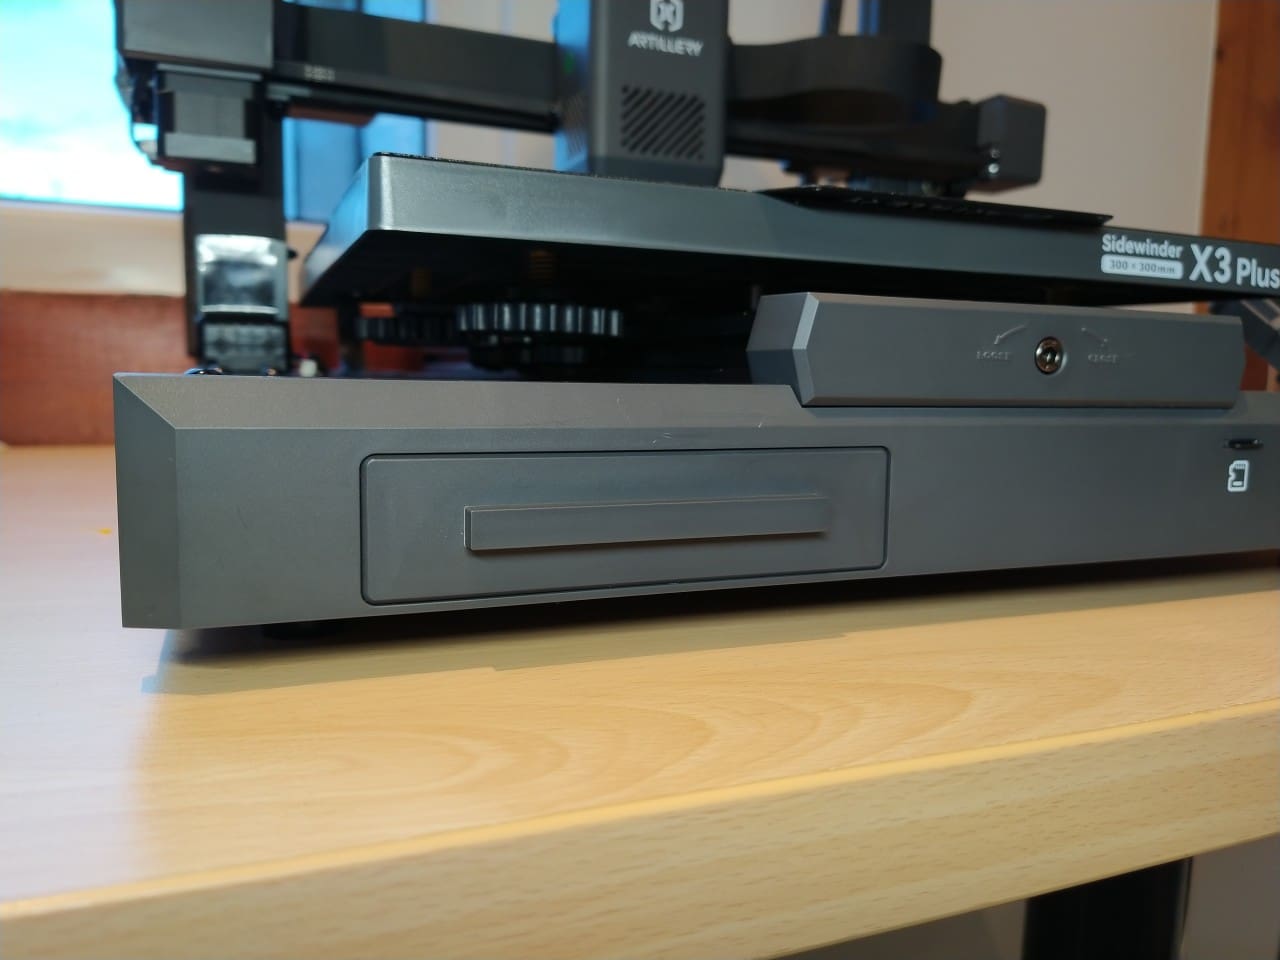
That’s a really good idea: a drawer! How often do you look for the filament pliers? Too often! Here it has a permanent place alongside other tools, spare parts and replacement nozzles.
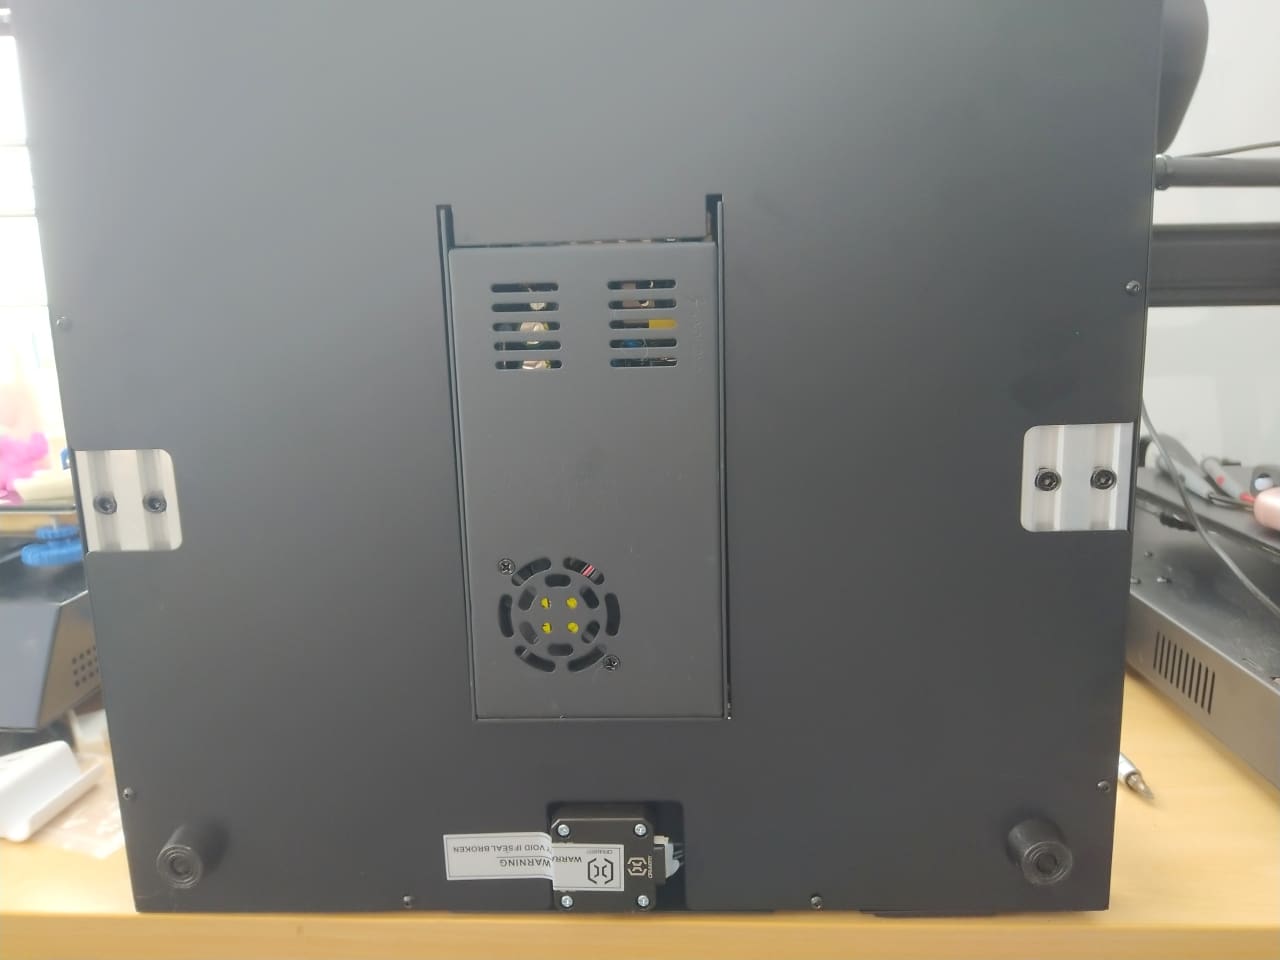
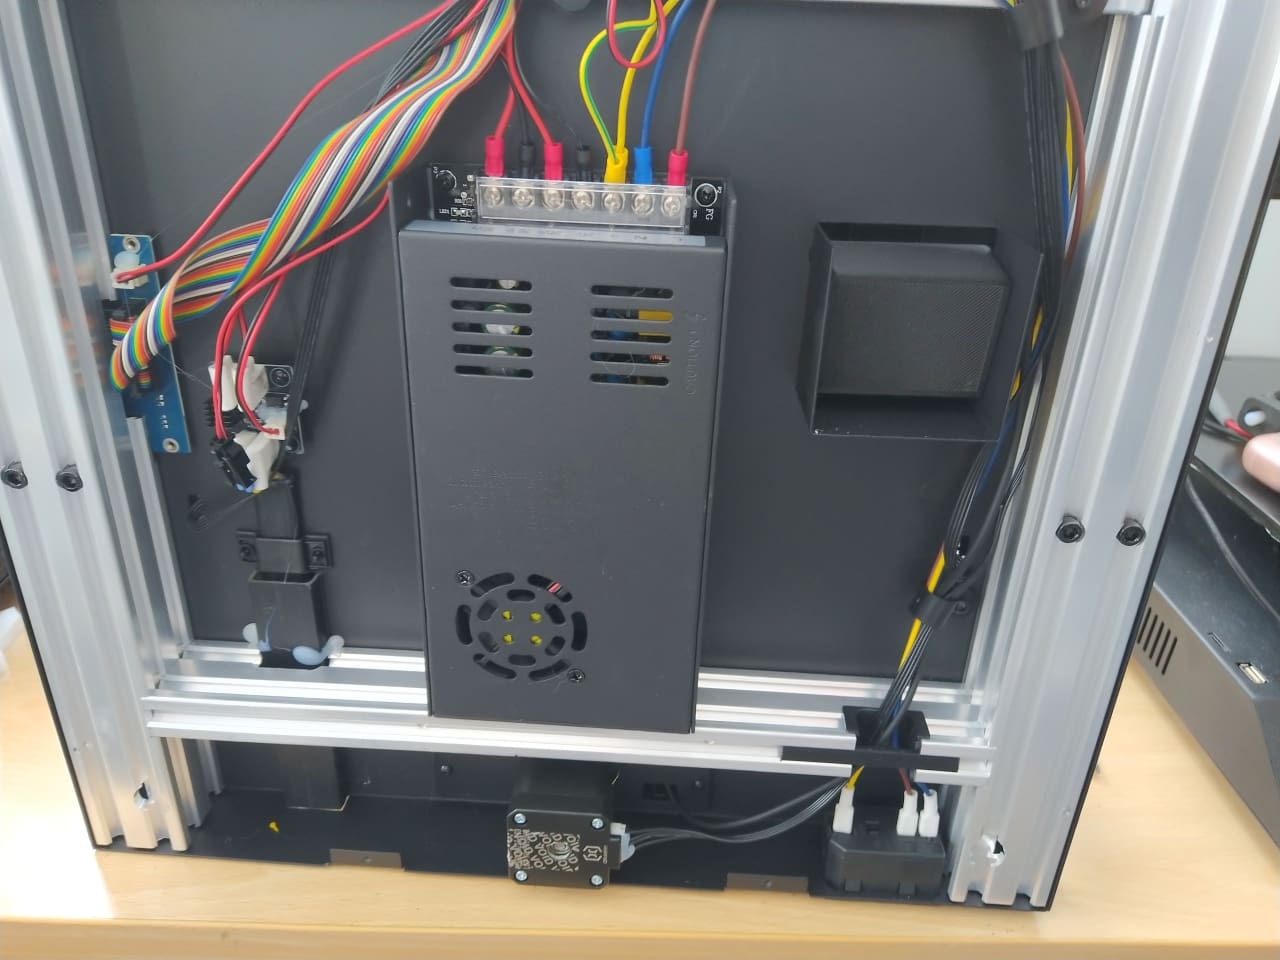
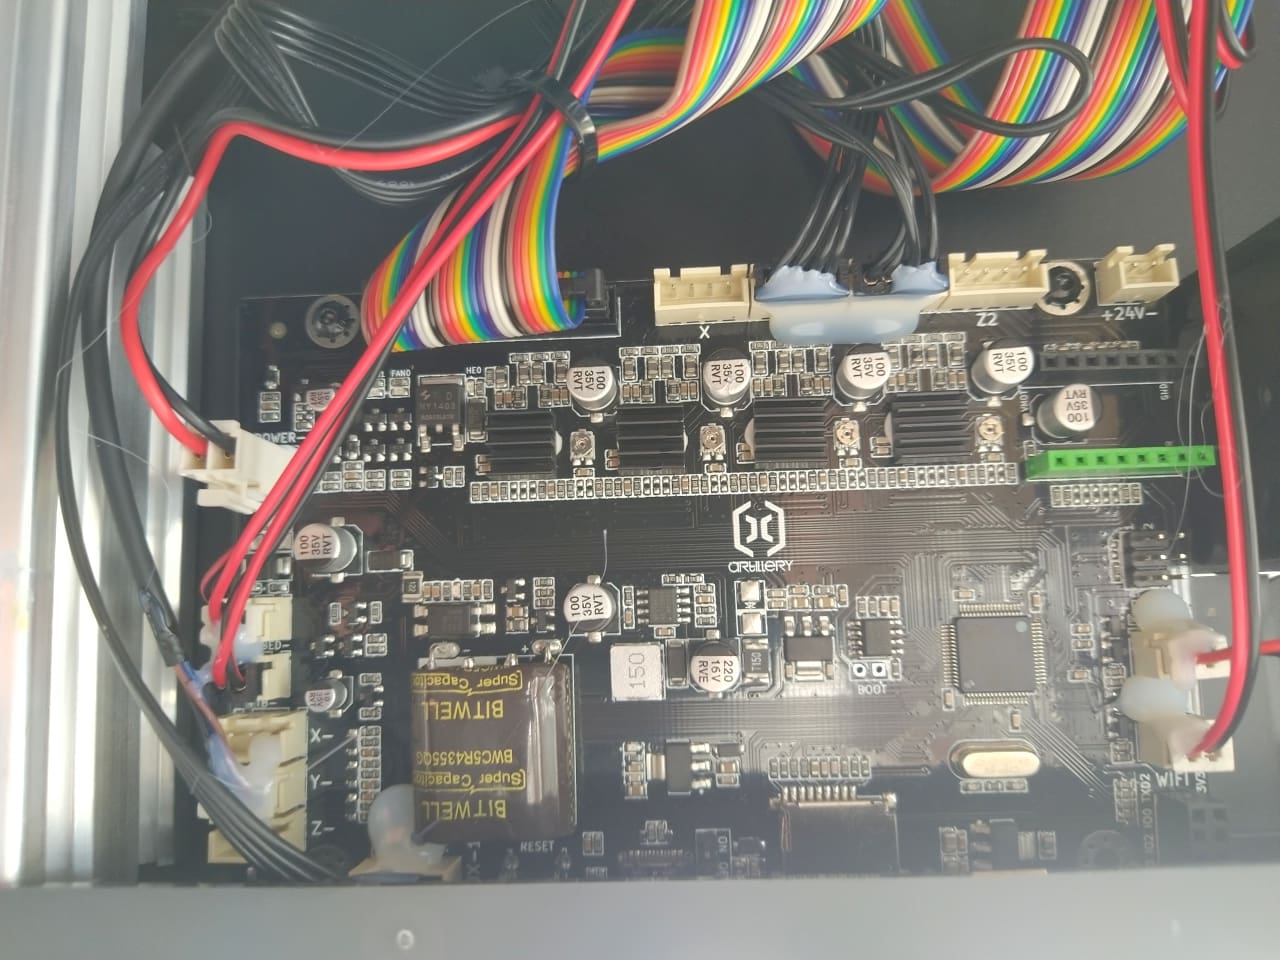
Interior
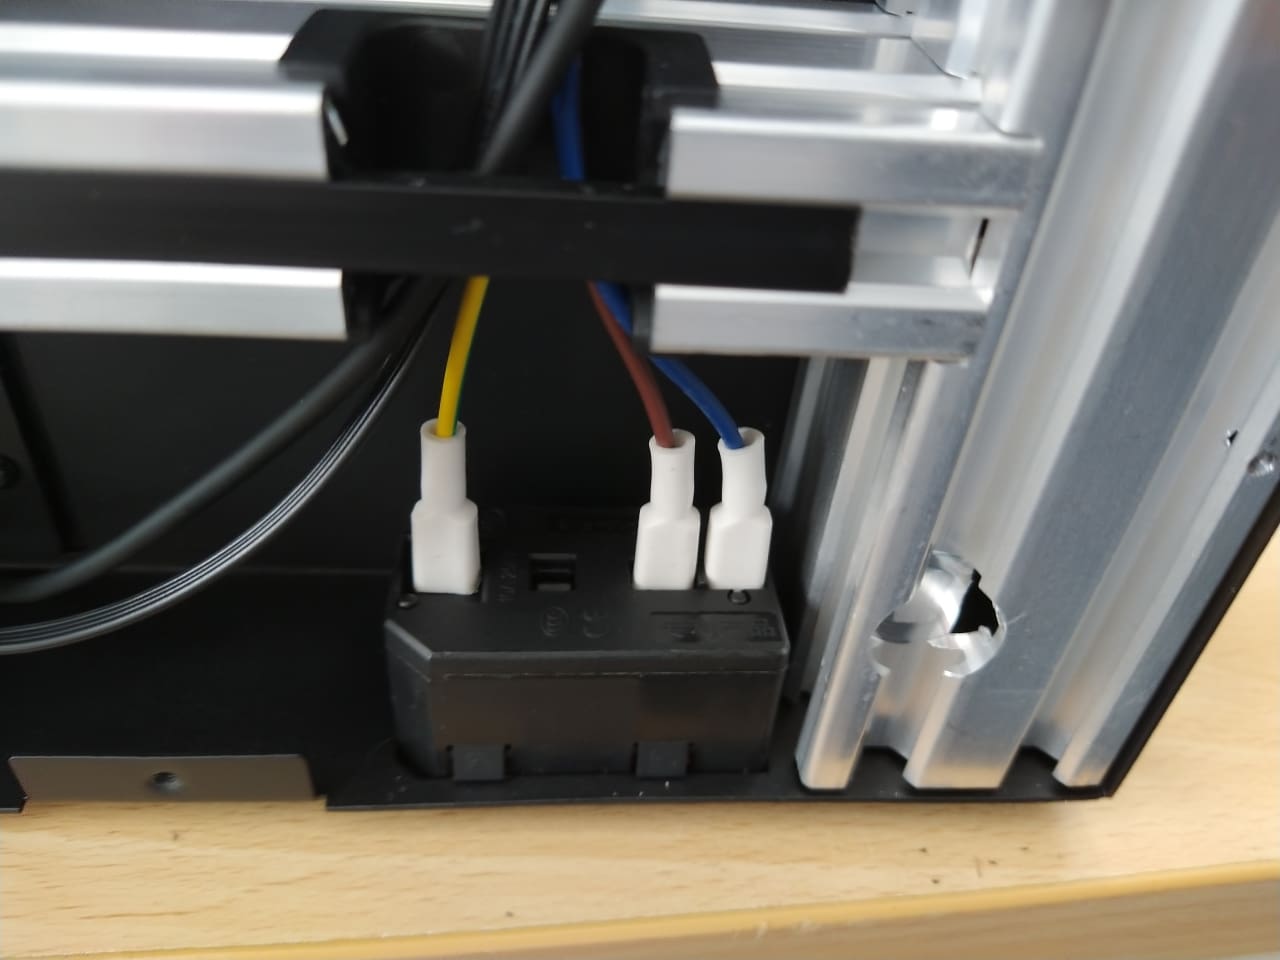
Once I had removed the lid from the base, I was in for a surprise. This is the cleanest printer I have ever held in my hand. I really like that. It’s interesting that the power supply protrudes from the base, so no air holes had to be cut into the base plate to obstruct the airflow.
Can you see it too? The power supply unit is black. A silver, unpainted housing is actually standard. However, someone here wanted the printer to look good from below as well.
The protective earth conductor was connected correctly and I was able to measure continuity on all metal parts of the printer.
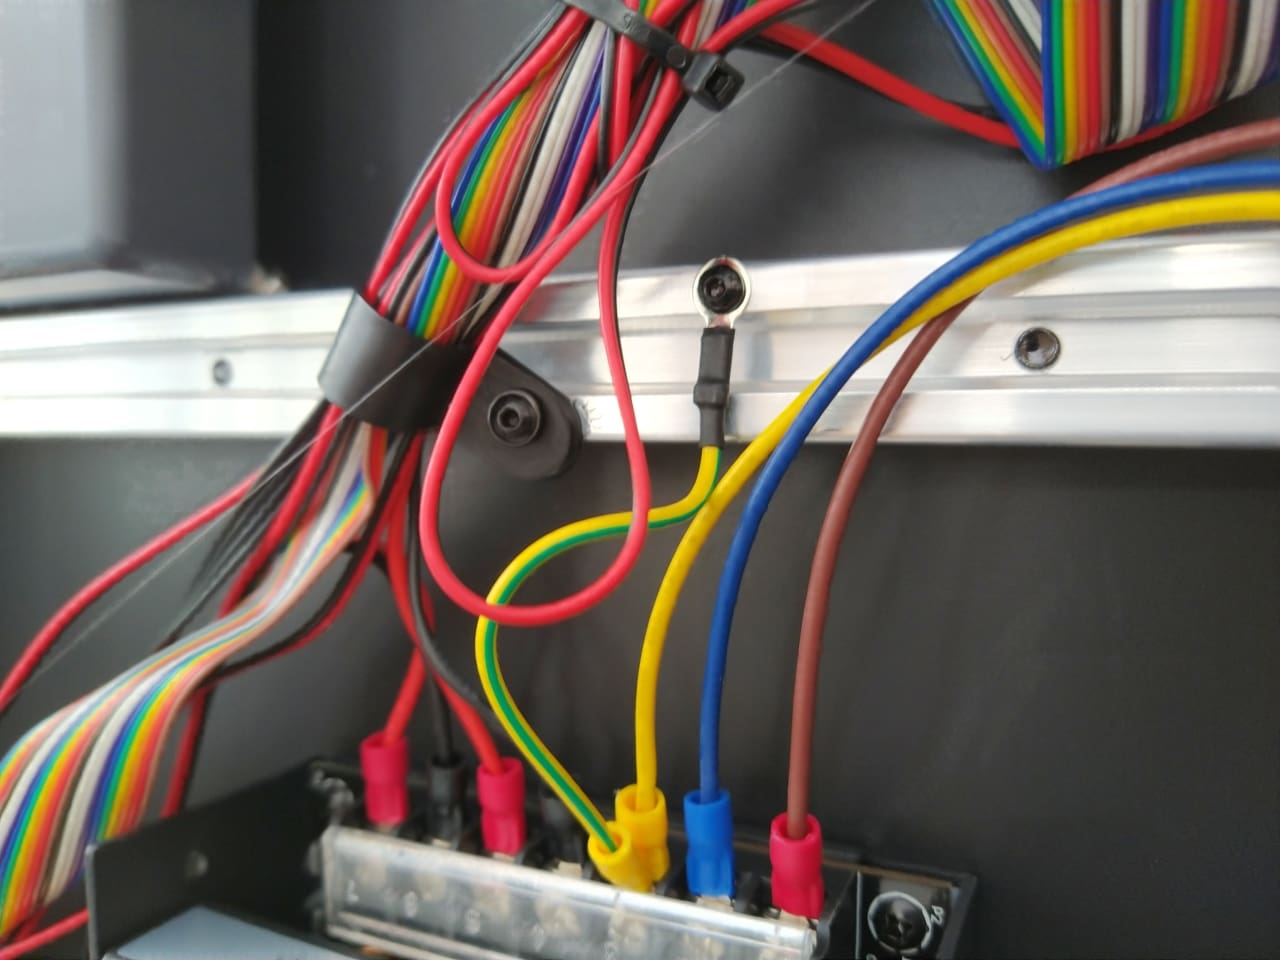
The mainboard works with 24 volts, the heating bed is operated with 36 volts.
Space requirement
The Artillery Sidewinder X3 Plus requires a sturdy desk, as it moves more weight than a small printer.
Depth
The Sidewinder X3 Plus takes up approx. 71 cm in total depth with the maximum bed movements. However, the desk only needs to be 62 cm deep if the housing is flush with the edge of the desk. In this case, the bed extends slightly beyond the desk.
Width
The printer requires a width of approx. 53 cm including the display.
Height
The height is 65 cm without the roll holder fitted, 78 cm with the roll holder and approx. 85 cm with the roll in place
Power consumption
It should be obvious that such a large heating bed also draws a relatively large amount of power. Compared to a 3D printer with a 220 x 220 mm heating bed, the SW X3 Plus has almost twice (1.86x) the surface area to heat. Since the power consumption of a printer is mainly caused by the heating bed, you would think that the power consumption would also go through the roof. But no, it doesn’t.
Yes, it still consumes a lot of power, but only during the heating phase does the power consumption rise to 320 watts throughout. During printing, consumption sometimes drops below 50 watts, depending on the ambient temperature.
- Idle: 8,0 Watt
- Heating phase: 320 watts
- 60 degree heating bed, 210 degree nozzle, 100 mm/s, PLA Silk = approx. 180 watts
- 60 degree heating bed, 210 degree nozzle, 200 mm/s, PLA Silk = approx. 160 watts
- 80 degree heating bed, 240 degree nozzle, 100 mm/s, PETG = approx. 190 watts
The printing hour with PLA, which most users will use, costs around 4.5 to 5 cents at 30 cents per kilowatt hour according to Adam Riese.
I have checked this many times, but I cannot say why the printer should consume more power at 100 mm/s than at 200 mm/s. That makes no sense. Since the faster print came directly after the slower one, I can only assume that the heating bed was more or less „heated through“ after the first three hours of printing, but that’s actually nonsense. I’ll just accept that.
In future, I should measure the total power consumption in kWh.
160 watts on average is a damn good value, which even smaller printers can hardly undercut at rated speed.
With these consumption values, there is no need to buy a smaller printer to save energy. The lion’s share of the printing costs is accounted for by the filament used anyway.
Print preparations
The printer is now ready to go. We plug in the power cable and can switch on the printer using the switch at the back right. The position is exactly the same as for the SW-X2.
Most printers need to be fine-tuned a little before the first print so that you can create the best conditions for the first print. These steps usually only need to be carried out once.
Cleaning the PEI plate
I have always cleaned the PEI plates of my printers thoroughly with washing-up liquid and the rough back of a new(!) kitchen sponge. At least twice from both sides. After drying, I degrease them with a clean microfibre cloth and white spirit.
The dry plate is then placed on the printer and heated to 80 degrees for half an hour. Once this is done, switch off the printer and allow it to cool down completely.
Manual bed levelling
The Siedewinder X3 Plus should have a sufficiently evenly levelled print bed from the factory. We can therefore skip the next point.
Optional: Adjusting the bed screws
If you are a control freak and already have experience with adjusting a heating bed, you can now loosen all six bed screws until they can be turned without resistance, i.e. the bed is completely loose on the small springs.
Starting from the centre, tighten all six evenly so that they have the same resistance but cannot come loose by themselves. Now the bed is really not straight, but tightened with the same tension throughout.
We now need a standard sheet of A4 paper, „copy paper“.
Main menu –>
Tools –>
Manual levelling –>
Select First Point
The print head is now moved to the front left and lowers. We first place our paper on the print bed.
The print head should land on the paper approximately in the upper quarter in the centre.
The aim is that the paper can be pulled out from under the nozzle, but can no longer be pushed under the nozzle.
It should be clear that „pulling out“ does not mean that the paper tears.
Pull on the paper.
If it is jammed and cannot be pulled out without force, tighten the front left screw more firmly. The print bed is pulled down at this point and the gap between the PEI plate and the nozzle widens.
If it can now be pulled without using force, push the paper towards the print head. If this works, loosen the screw again slightly until the paper can no longer be pushed but only pulled.
Yes, it’s a bit tricky the first time, but you’ll soon get a feel for it. Everything else will be quicker and more routine later on.
We now repeat this up to Fourth Point.
The centre point gives me a bit of a headache. To be honest. We can only measure the distance in the centre here, but we have a wheel on the left and right to adjust the bed. A lot of feeling is required here. I tried to tighten the screws on both sides with the same force and then with the same number of turns.
First on the left, then on the right. Always for about „an hour“, i.e. turn the wheel a twelfth of a turn, then do the paper test, if it doesn’t work, make the same adjustment on the right-hand wheel. If it didn’t work, turn it to the left again – and so on until it worked.
You won’t like what happens next, but you have to do it if you want to print properly.
Once again!
No, this is not a joke! Now check the first point again! You will realise that the first point is probably no longer set correctly. This is because you are putting the whole plate under tension by turning the screws.
Now do this until all four corner points feel the same, i.e. until you have set exactly the same height between the nozzle and the plate. There’s no „Oh, it’ll fit“ here! This work is important!
Now check the centre point again. But with the centre point, we are no more pontifical than the Pope. If the centre point feels a little too loose, that’s fine. The distance should not be too tight so that the nozzle does not drive into the print bed at this point and damage the printer.
Automatic bed levelling
We remove the paper and select the „Auto levelling“ menu item. The printer will immediately measure the print bed at 49 points. This is necessary because, to put it bluntly, it looks like a meadow landscape. There are mountains and valleys. But you can’t recognise them with the naked eye. But you can with a Hall sensor attached to the print head!
Once this is done, press „Save“ and the printer will now multiply the topology of your print bed. With each print, it will raise or lower the nozzle by a few hundredths of a millimetre so that your print adheres perfectly to the printing plate. The Sidewinder X3 Plus has a very large print bed and you don’t want to suffer a misprint just because the print comes loose in one place.
So why use manual levelling?
Why bother if the printer can determine the position between the nozzle and the bed itself? Because it can’t! This is about hundredths of a millimetre. You use a different nozzle or a different PEI plate and the distance is no longer correct! To prevent the nozzle from driving into the print bed under any circumstances and damaging the printer, the bed must first be mechanically adjusted at the five points.
Don’t worry, you almost never have to touch the adjustment wheels again, not even when changing nozzles or PEI plates, because you can fine-tune the Z-offset, the distance between the nozzle and the print bed, later in the menu.
Fine adjustment
In principle, you should fine-tune every printer if you want the best possible print result. I have shown you how to do this in another article.
Inserting the filament
As with its predecessor, the filament roll holder is located at the very top of the printer. Many will miss the ball bearings, but in my opinion this is more a question of faith. I don’t particularly like the old X2 holder. It’s too over-engineered for me. There is a simpler way!
The redesign of the filament roll holder is truly „Reduce to the Max!“, because with the Sidewinder X3 Plus, changing the filament is easier and quicker than with any other of my printers.
The roll now sits crosswise and is placed on a plastic axle. You can do this at your leisure with the end of the filament fixed in the roll.
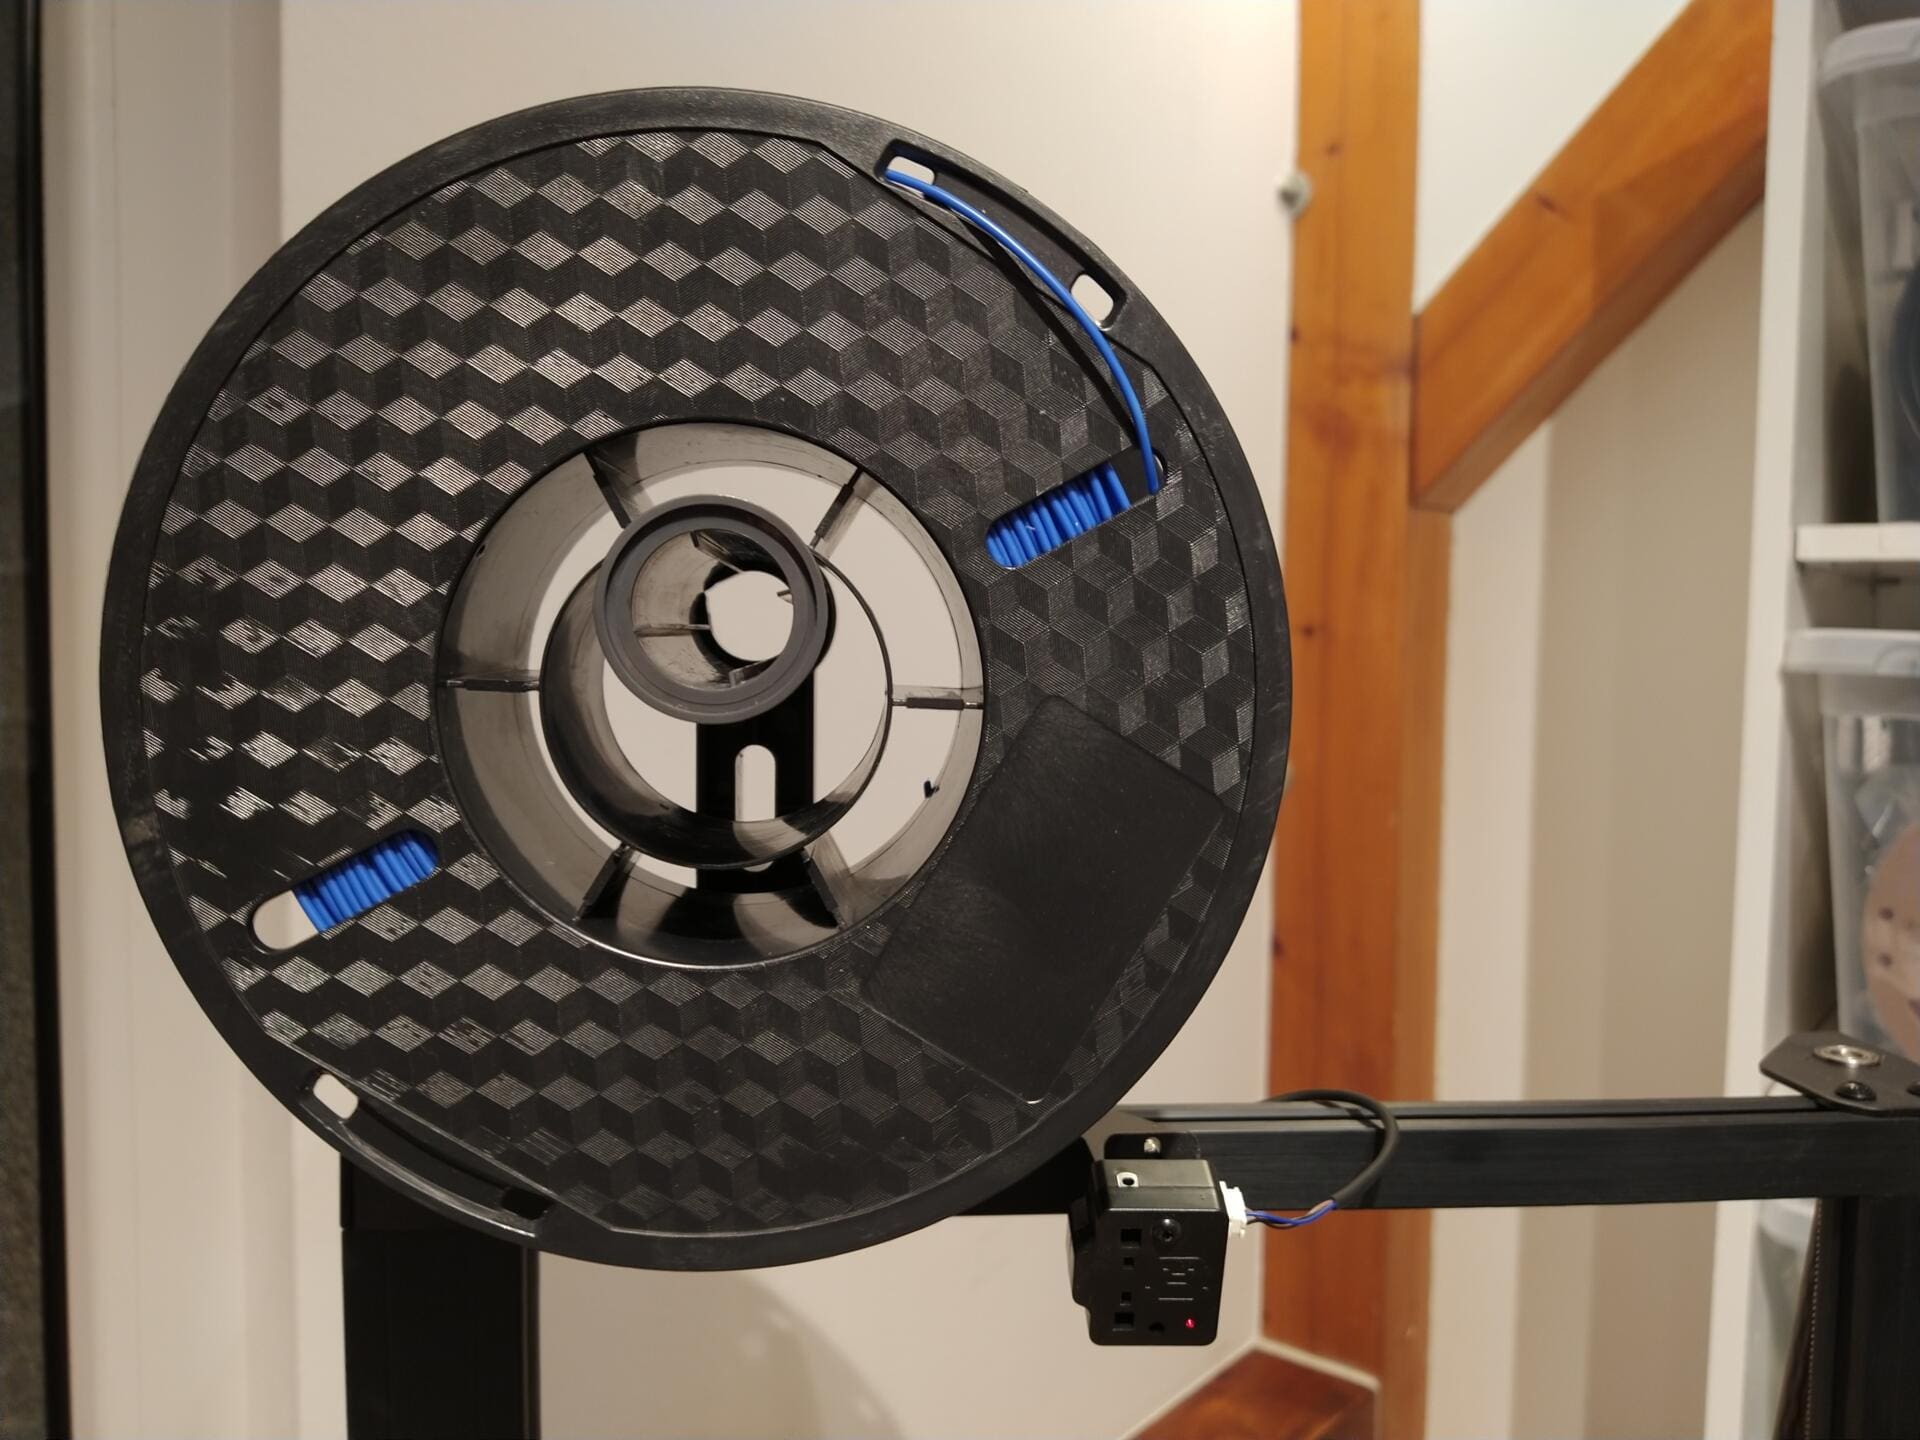
Now detach the filament from the roll and feed it through the filament sensor. Now it cannot snap back and cause knots on the roll.

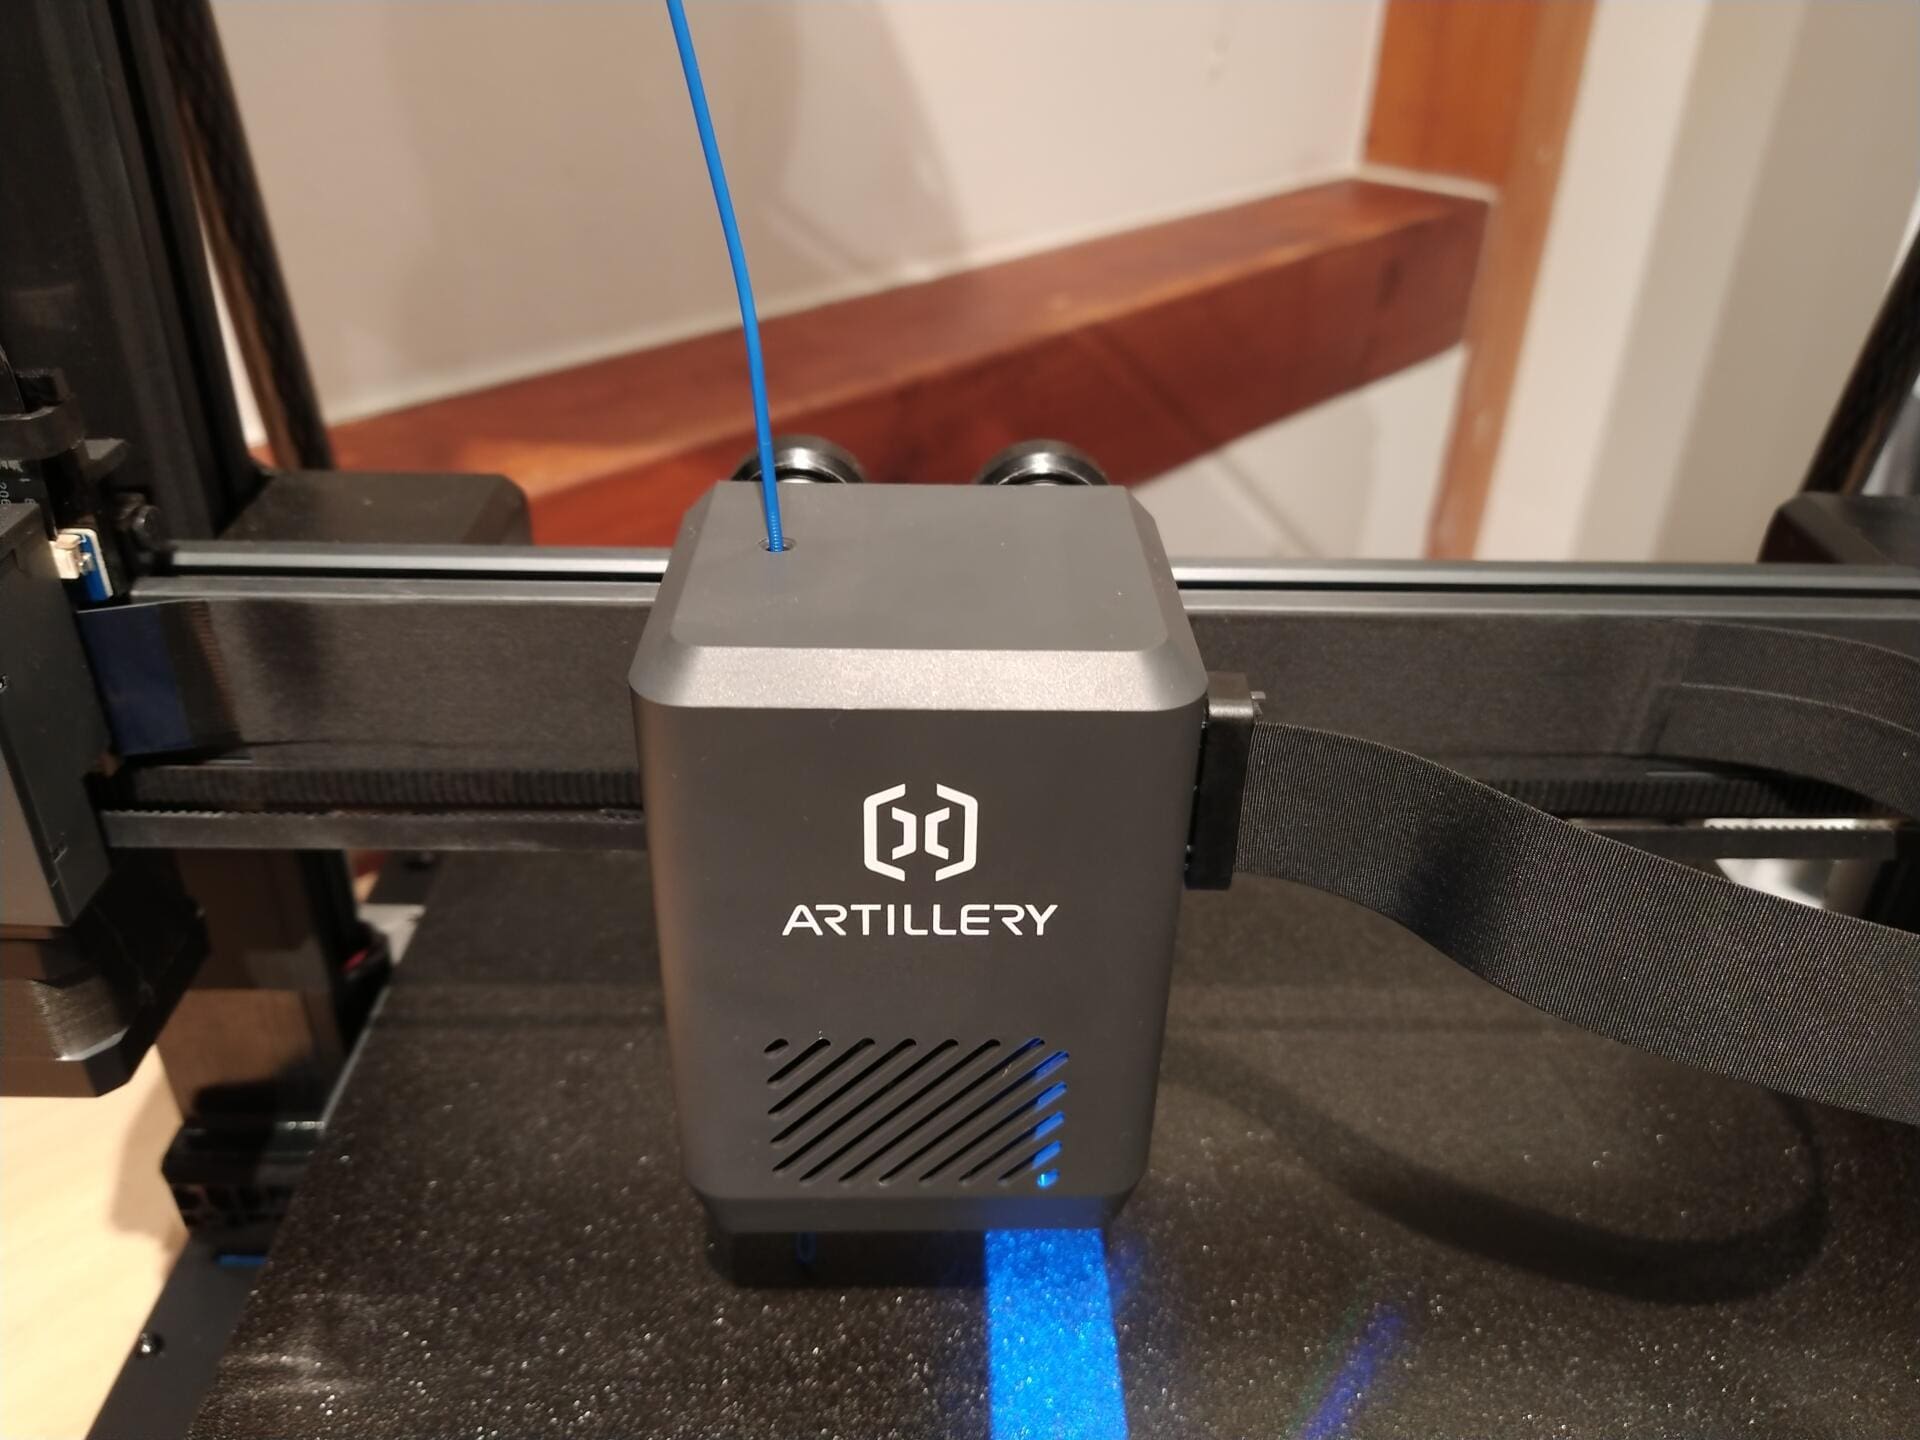
Simply push the end of the filament into the print head as far as it will go.
In the filament menu, select –>
Filament and –>
Feed
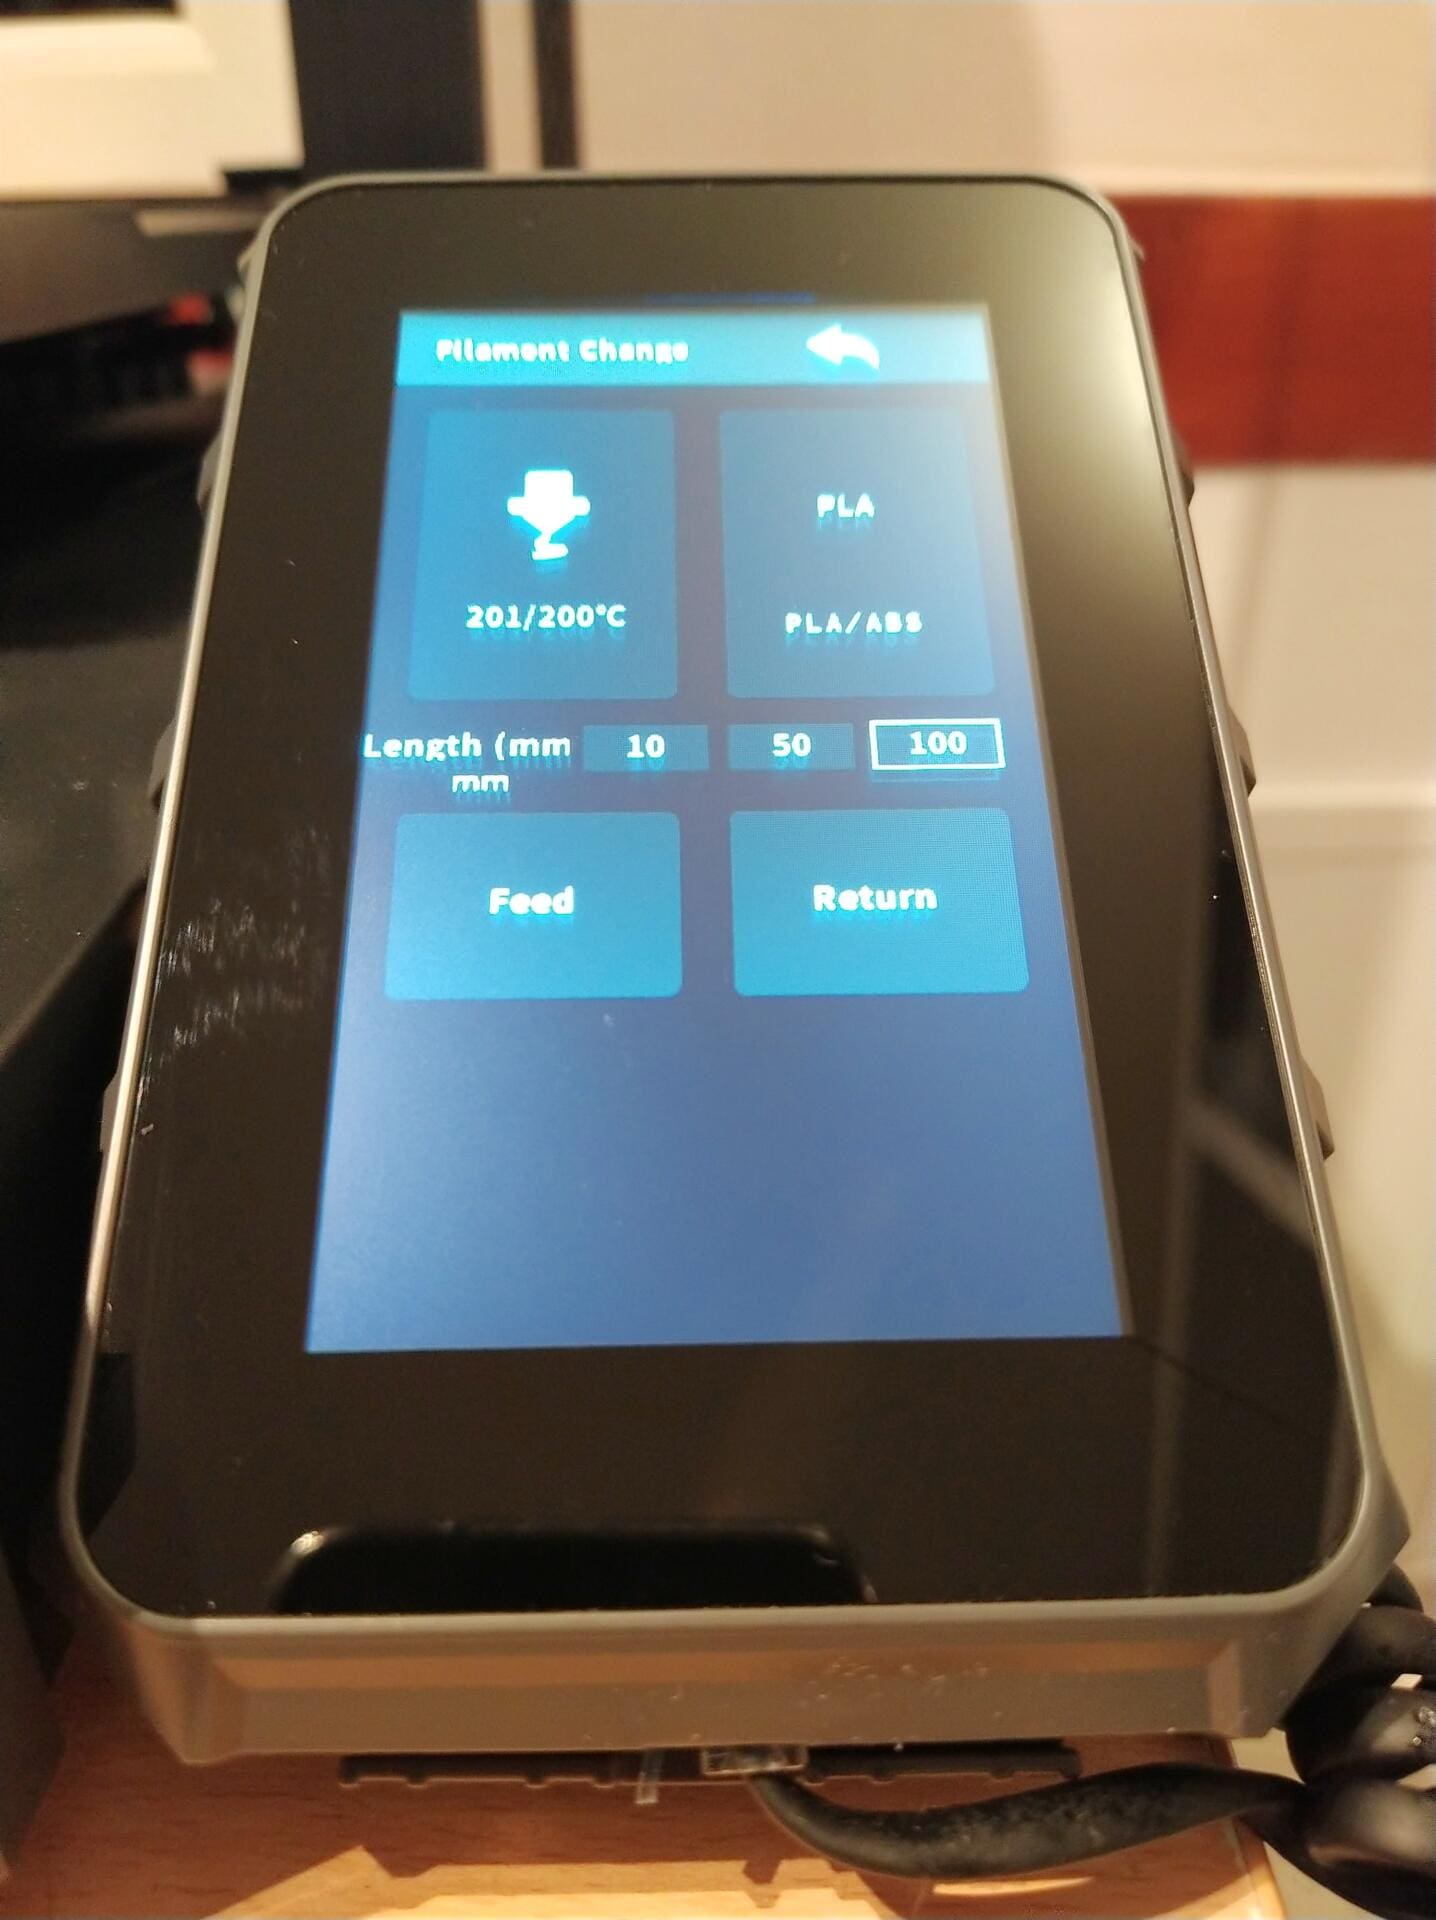
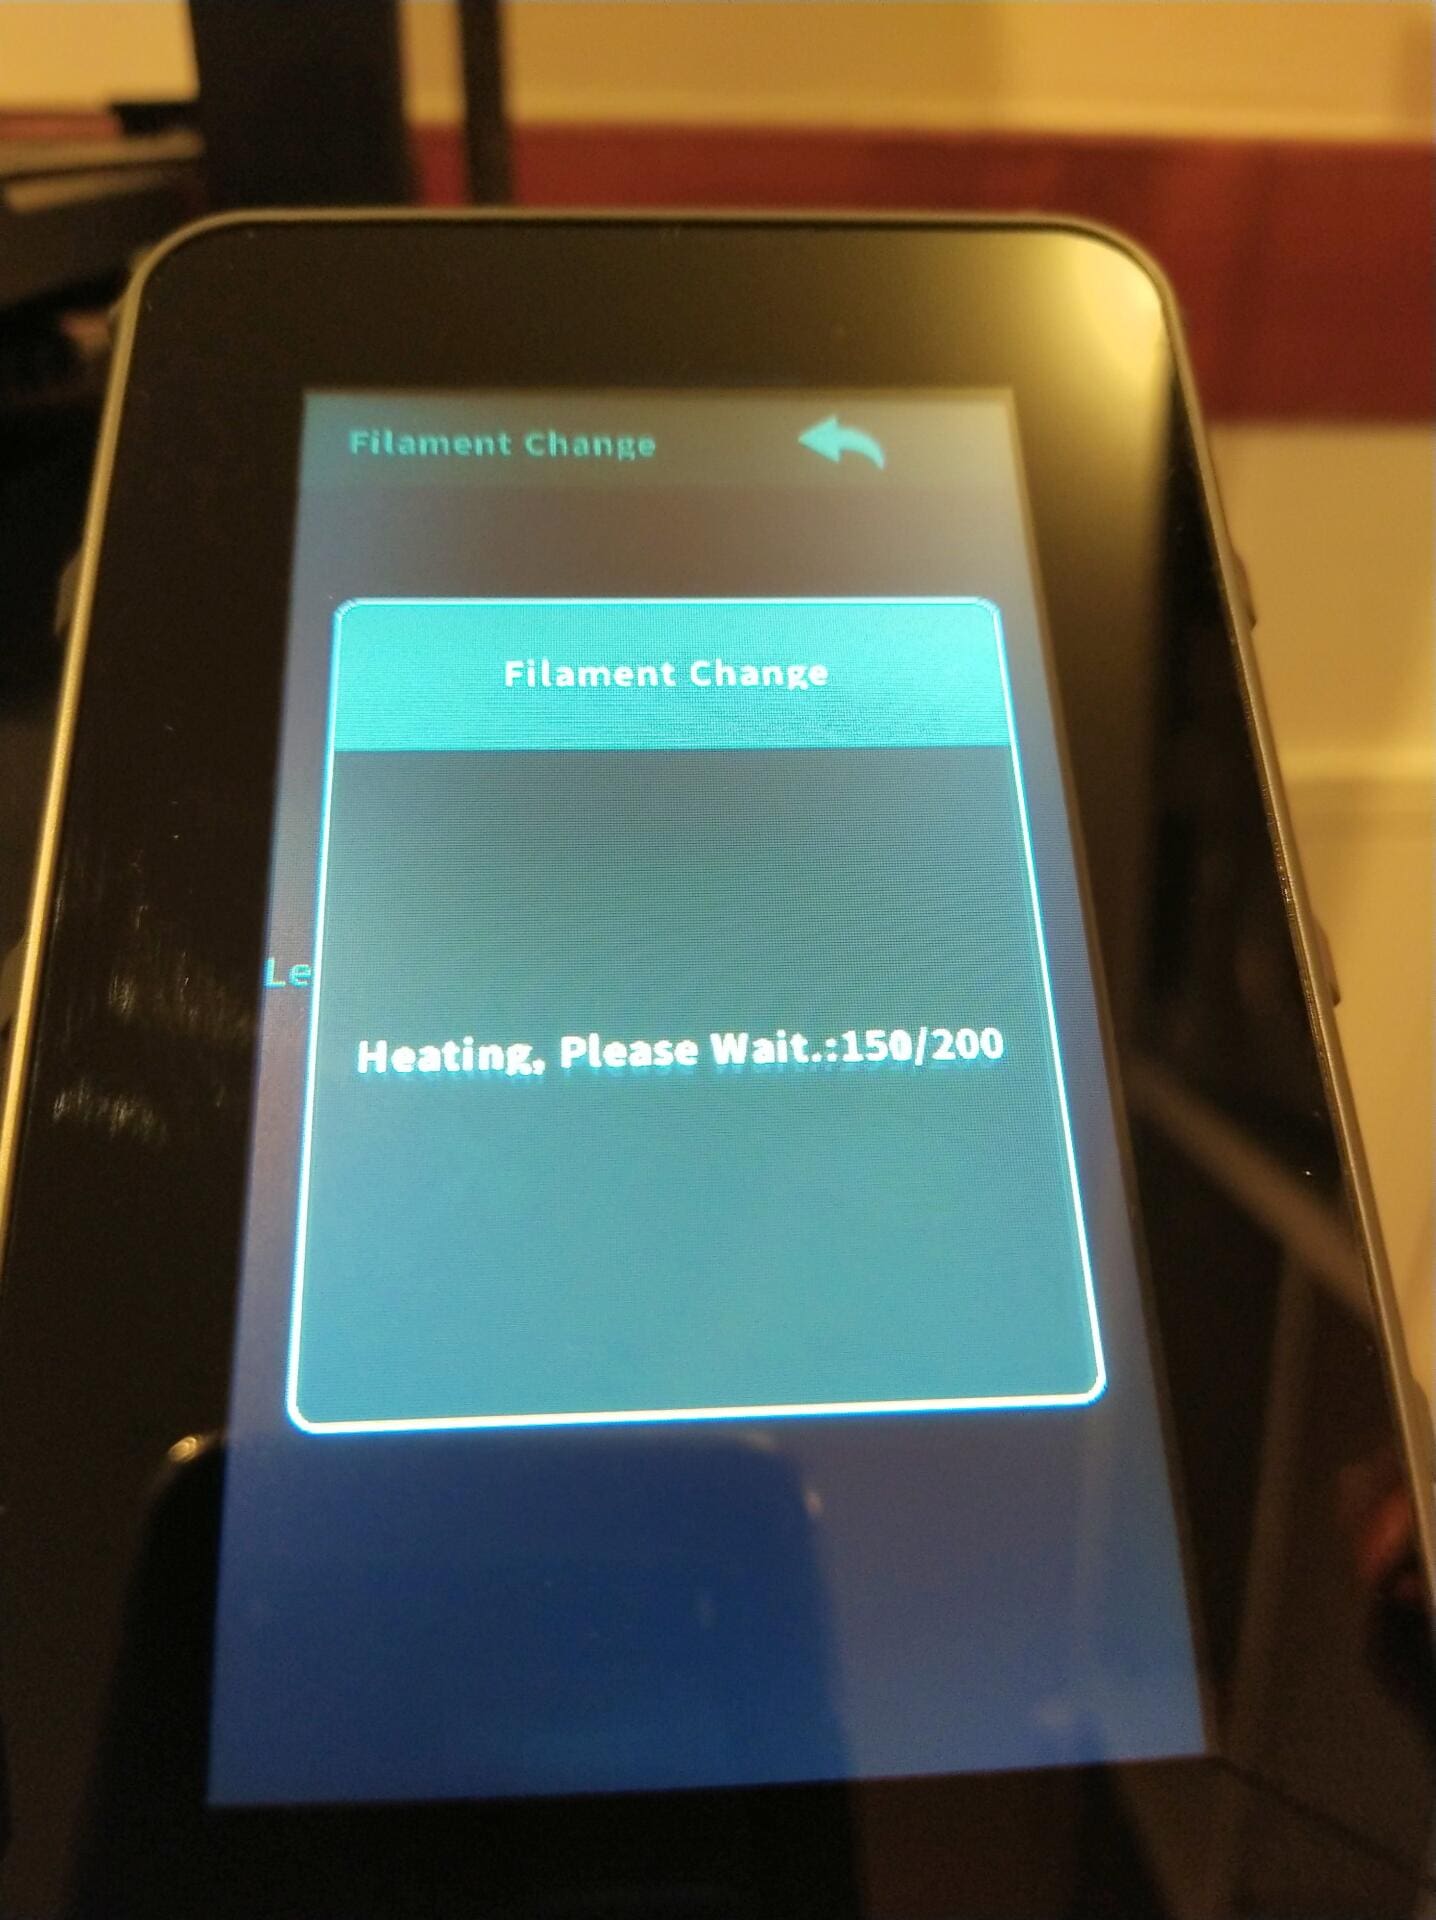
The print head heats up and the filament is then fed in automatically.
Unloading filament is just as easy. select „Return“ and the filament is ejected. Now turn the roll until the filament reaches the sensor. Grasp it with your right hand above the sensor and continue turning the roll. Now you can pull the filament through the holes on the roll and secure it again.
Sounds stupid or trivial? But changing the filament is really one of the highlights of this printer. It’s the little things that make life easier – and it couldn’t be simpler.
Preparing the slicer
Even if you use the supplied Artillery Slicer, which is based on the Prusa Slicer, it still needs to be customised. I do not know why Artillery has not yet adapted the printer profile and does not offer profiles for other slicers.
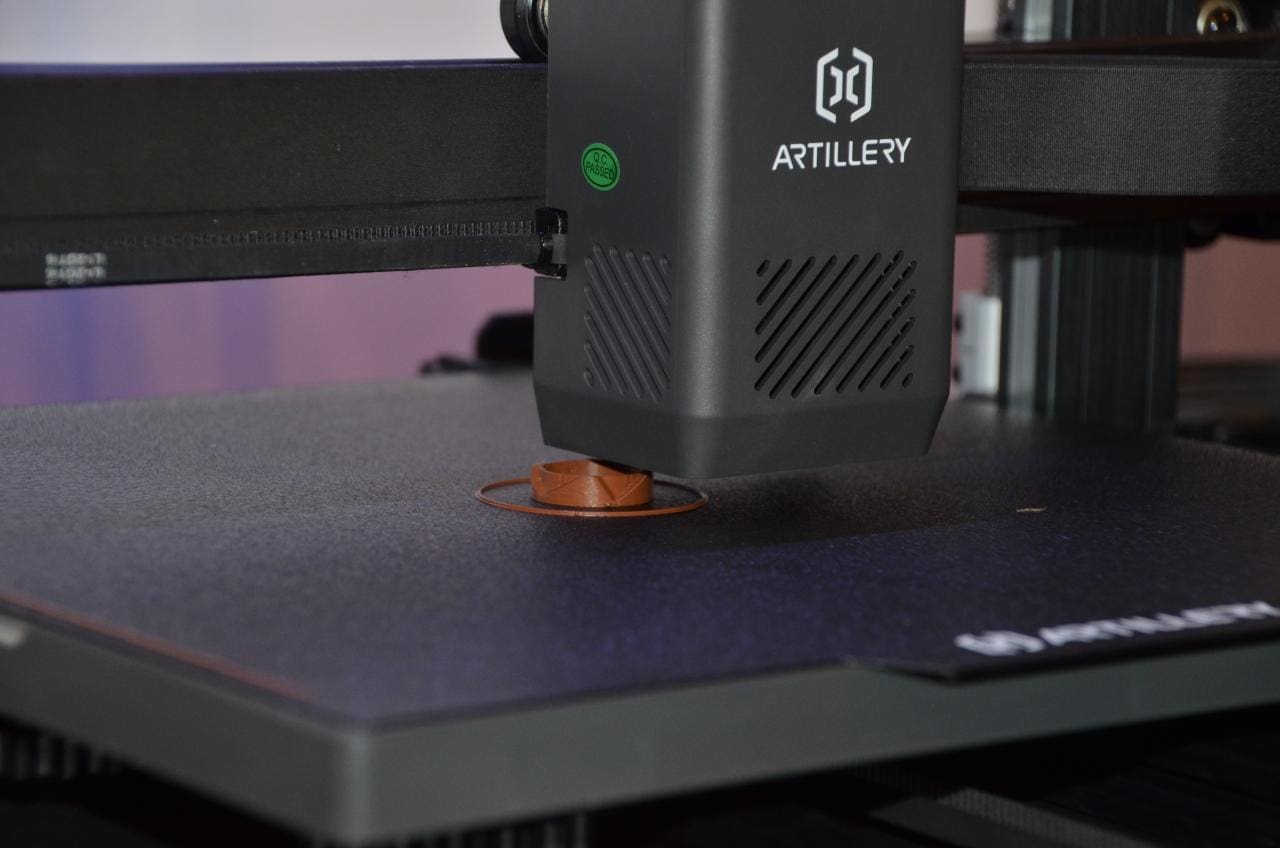
Adhesion first layer
The first 18-minute benchmark with the enclosed high-speed PLA was a total disaster. The test prints kept tearing off the printing plate. There were four reasons for this:
- The print head was mounted crooked.
- The PEI printing plate had only built up better adhesion after thorough cleaning.
But the third reason was completely unnecessary:
- After printing the first layers, the heating bed was cooled down to 45 degrees!
Leudies, leudies, leudies! Artillery, what were you thinking? Even with a PEI plate, I have never been able to print at less than 60 degrees with any printer. Especially not with high-speed PLA! Of course, I always use the benchy files supplied with the printers for such tests, they are usually hand-optimised and I don’t want to be unfair in the test.
- Fourthly, the printer apparently did not use autolevelling even with the Artillery Slicer, as I discovered when I looked at the start code.
Fortunately, after correcting the errors and inserting the autolevelling function into the printer’s startup code, the prints were very satisfactory.
Insert GCode into start code
The Sidewinder kept annoying me with peeling prints and warping, even with PLA. It was so annoying that I even used spray adhesive, but that didn’t help much either. What’s wrong with the printer? It doesn’t perform auto-levelling before each print? You should definitely take this time.
Artillery Slicer
I have added the following values to the start GCode in the Artillery Slicer:
M190 S60 ; set bed temperature and wait for it to be reached
M104 S210 ; set nozzle temperature
G28 ; Home XYZ
G29 P1 ; start auto levelling
M500 ; save mesh / config
M420 S1 Z10 ; use mesh, recommended by artillery
Other slicers
For all other slicers, I set the GCode type to „Marlin 2“ and use the following start code:
; Initial setups
G90 ; use absolute coordinates
M83 ; extruder relative mode
M900 K0.12 ; K factor
M900 W[line_width] H[layer_height] D[filament_diameter]
M200 D0 ; disable volumetric e
M220 S100 ; reset speed factor to 100%
M221 S100 ; reset extrusion rate to 100%x3 specific
M190 S60 ; set bed temperature and wait for it to be reached
M104 S210 ; set nozzle temperature
G12 C2 ; clean nozzle
G1 Z3 F3000 ; move z up little to prevent scratching of surface
G28 ; Home XYZ
G29 P1 ; start auto levelling
M500 ; save mesh / config
M420 S1 Z10 ; use mesh, recommended by artillery
G28 Z ; print purge line; set the heating
M190 S[bed_temperature_initial_layer_single]; wait for bed to heat up
M104 S[nozzle_temperature_initial_layer ] ; start nozzle heating but don’t waitwait for final heating
M109 S[nozzle_temperature_initial_layer ] ; wait for the nozzle to heat up
M190 S[bed_temperature_initial_layer_single]; wait for the bed to heat upextruder
G92 E0 ; Reset extruder
Please ensure that nothing is entered twice in the slicer profile of the printer. In particular, the purgeline must not be printed twice. Before printing for the first time, take a look at the GCode generated by the slicer.
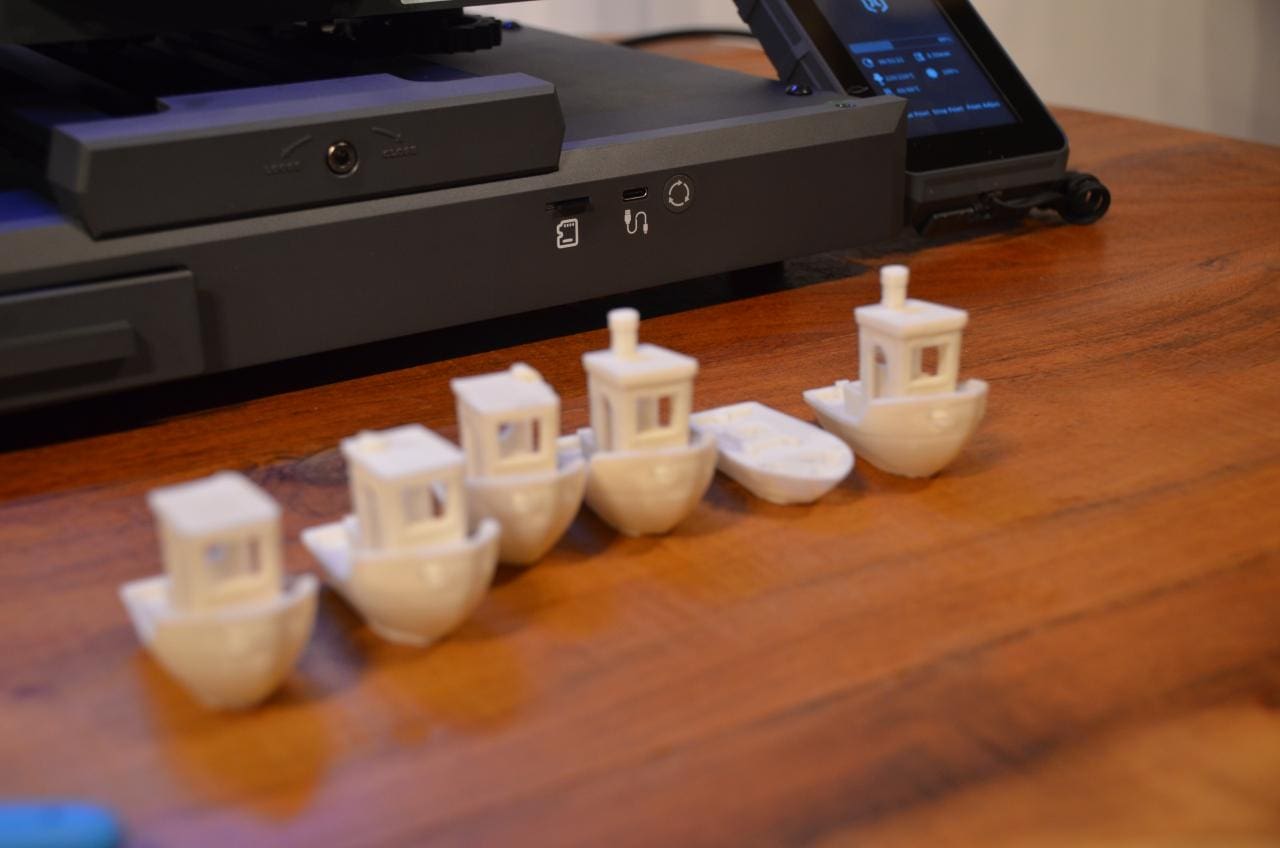
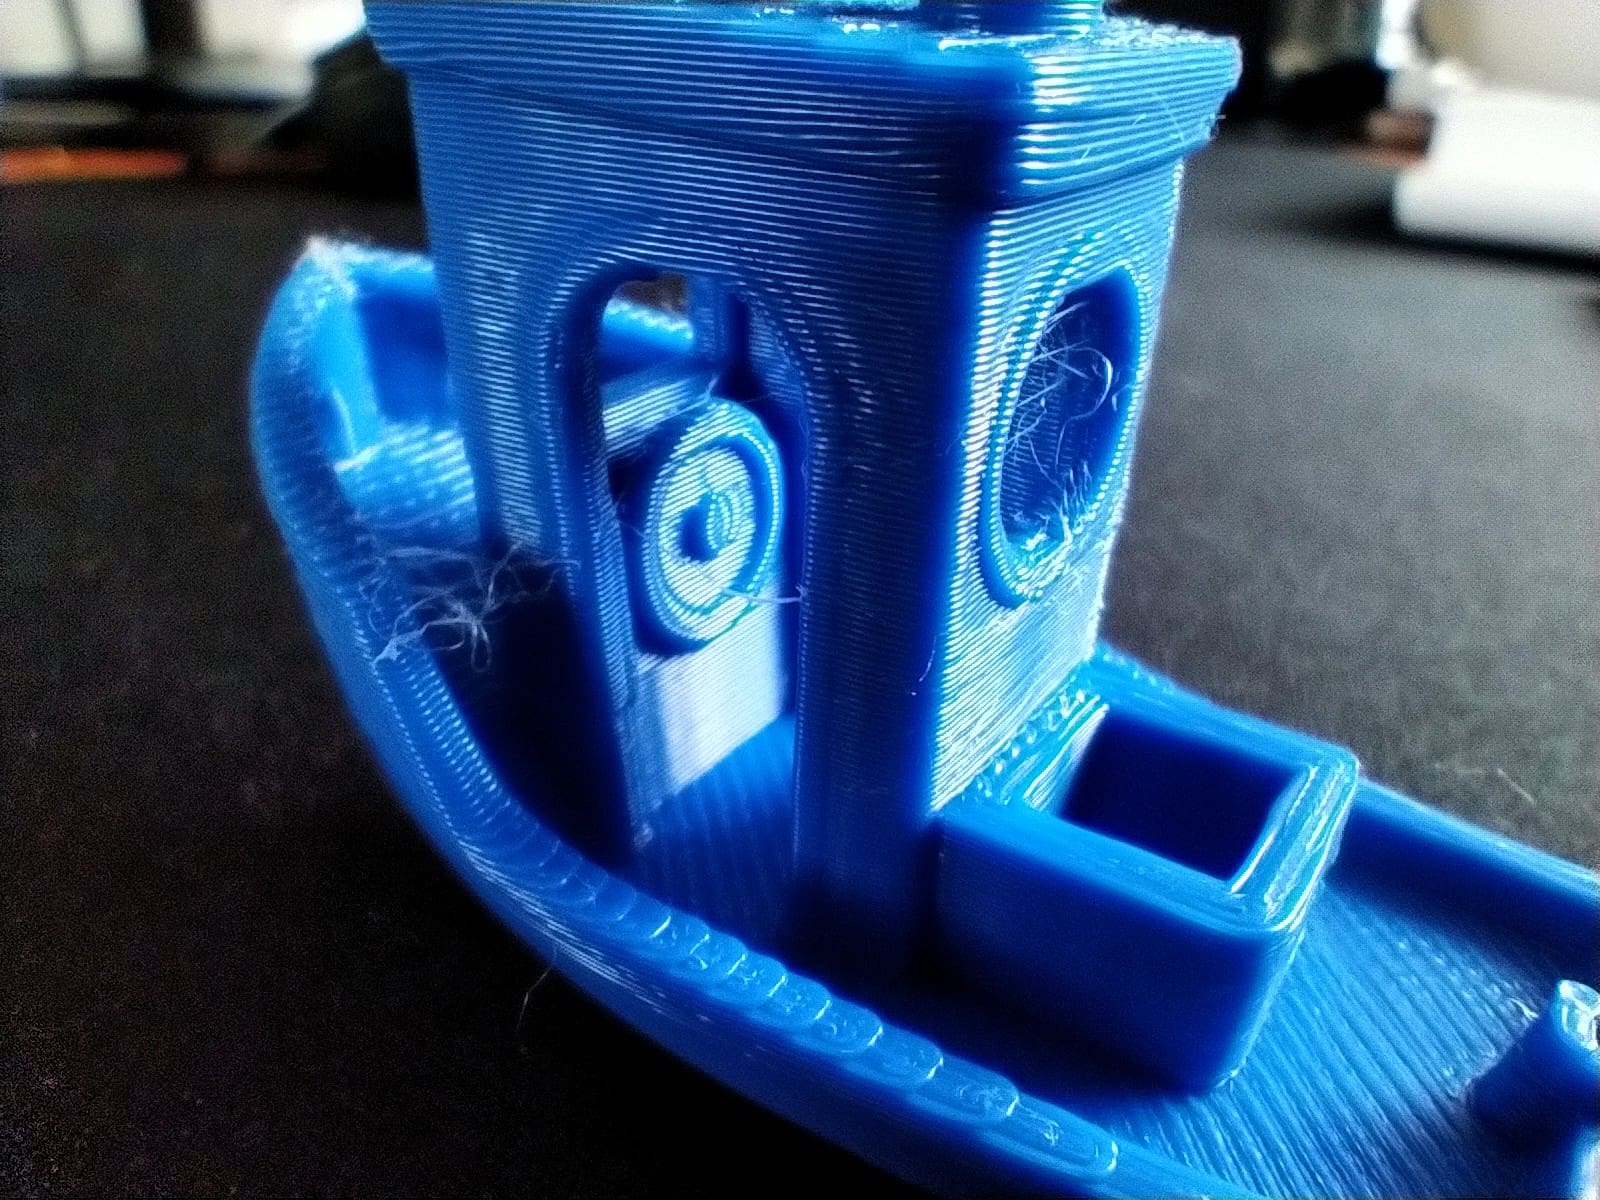
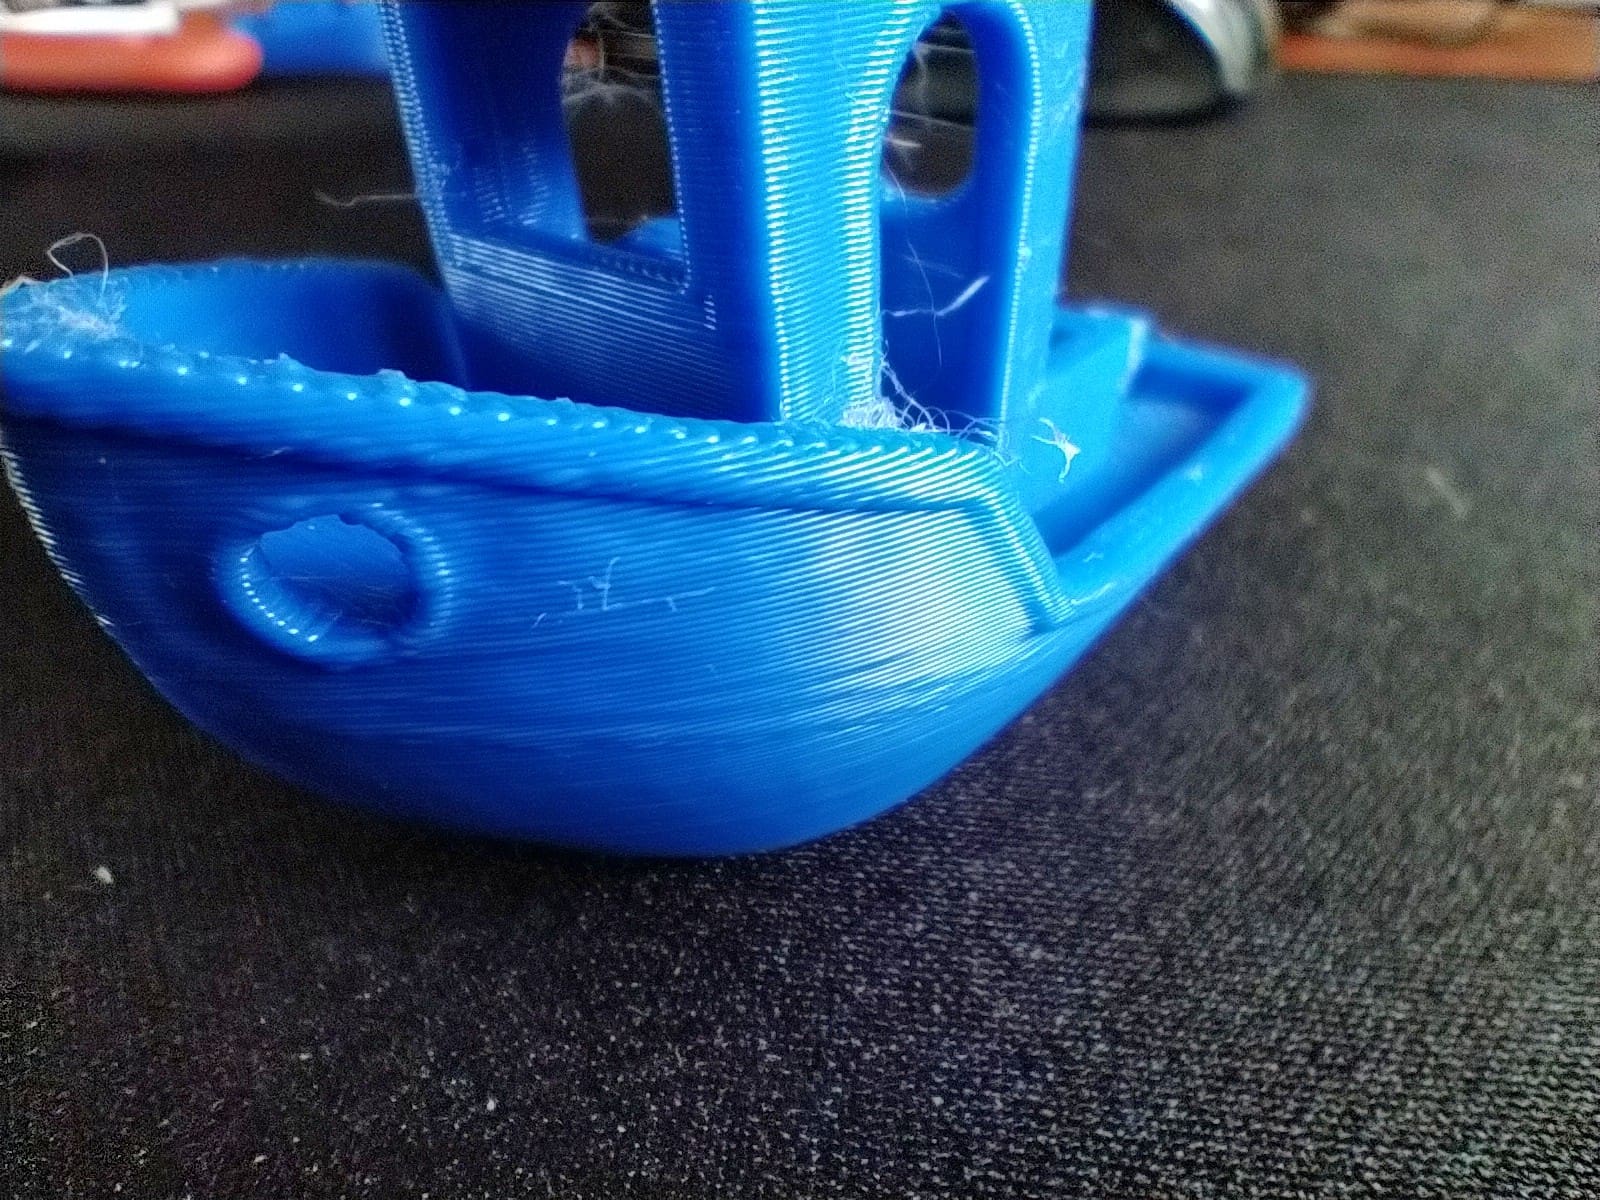
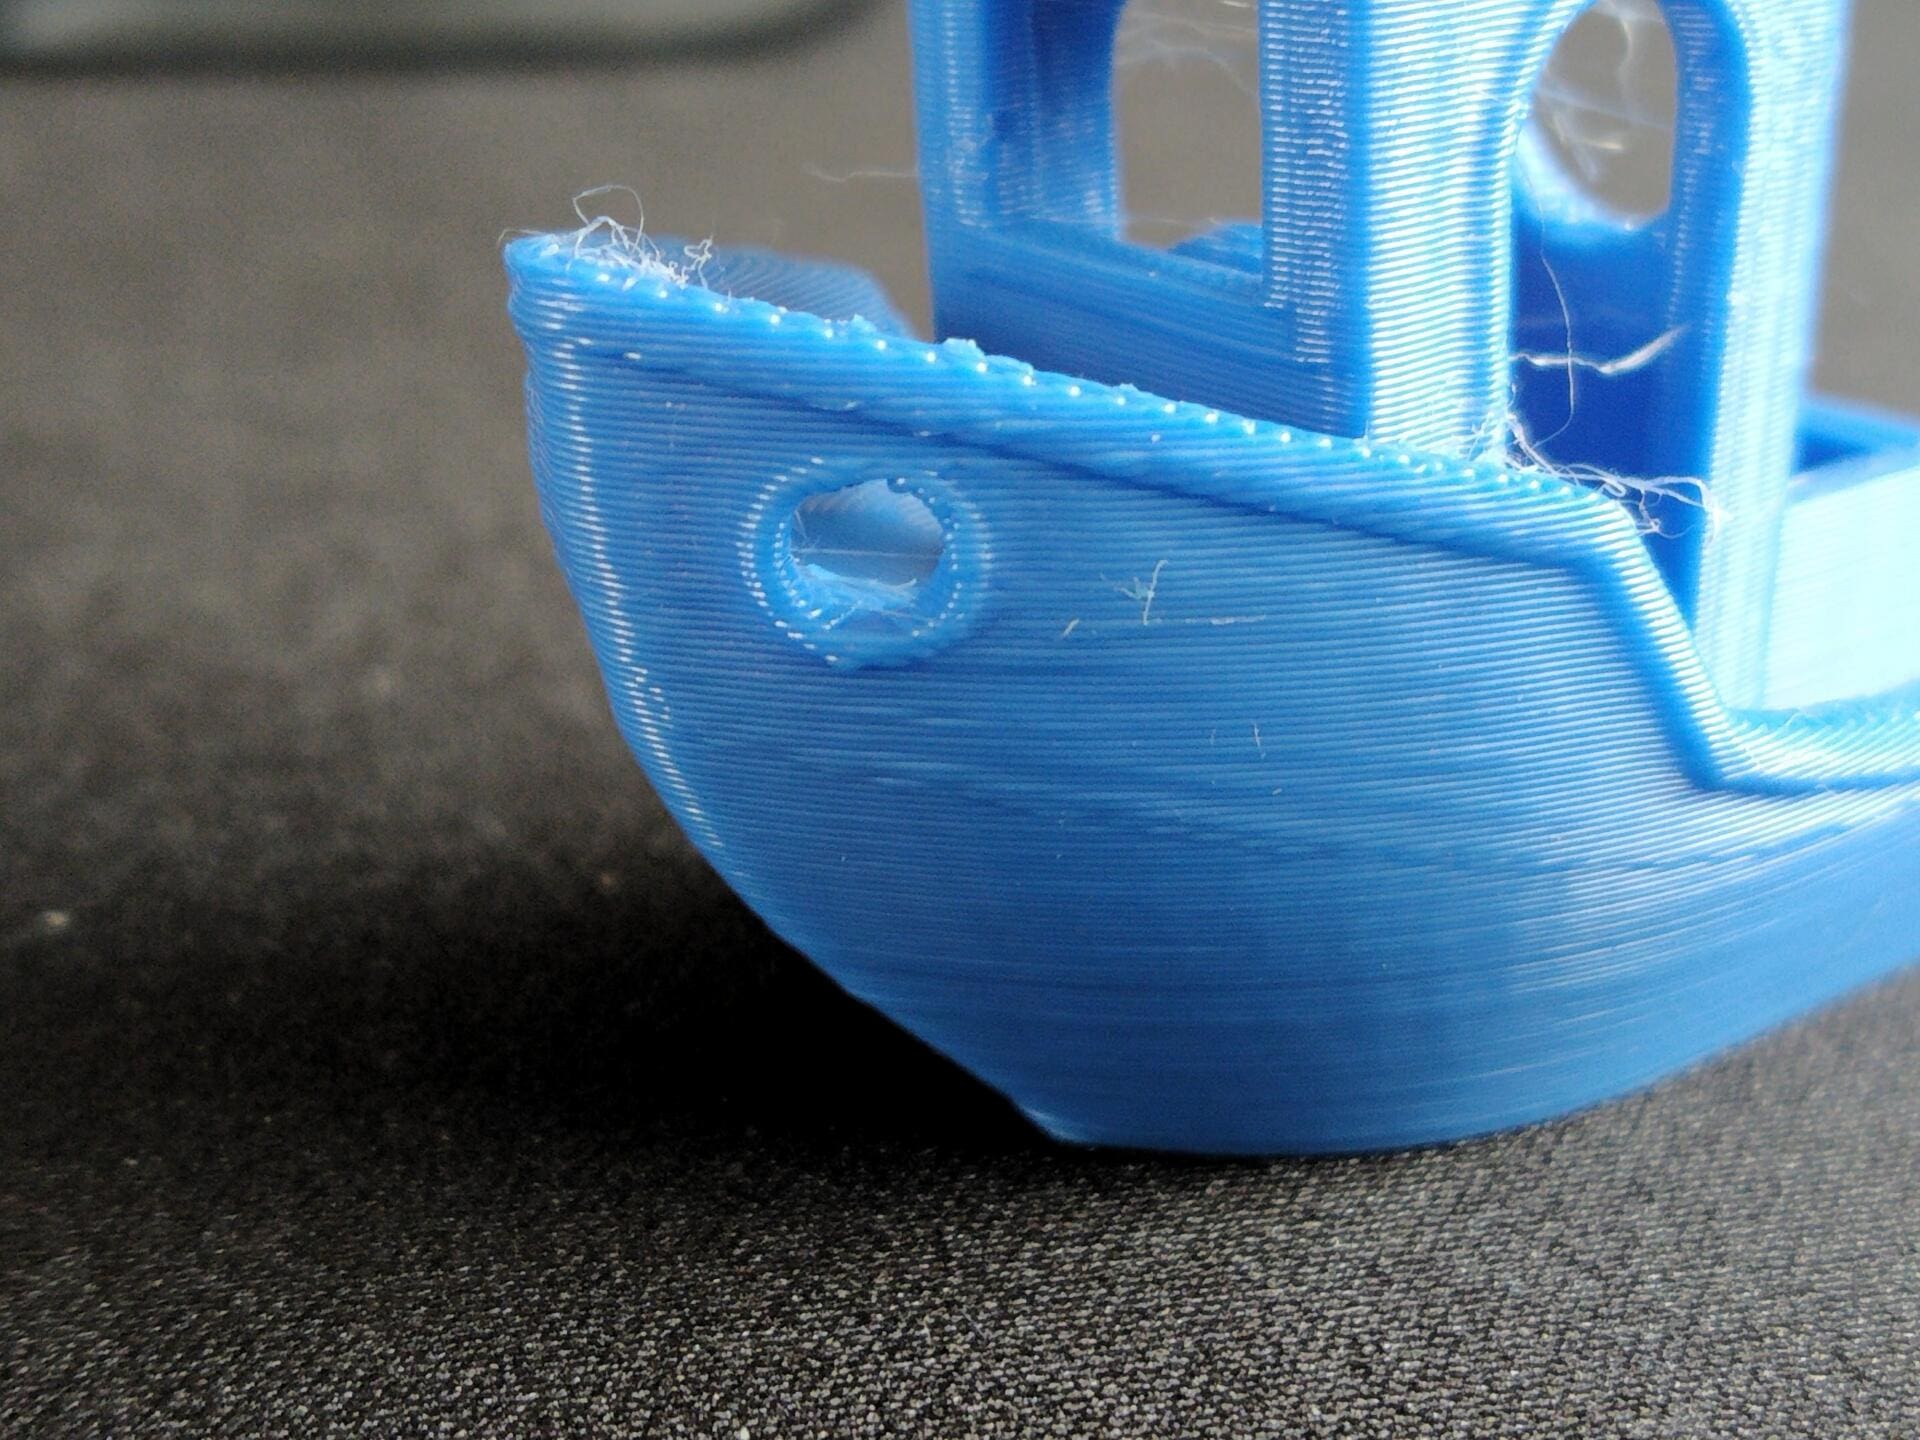
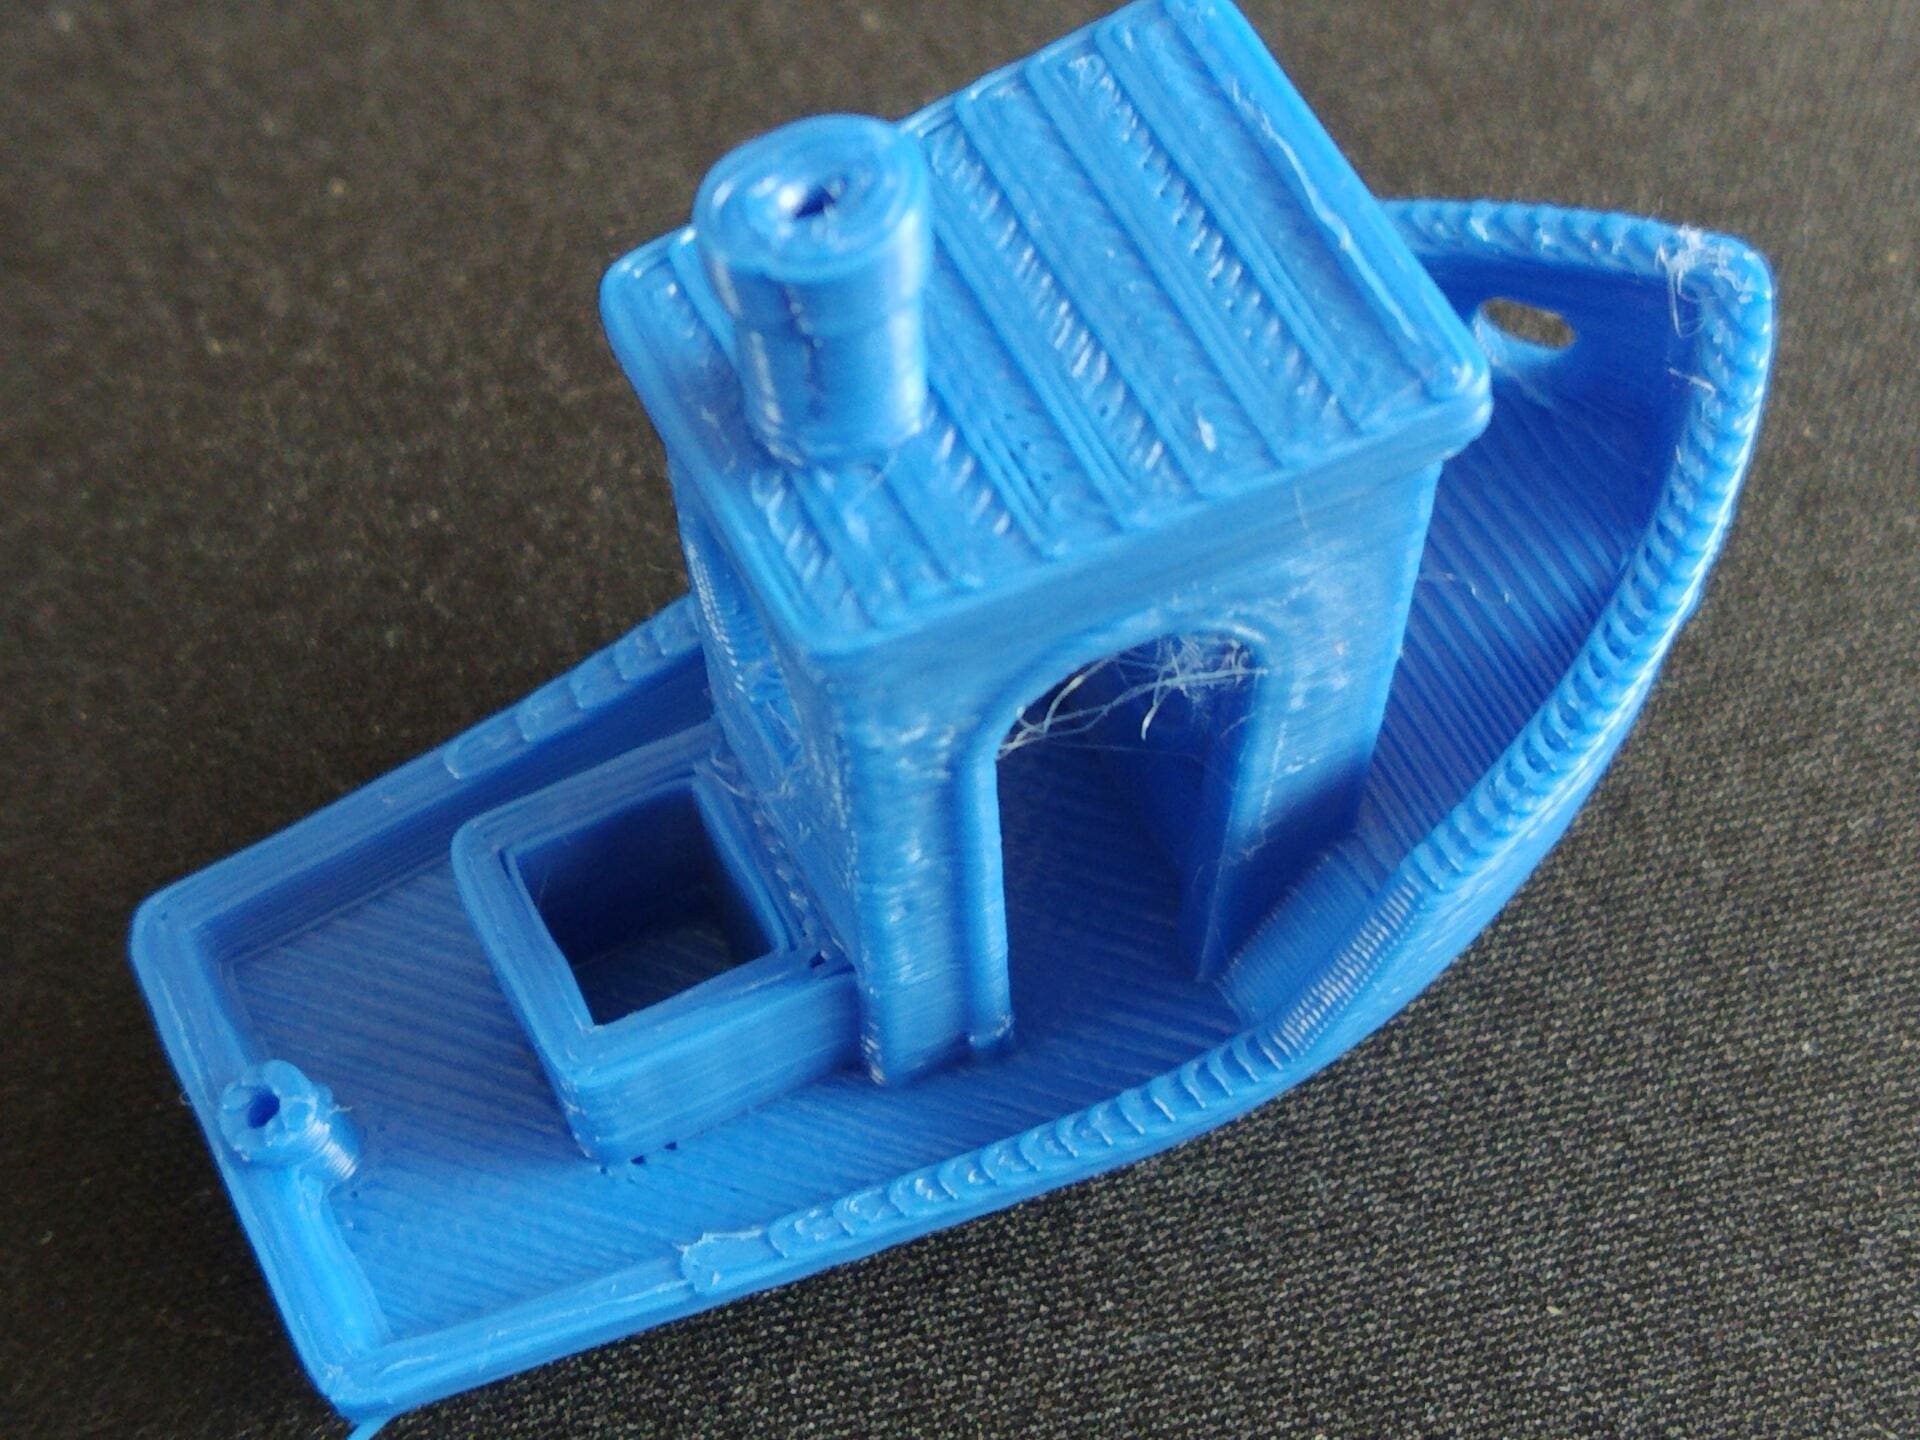
Print results
And what do the print results look like? Well … it really got on my nerves. But at last, the Sidewinder makes up for it with clean prints that are in no way inferior to those of its predecessor, only some of them are produced much faster.
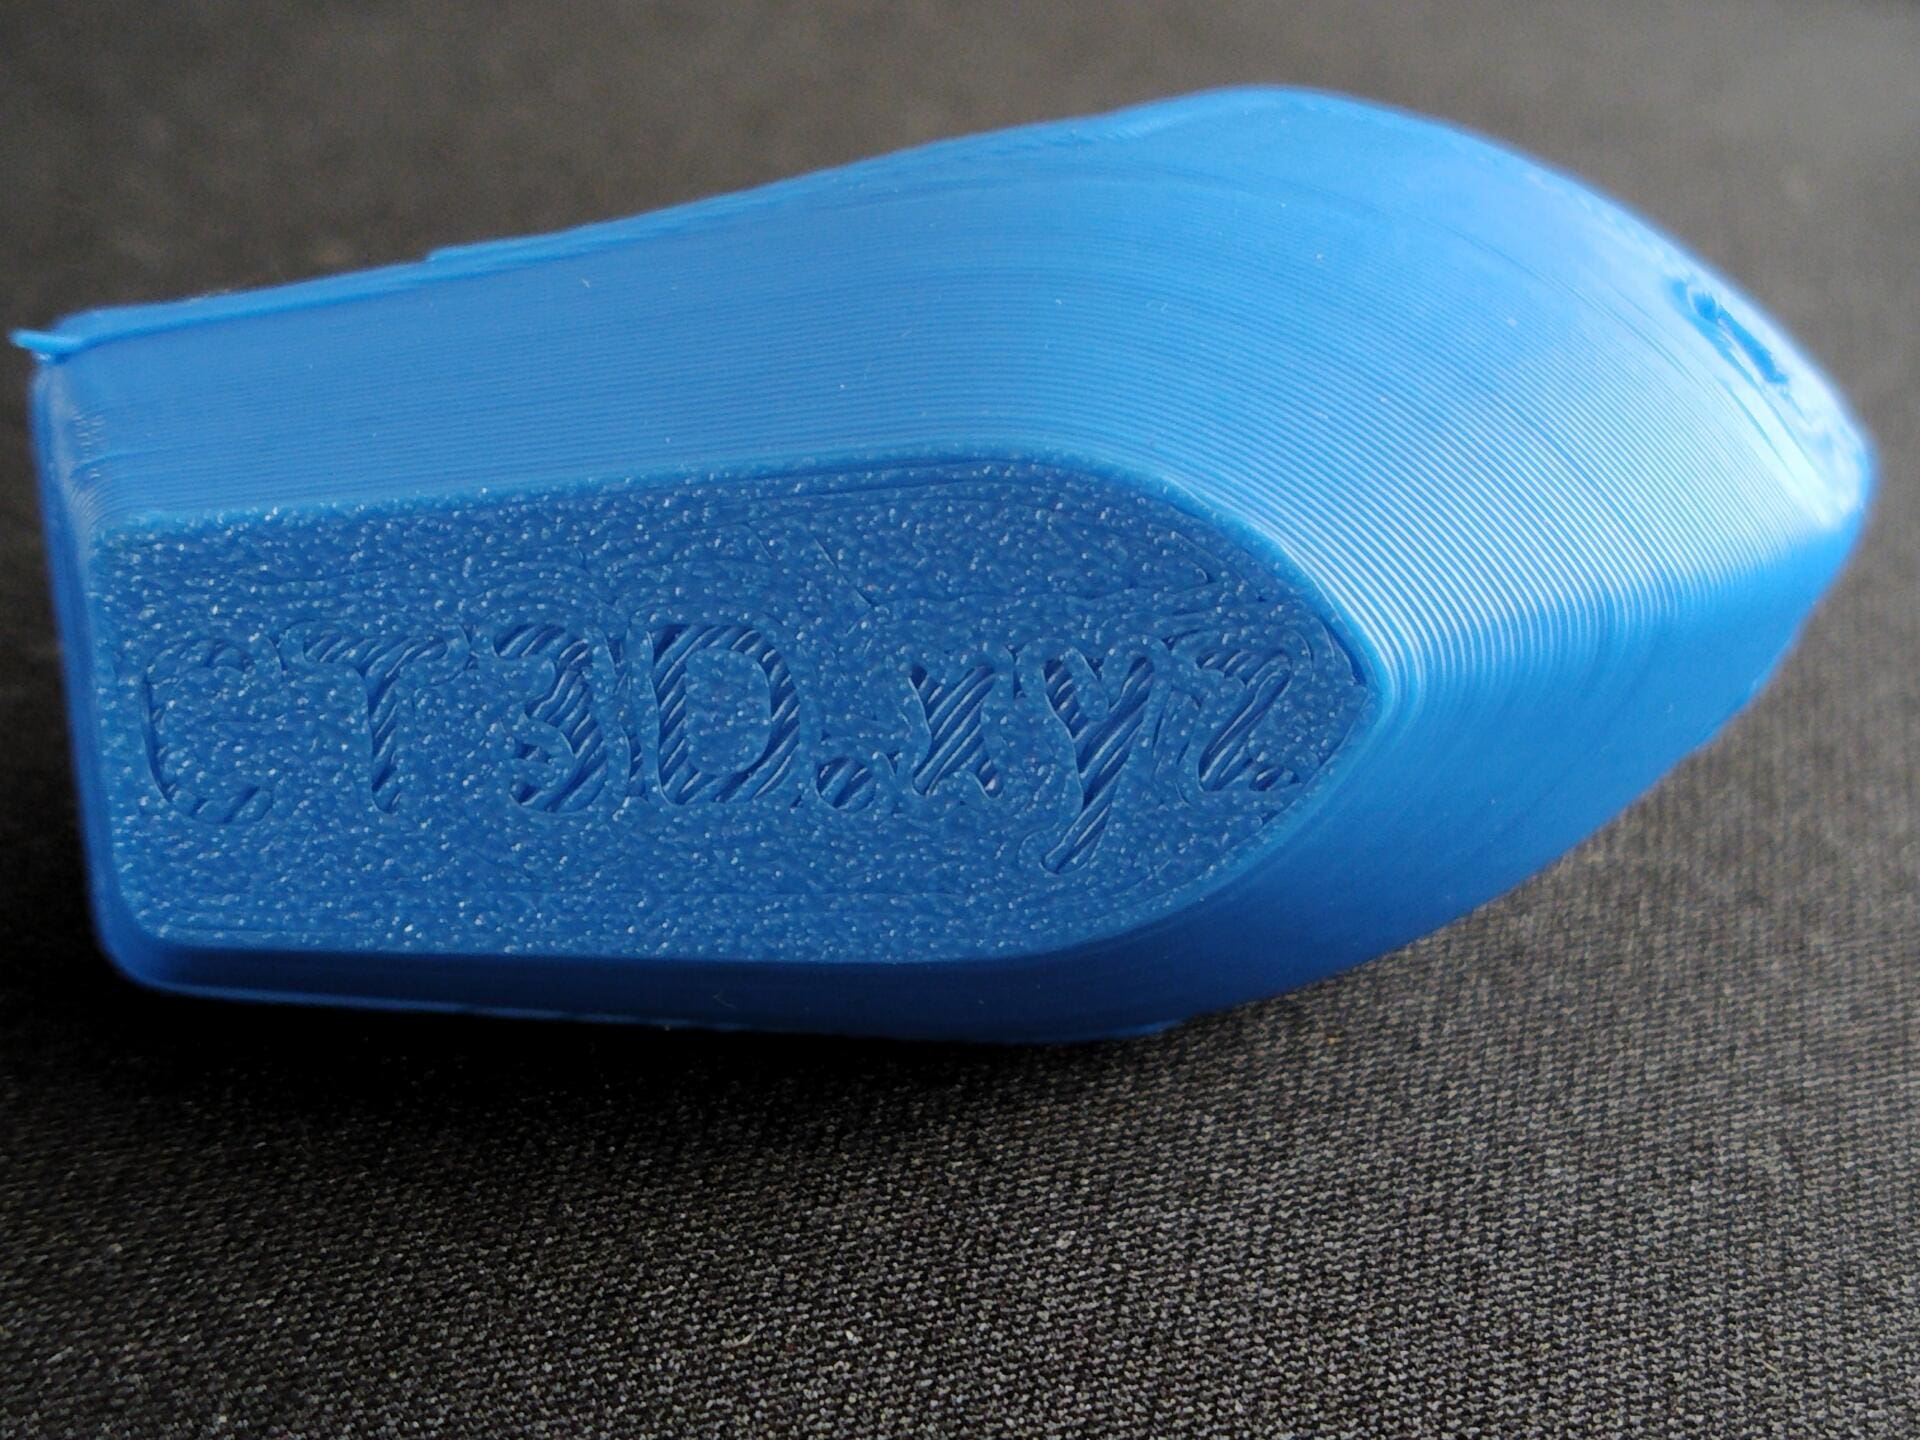
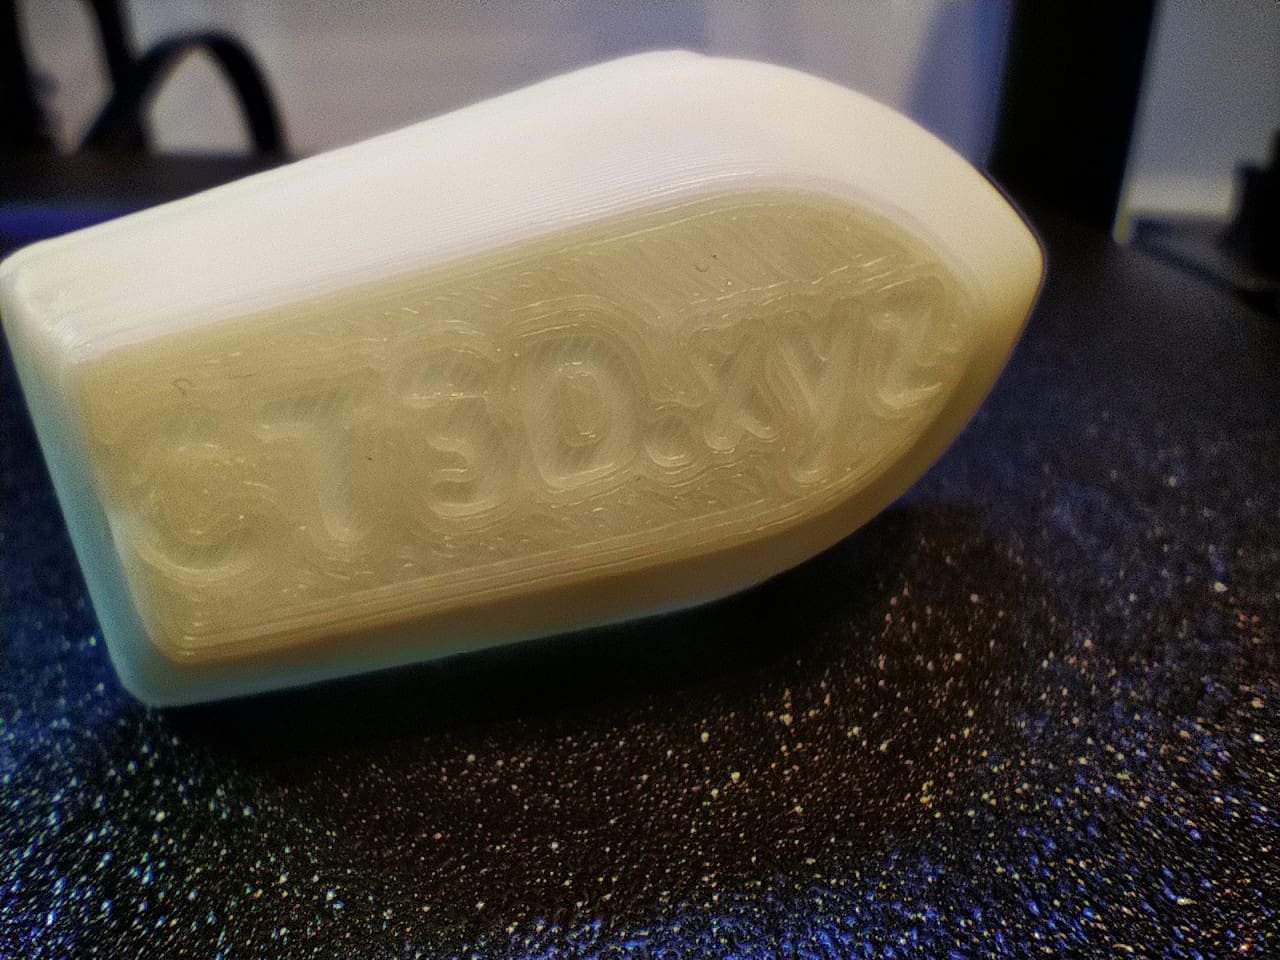
Benchy
I also printed the high-speed benchmark with the cheap low-speed PLA from Kingroon. The result is convincing, as it shows that the printer is not particularly picky when it comes to filaments.
In reality, however, the Sidewinder X3 Plus needed 20:30 minutes for the „18-minute benchmark“. I have yet to print out a benchy that lived up to the advertising claims. All of them took longer than advertised. But 20 minutes is not bad for a relatively large 3D printer without a Klipper.
This also shows that a printer does not get faster linearly with the maximum print speed. A 500 mm/s printer needs approx. 16 to 18 minutes for the benchy, depending on the maximum possible acceleration (mm/s²), so the SW X3 Plus with „only“ 300 mm/s maximum print speed should need half an hour for the benchy. But it is much faster.
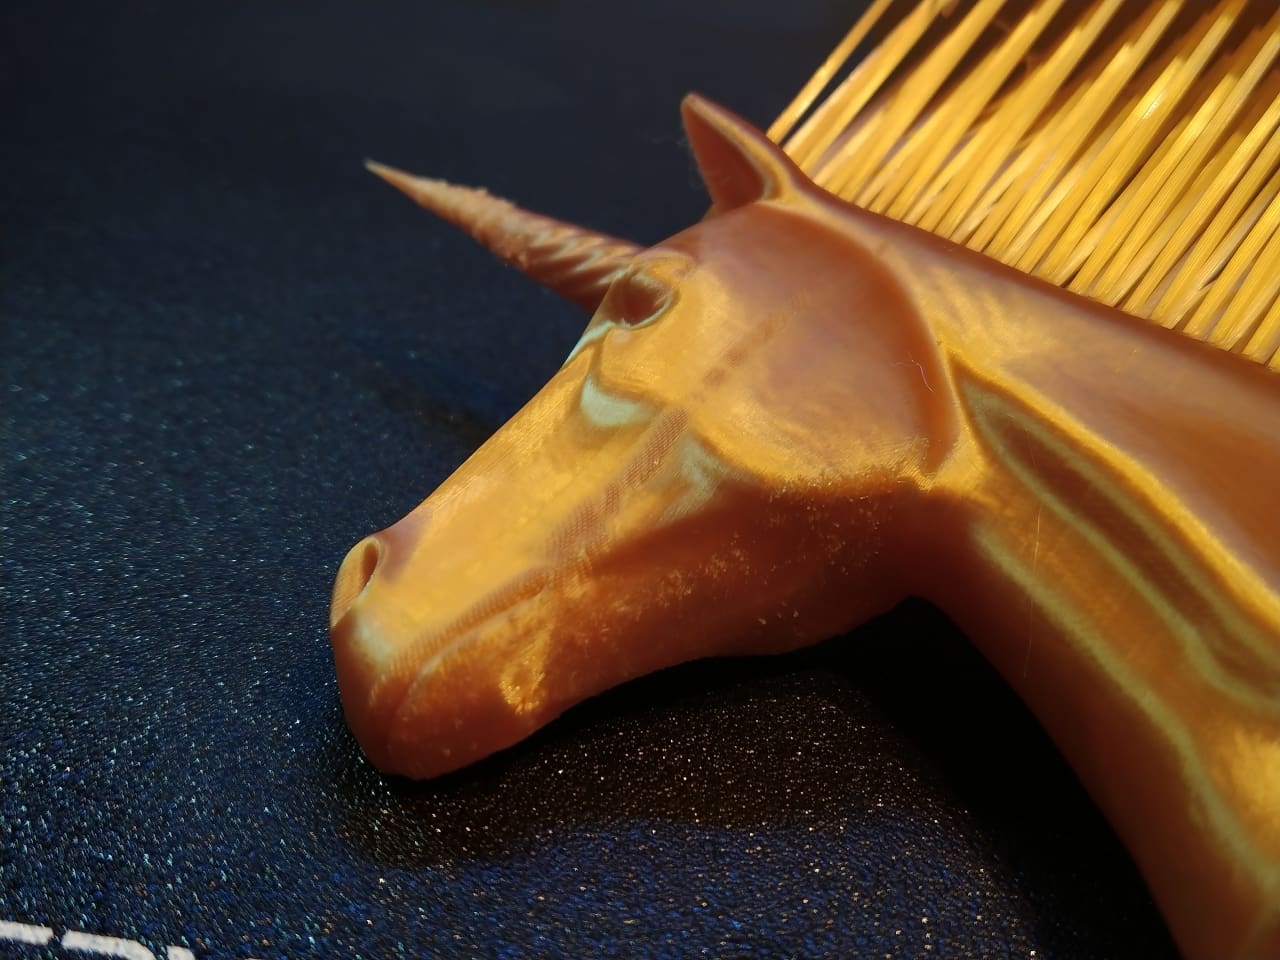
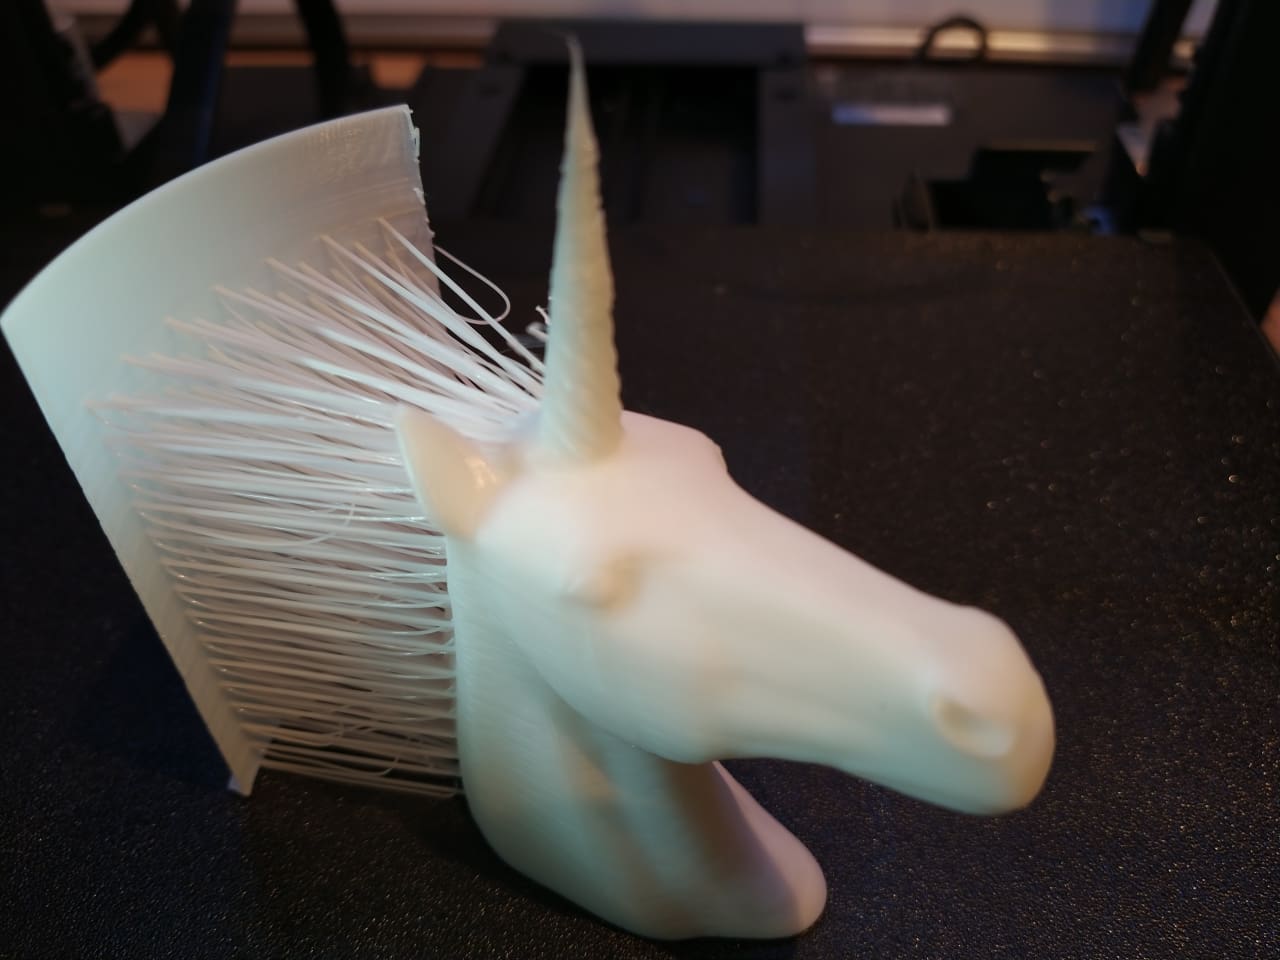
Rüdiger
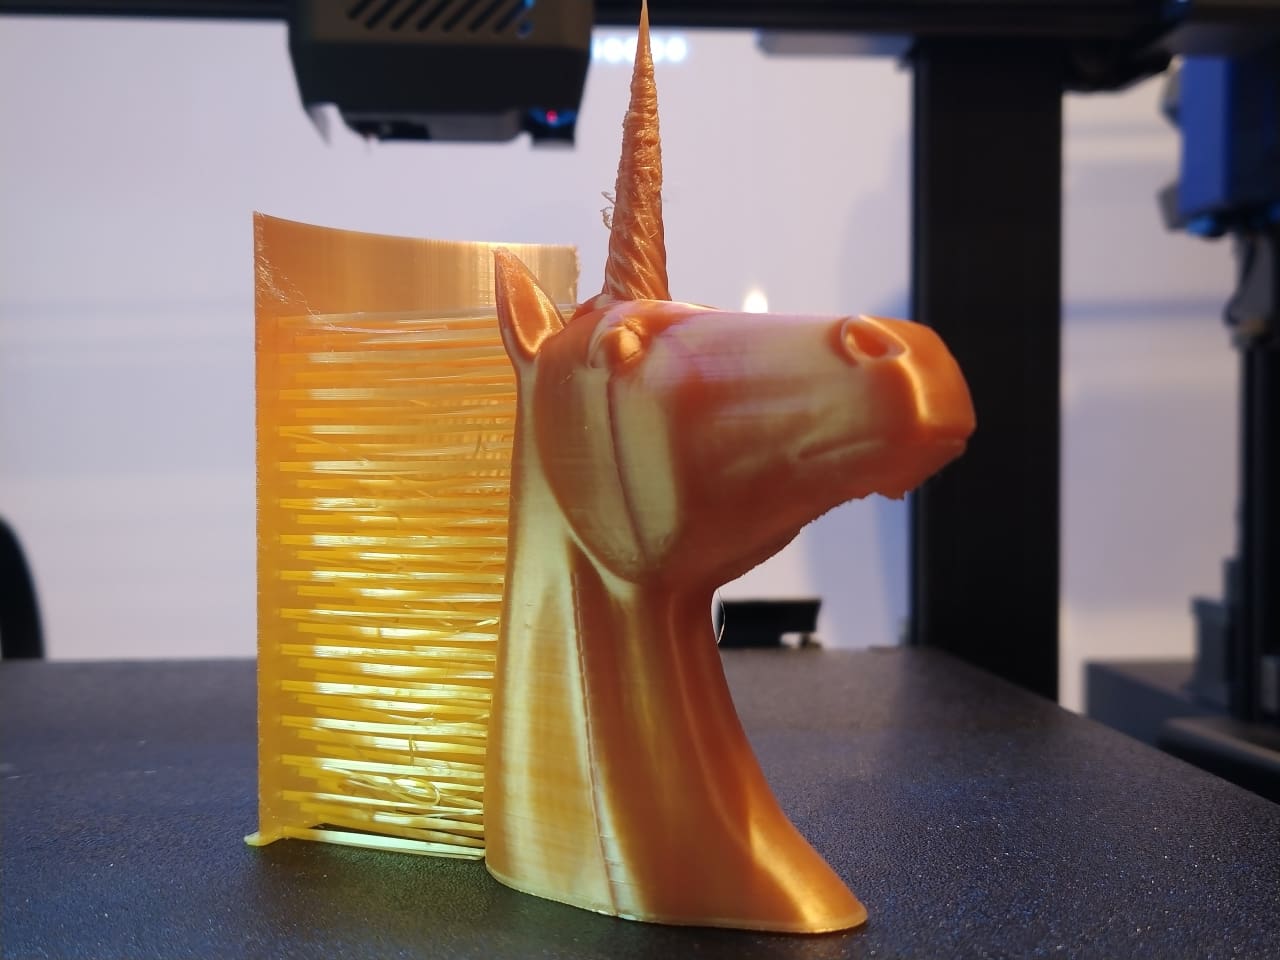
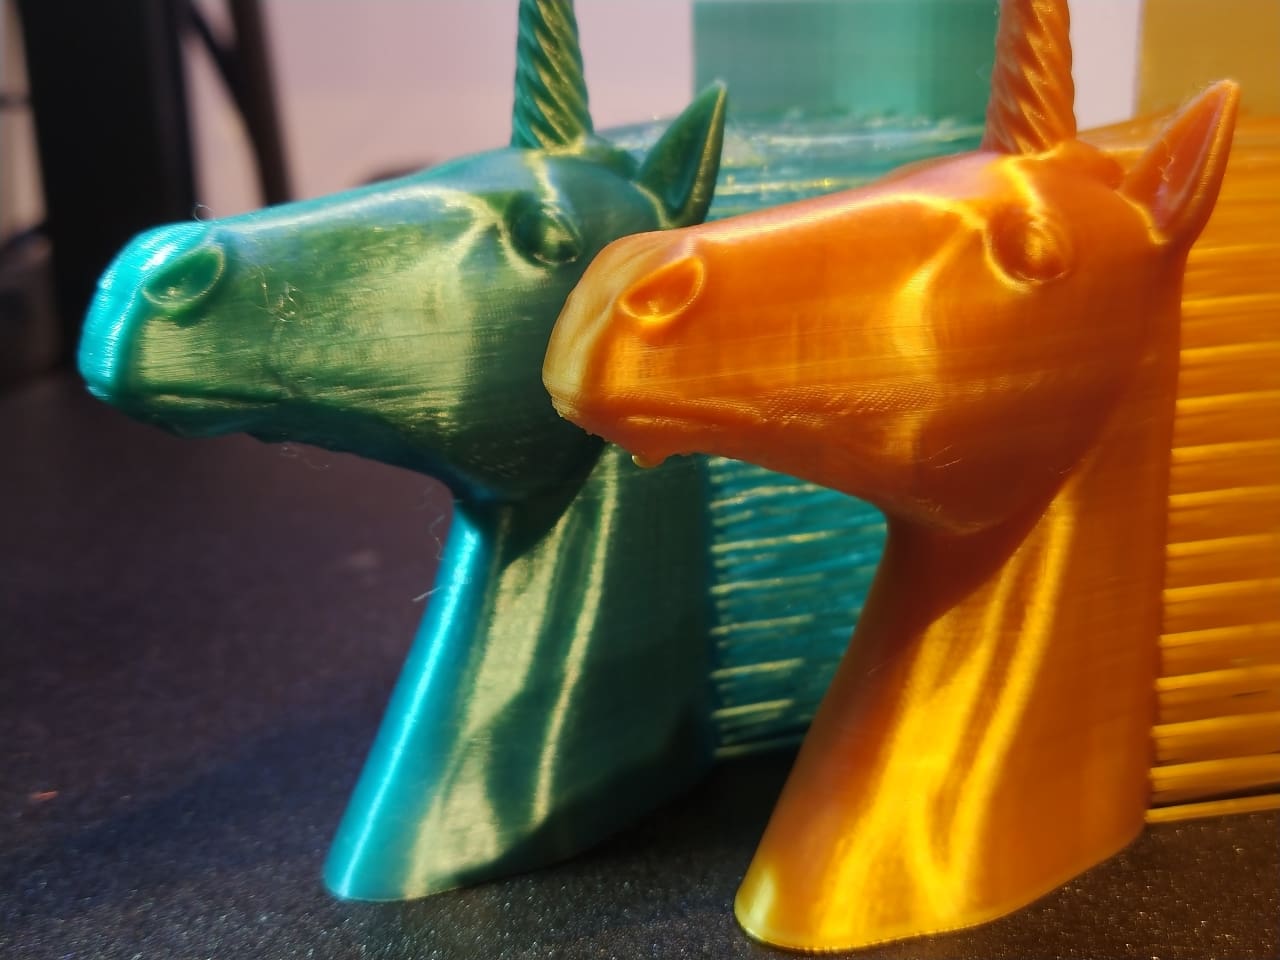
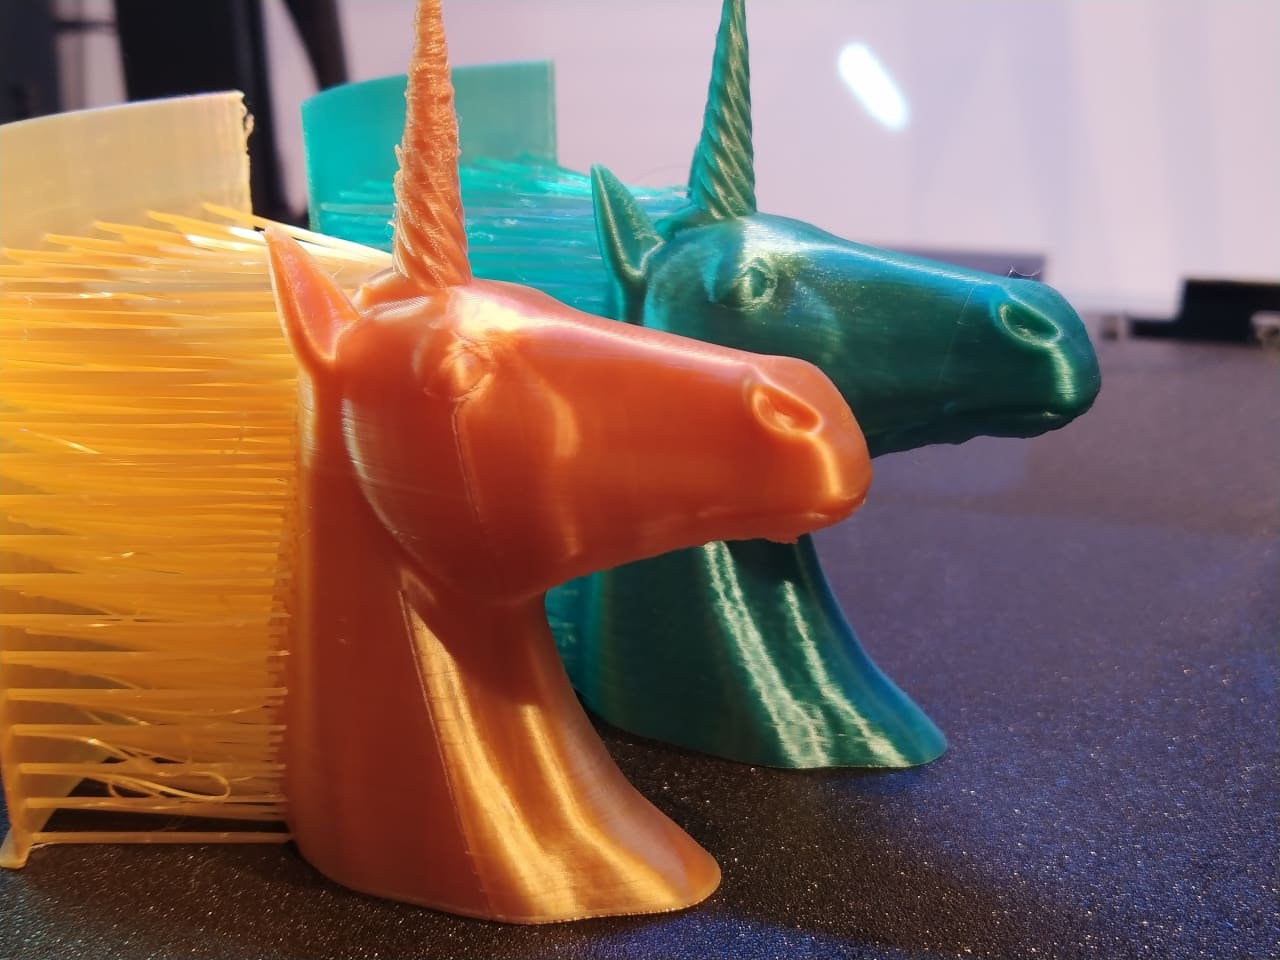
I like to use Rüdiger as my personal benchmark. Rüdiger is actually called „Hairy Unicorn“ and was designed by Geoffro. Here I have many things that are important to me: smooth surfaces and normal as well as very long overhangs. I always print Rüdiger with the basic settings of the supplied slicer for the respective filament type. If this fails completely, I adjust the print speed.
The Sidewinder X3 Plus took just under three hours to printRüdiger in 0.1 mm quality. The Creality Ender-3 V3 KE, a 500 mm/s printer, needed the same time with the Geetech Silk Raibow-PLA. Here, the filament simply limits the printer’s capabilities. Unfortunately, Silk PLA cannot be printed much faster than 80 to 100 mm/s if the print quality is still to be good.
Of course, I also tested Rüdiger at the maximum recommended speed of 200 mm/s and the maximum acceleration of 3,000 mm/s² with high-speed PLA from Creality. However, this only reduced the printing time by half an hour to 2:31 hours . I wouldn’t print faster than 150 mm/s with the Sidewinder. On the one hand, the time saving is too small, on the other hand, small details benefit
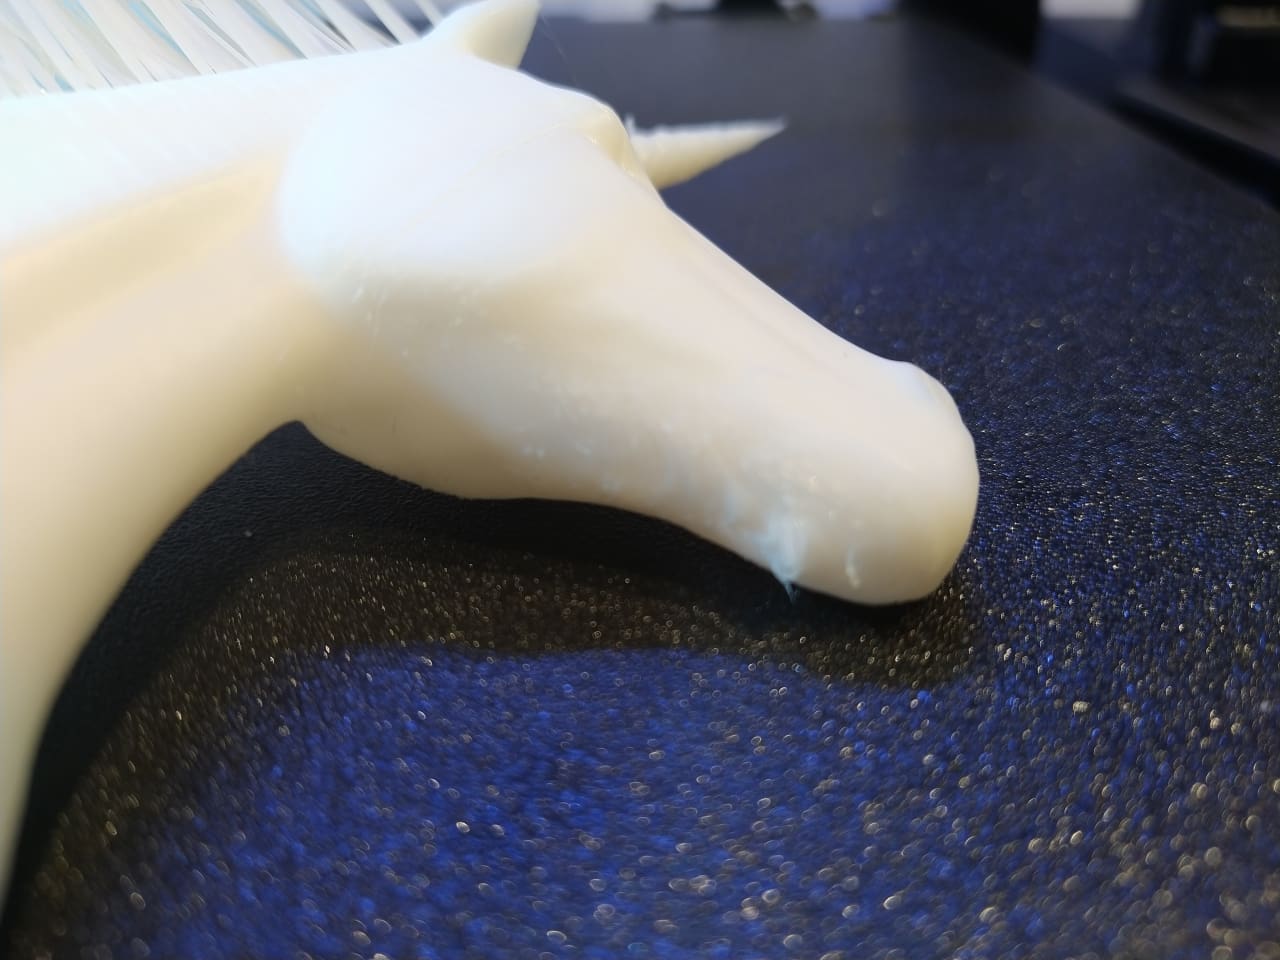
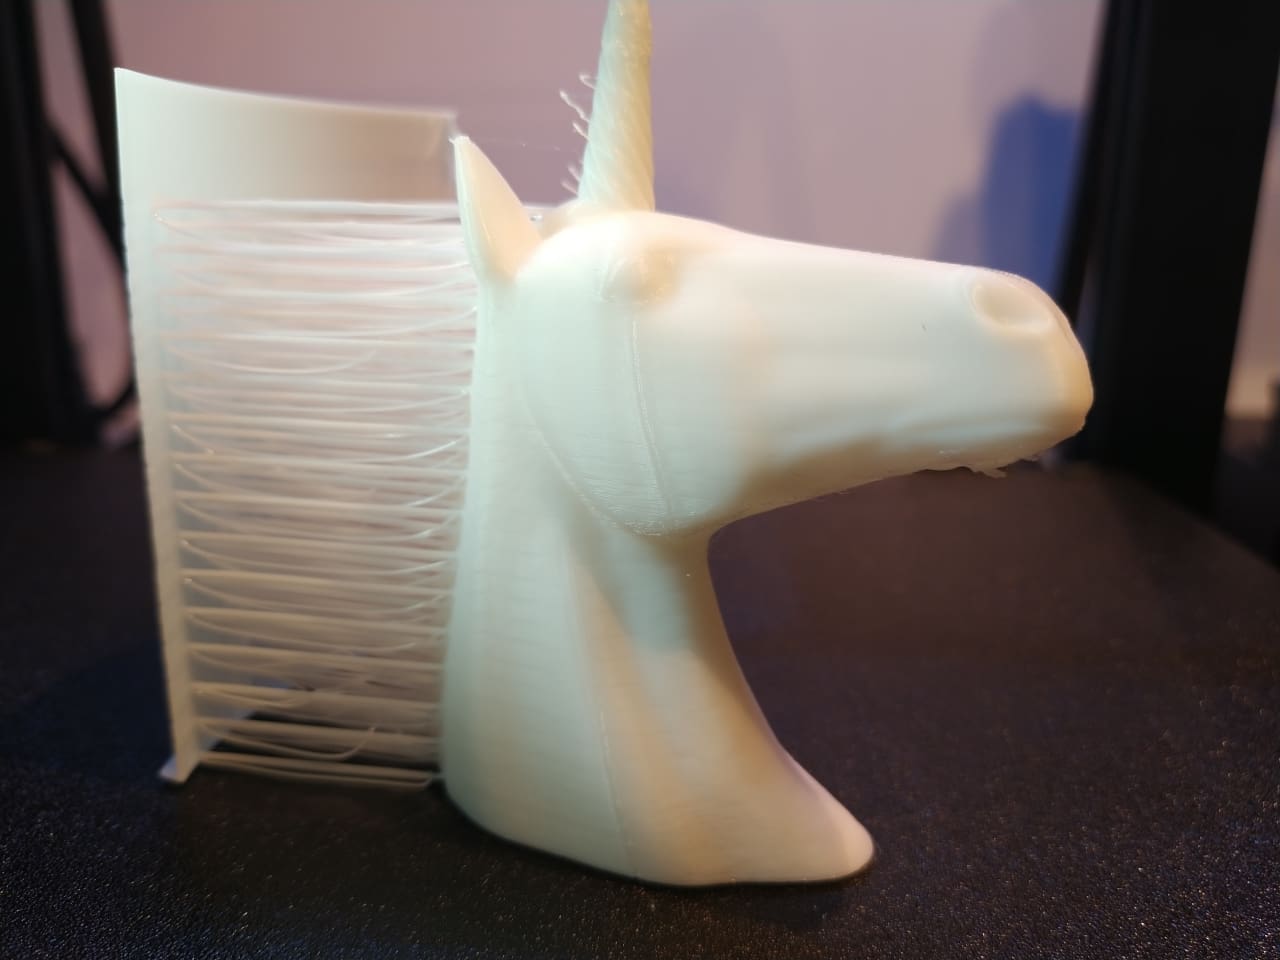
The unicorn is not an illustrative example if you want a nice and fast print. That’s why I chose it. If you want to print Rüdiger in the best possible quality, you have to reduce the speed on every printer and experiment a lot with the filament settings. But that’s not the point here.
I’m testing how well Rüdiger prints with the default settings. This is the 90% quality of Rüdiger that you can print in 10% of the time. If you want the last 10 % quality, you have to spend the last 90 % of the time.
So we shouldn’t overestimate the results.
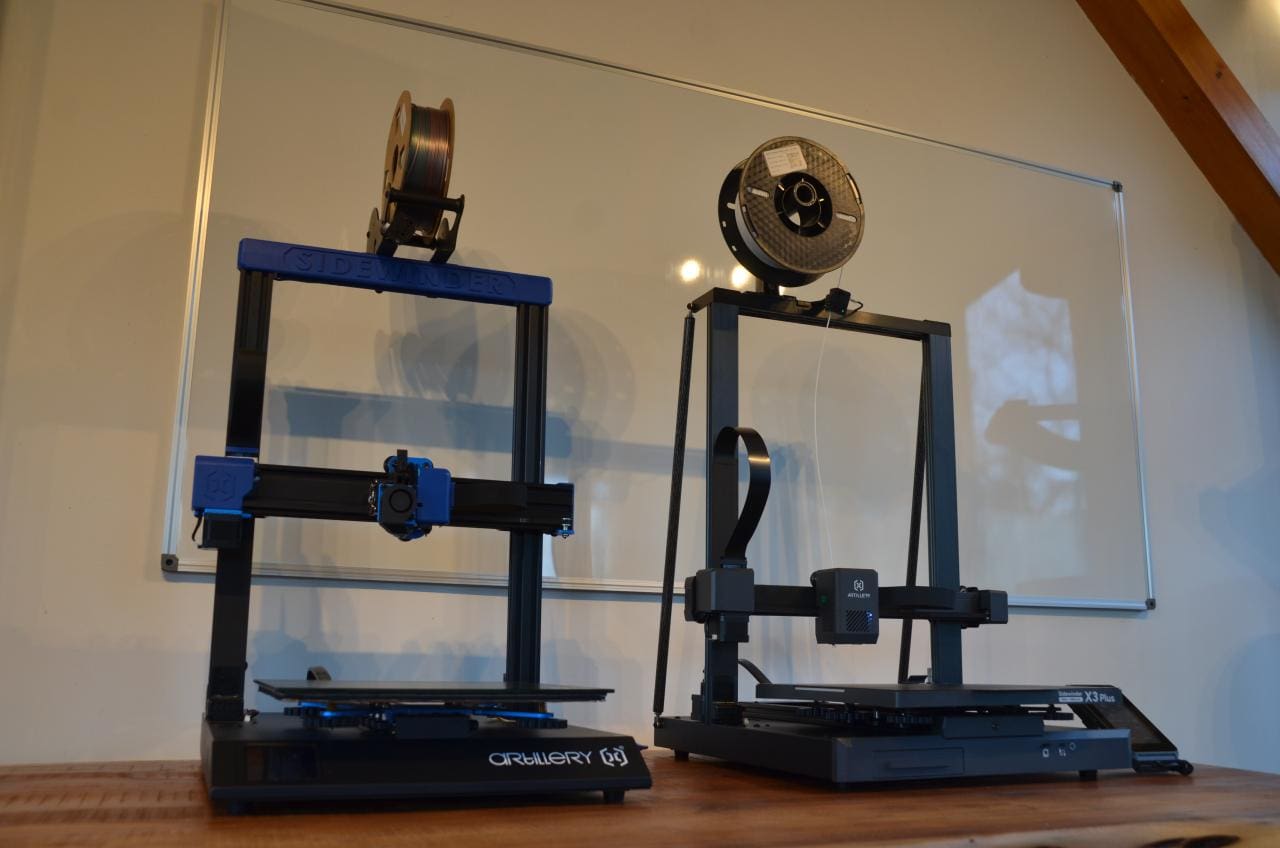
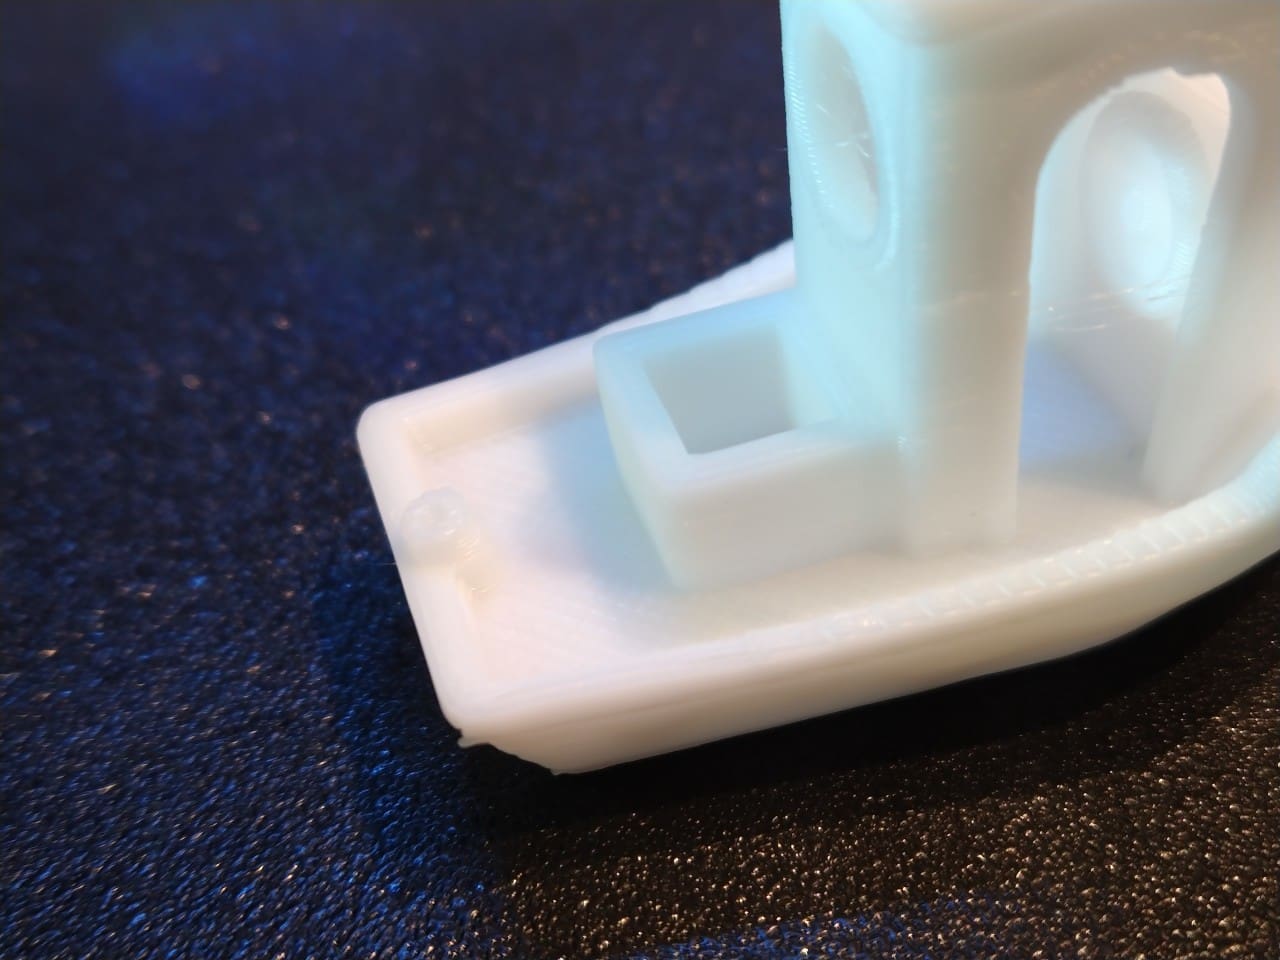
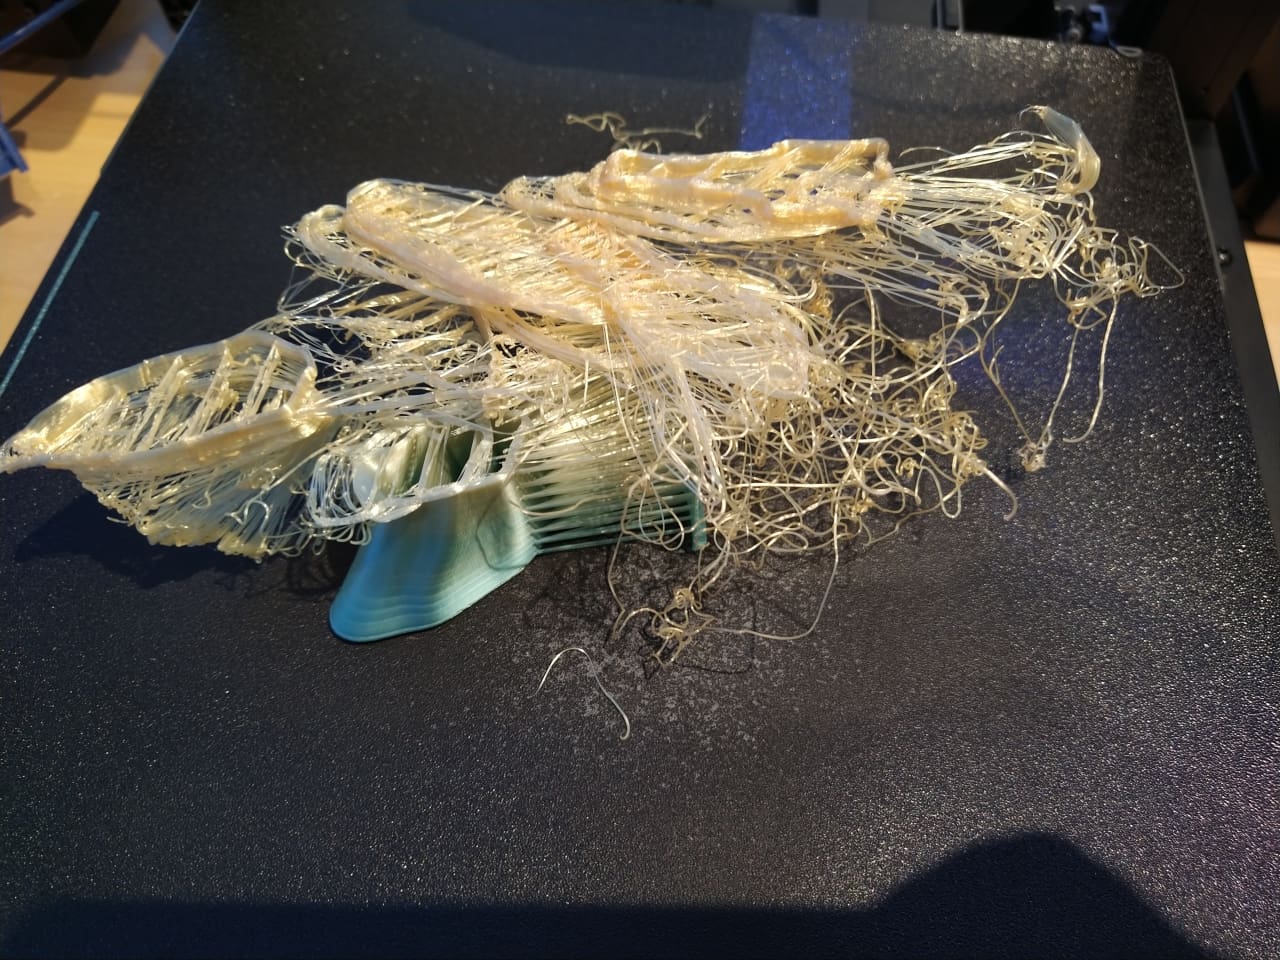
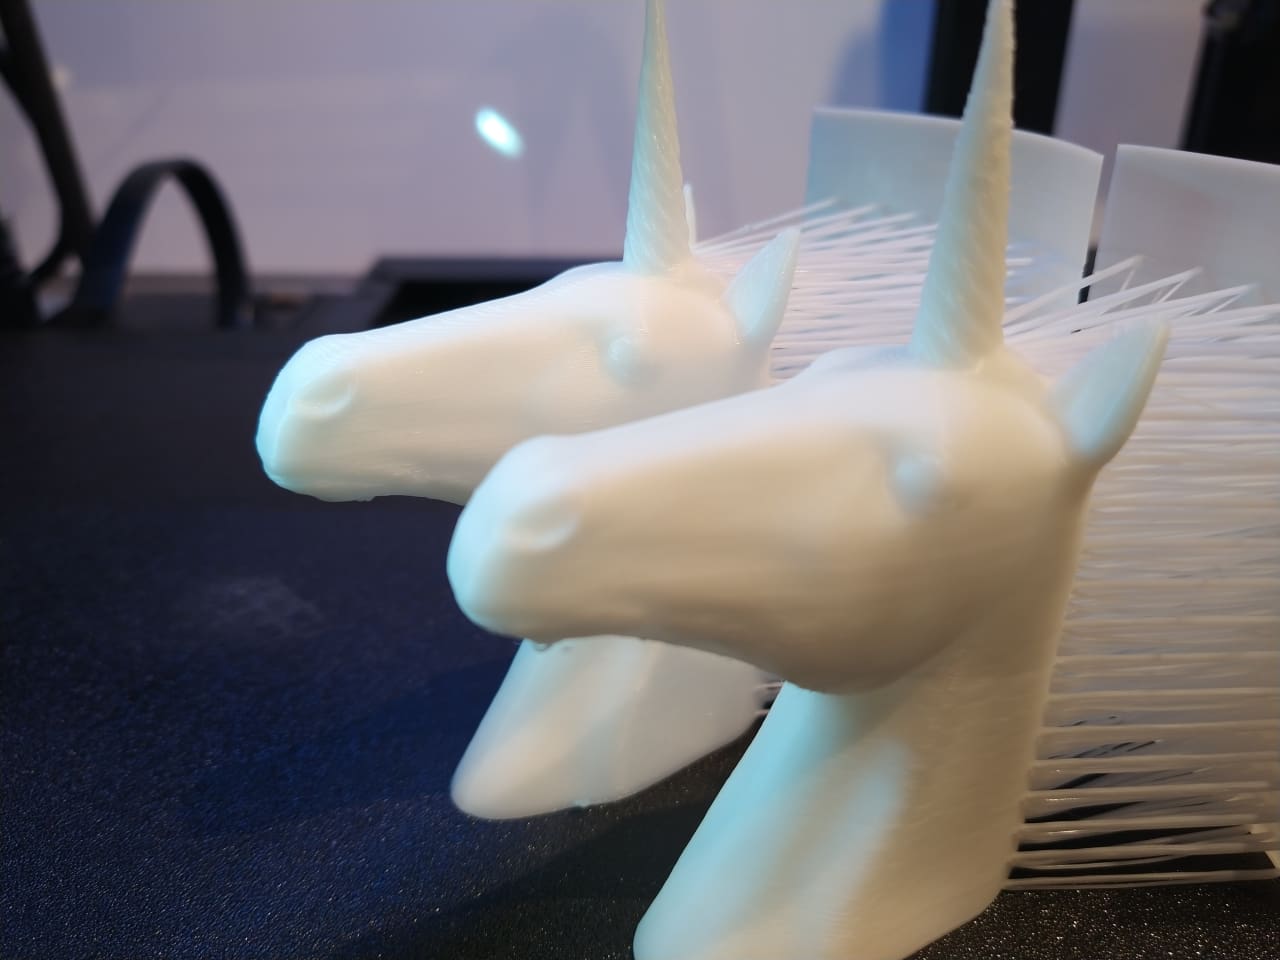
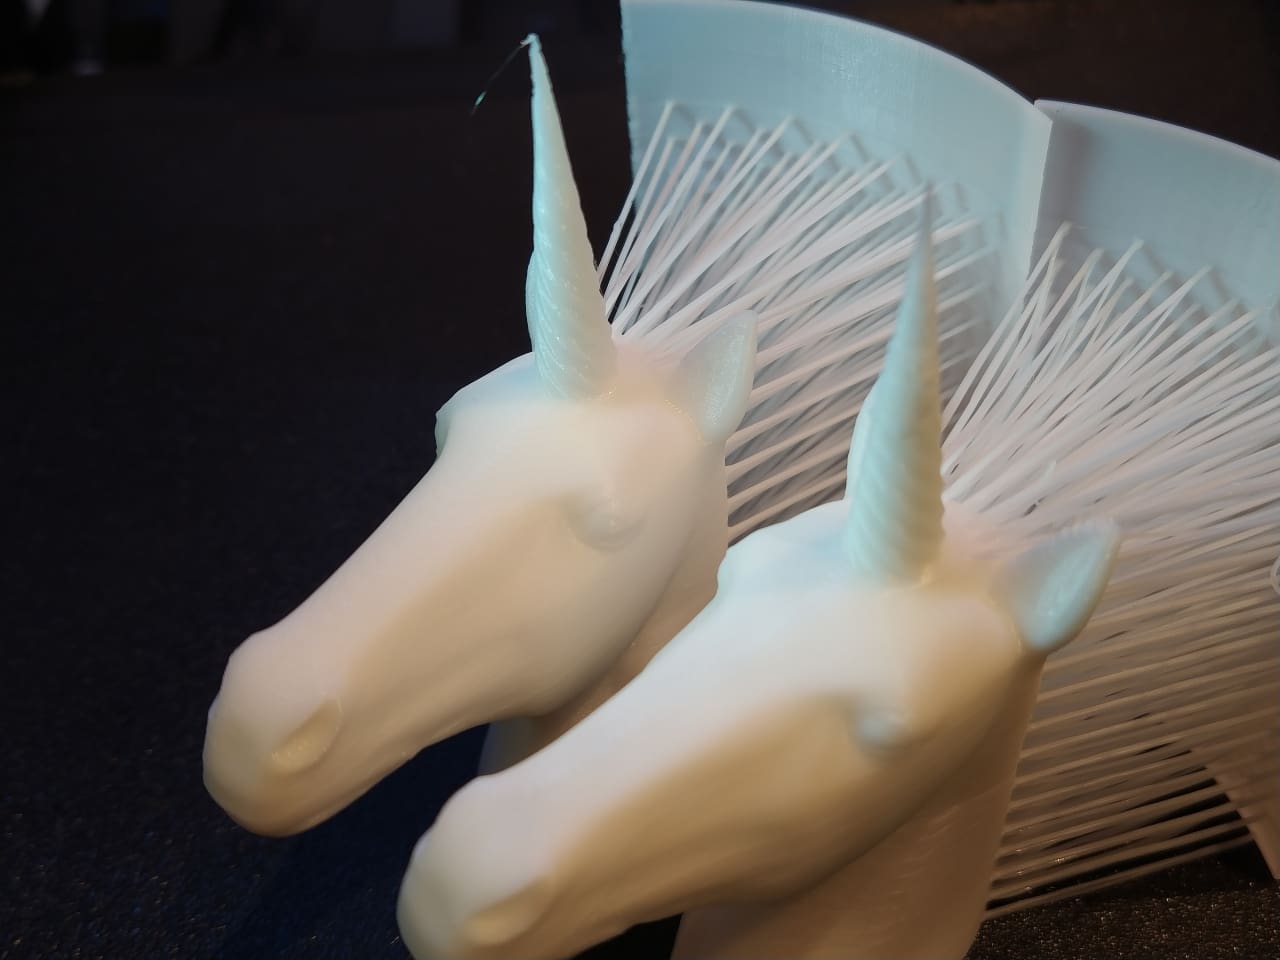
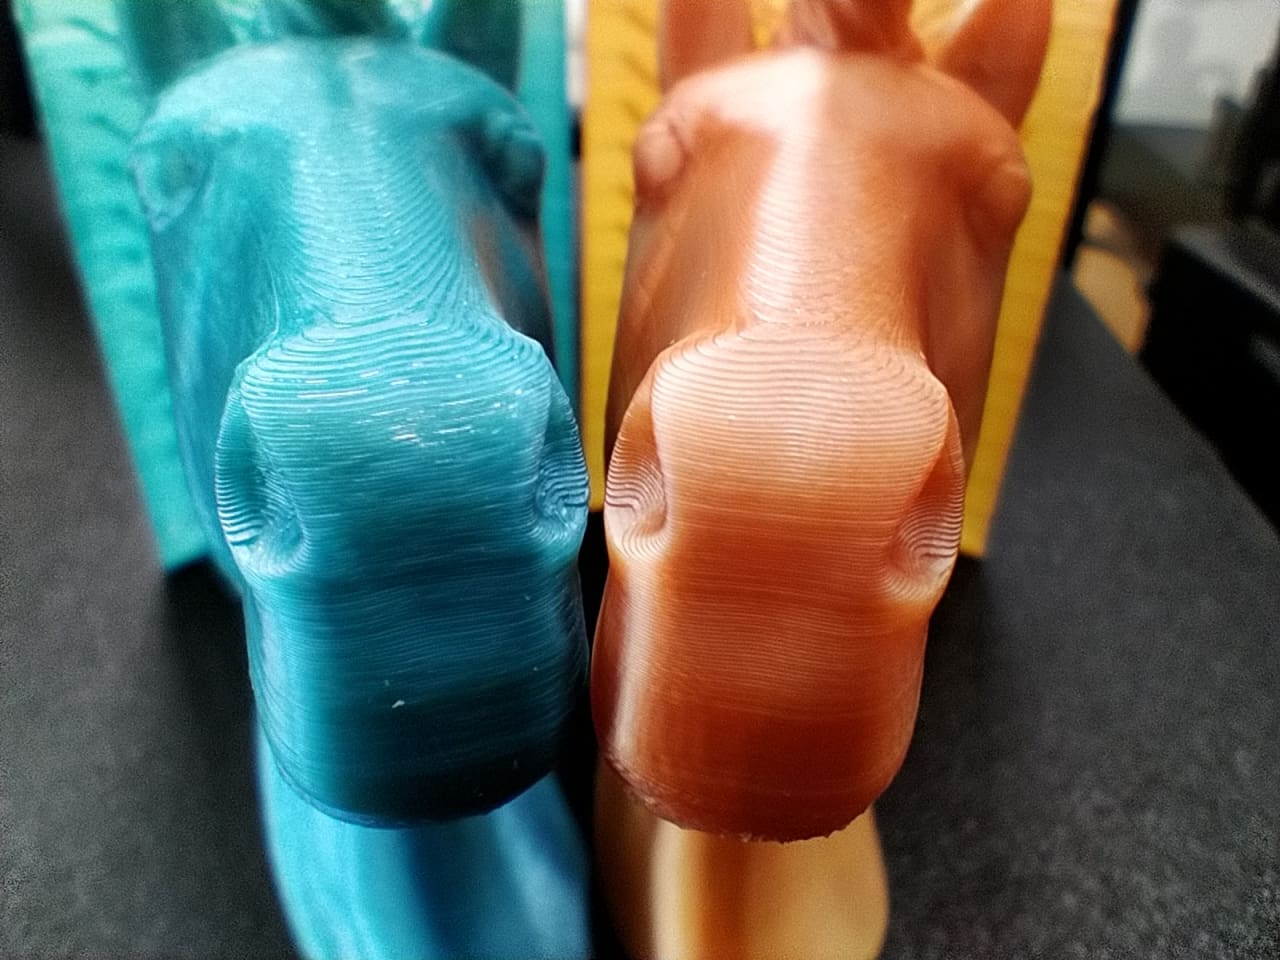
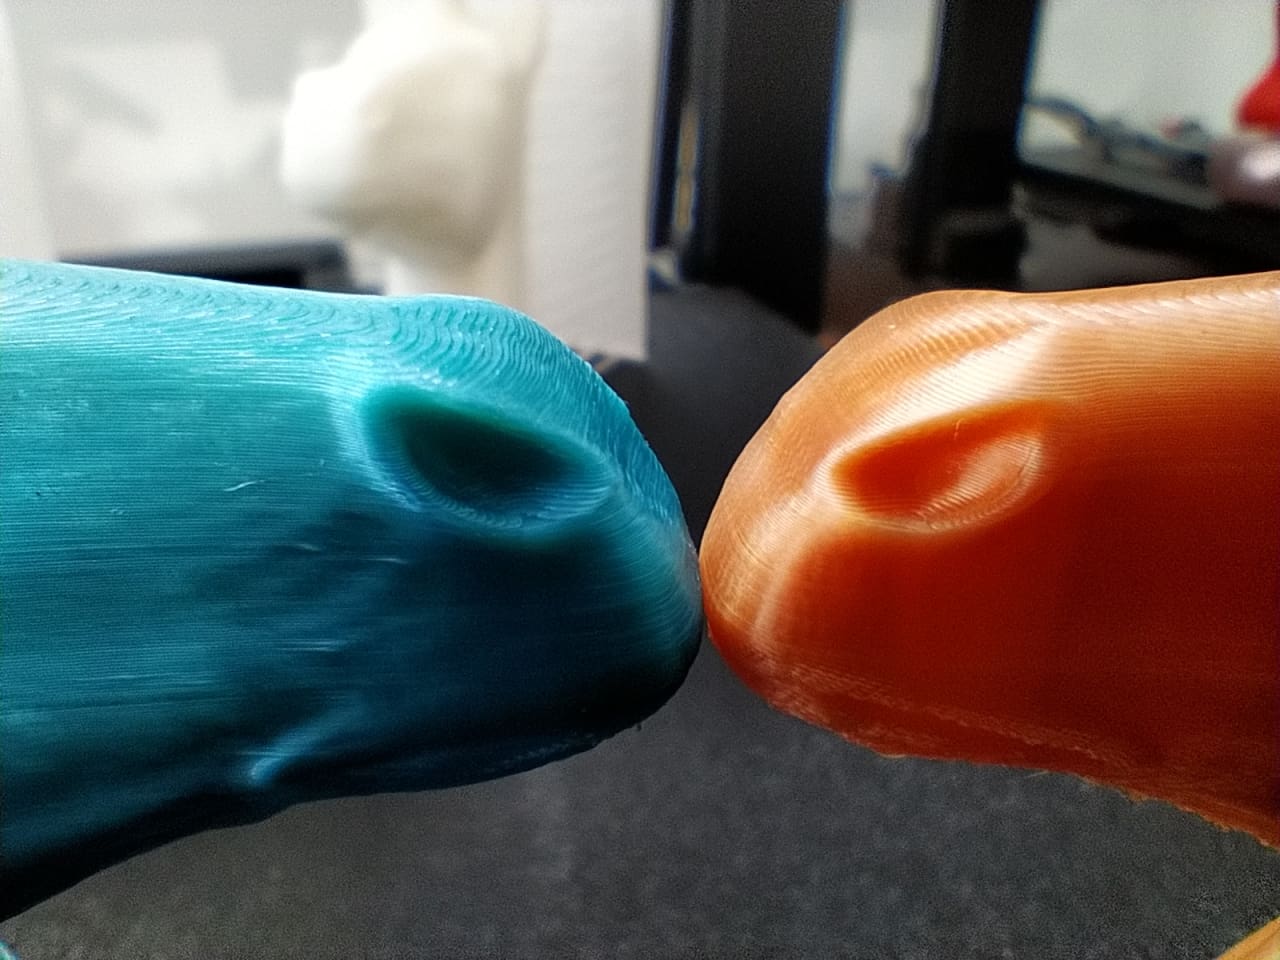
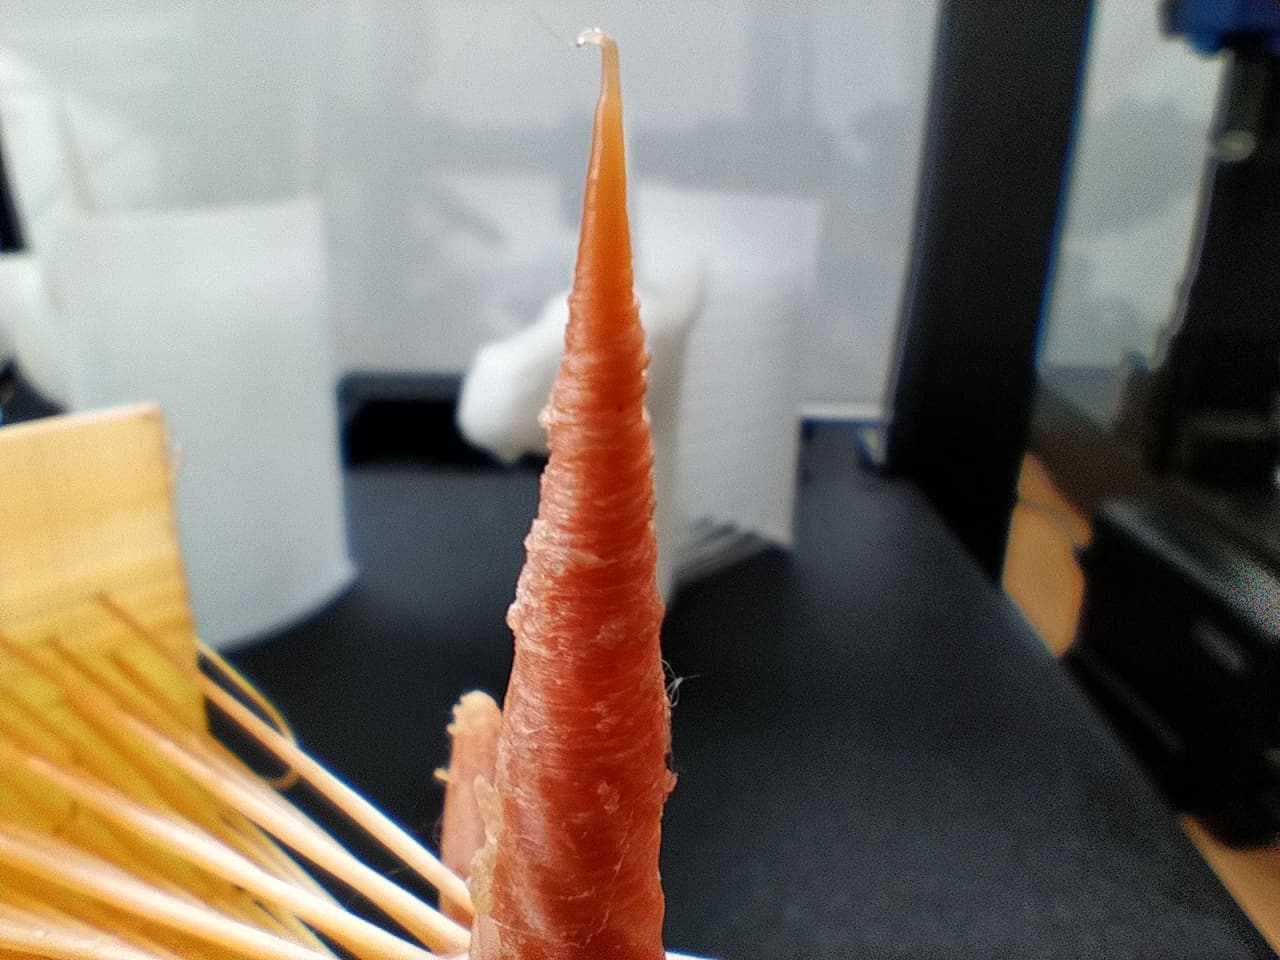
The turquoise and the orange unicorn were printed with the same filament from the same roll. It is silk Rainbow PLA. The colour transition was lost with the warping, the subsequent tearing off of the print and the spaghetti.
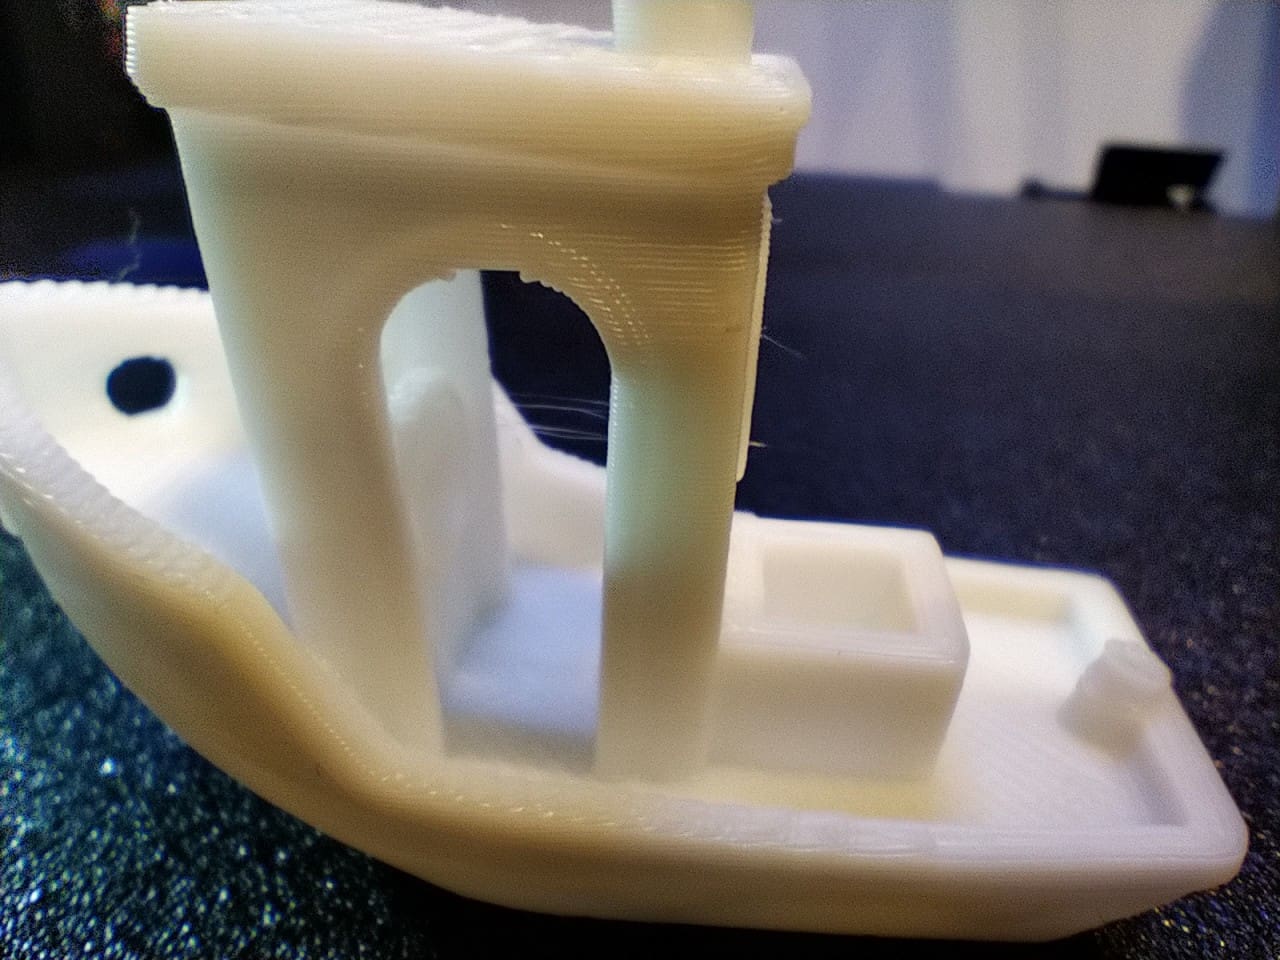
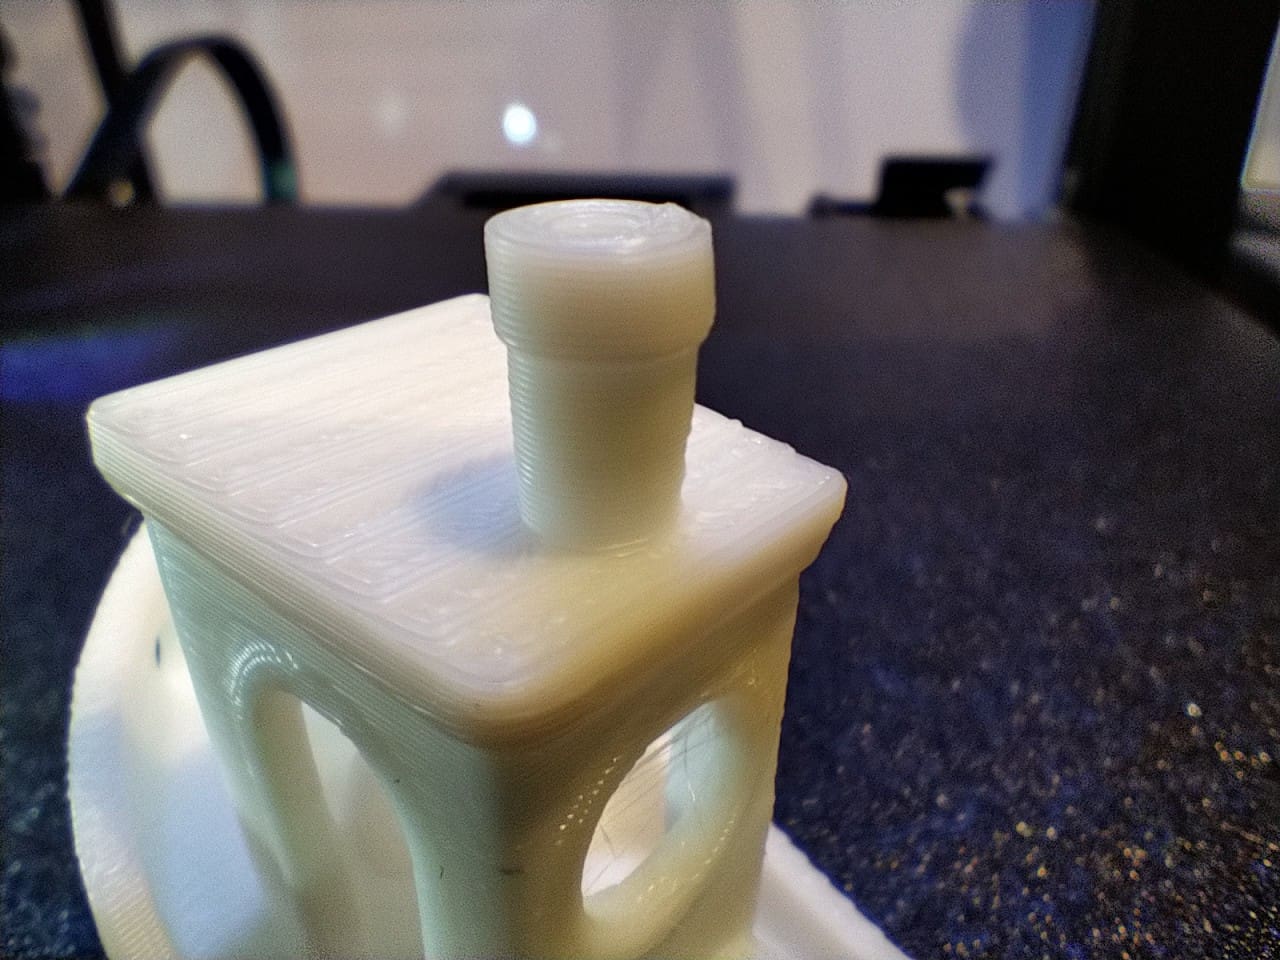
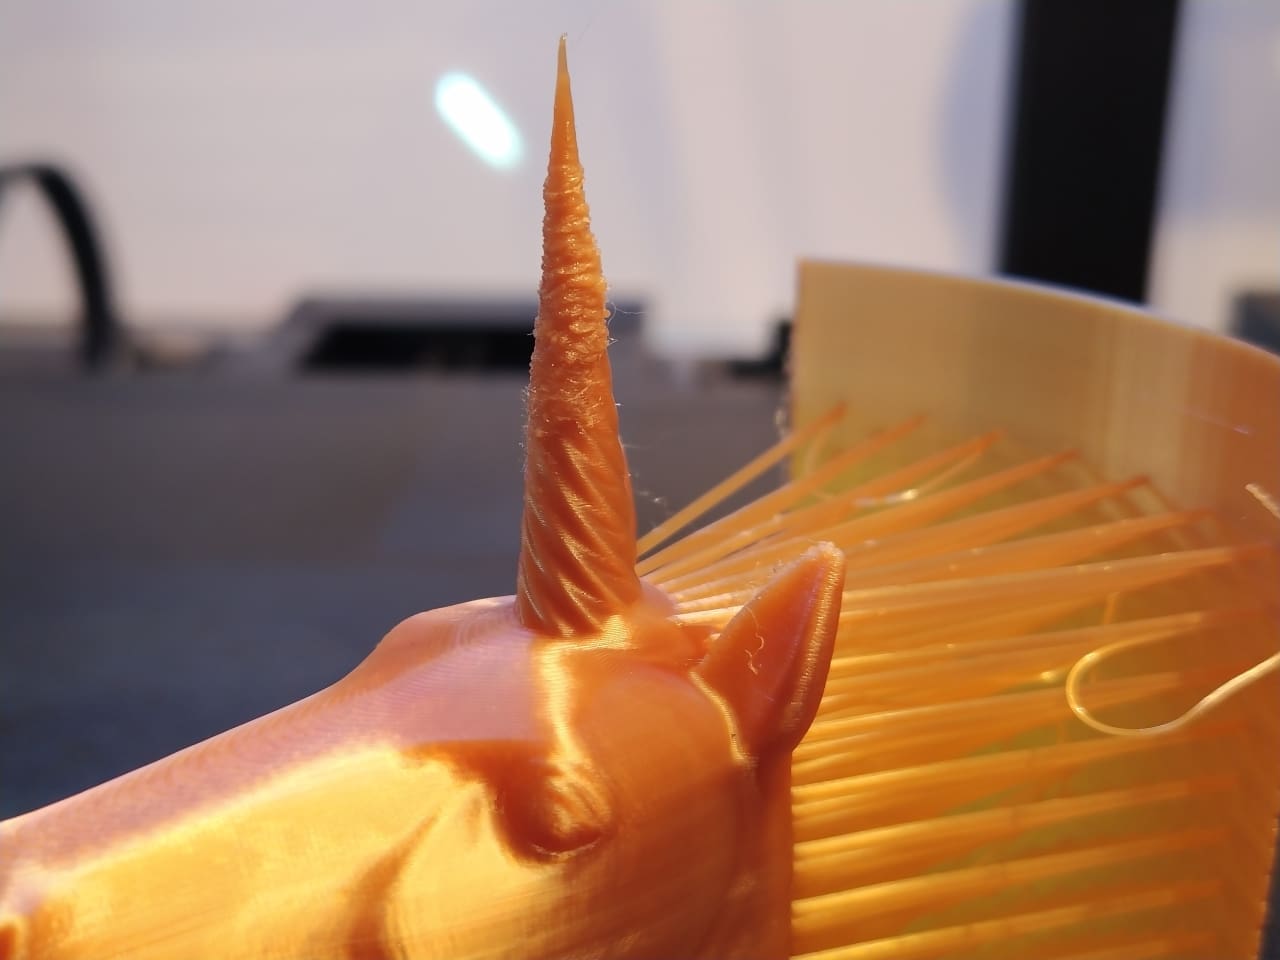
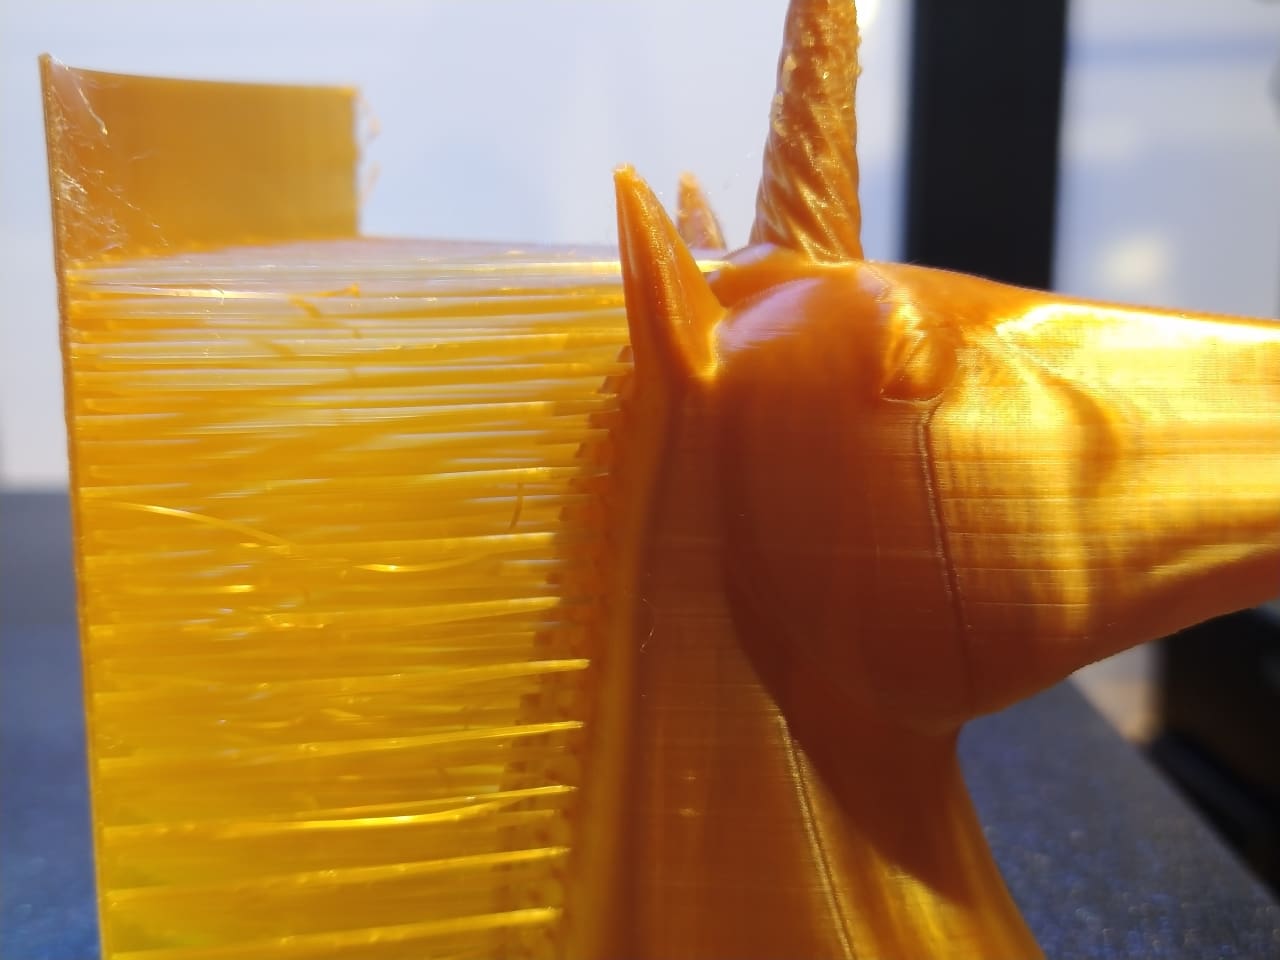
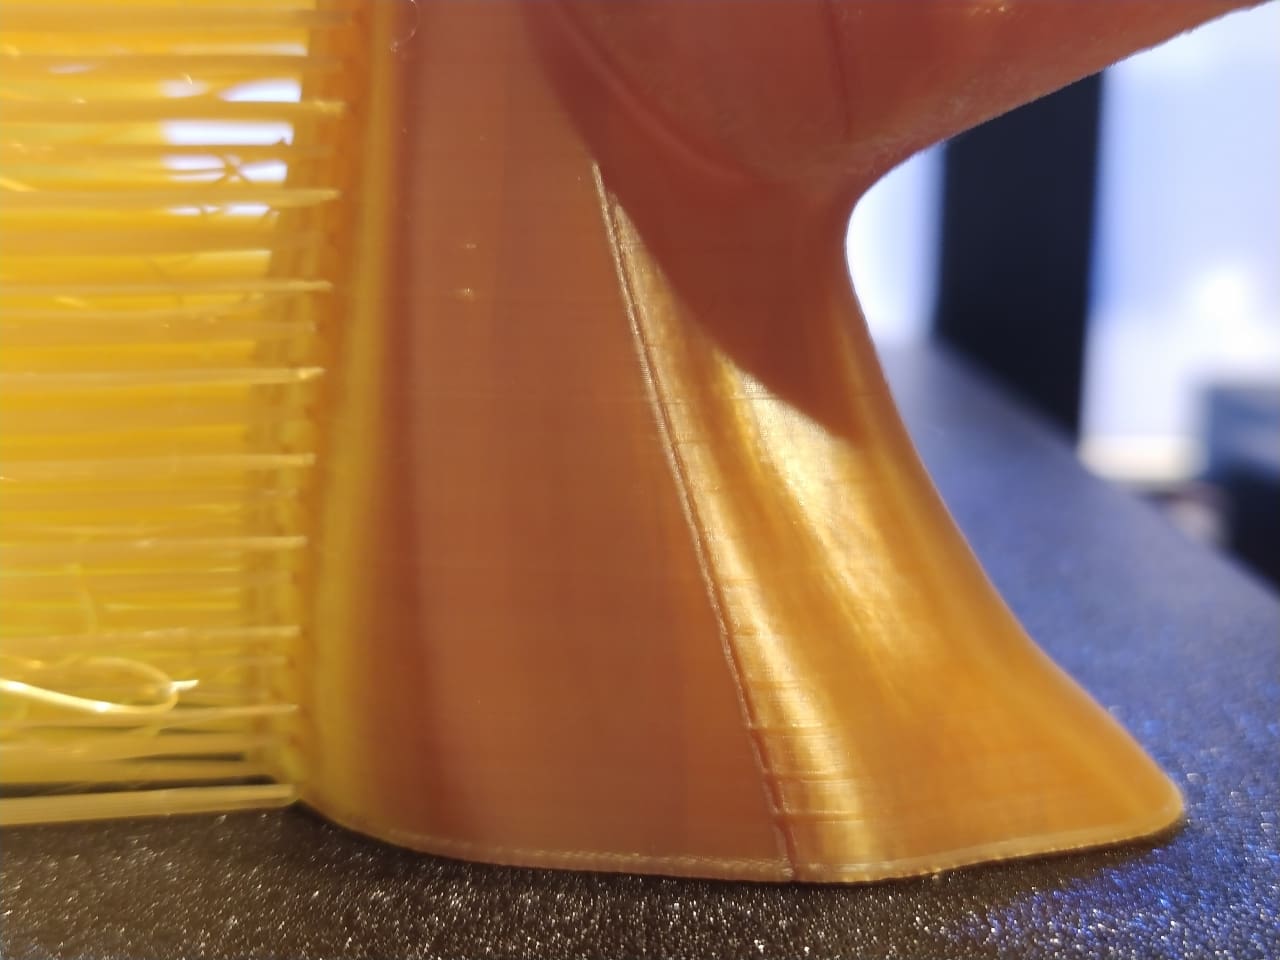
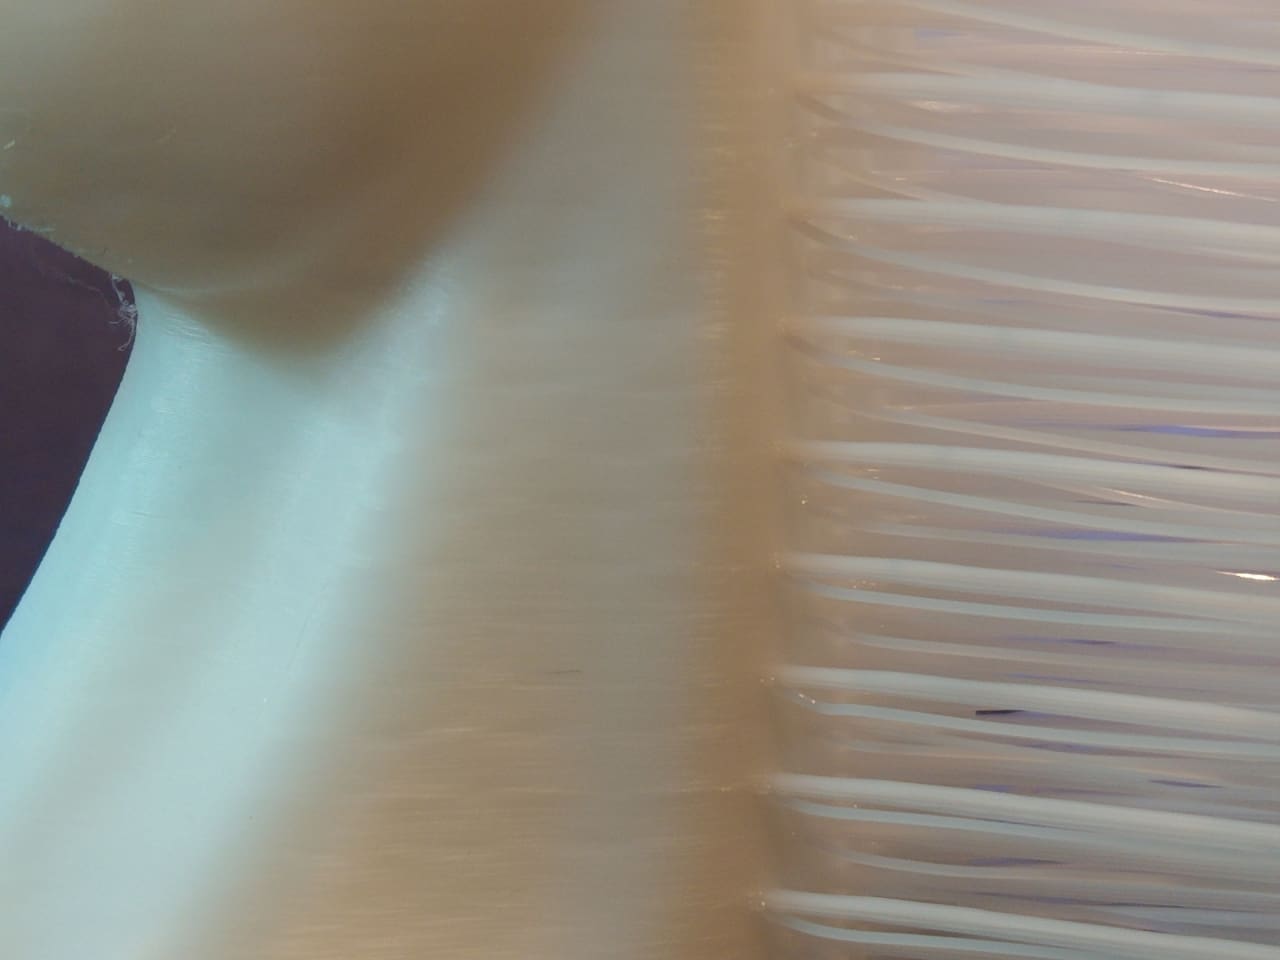
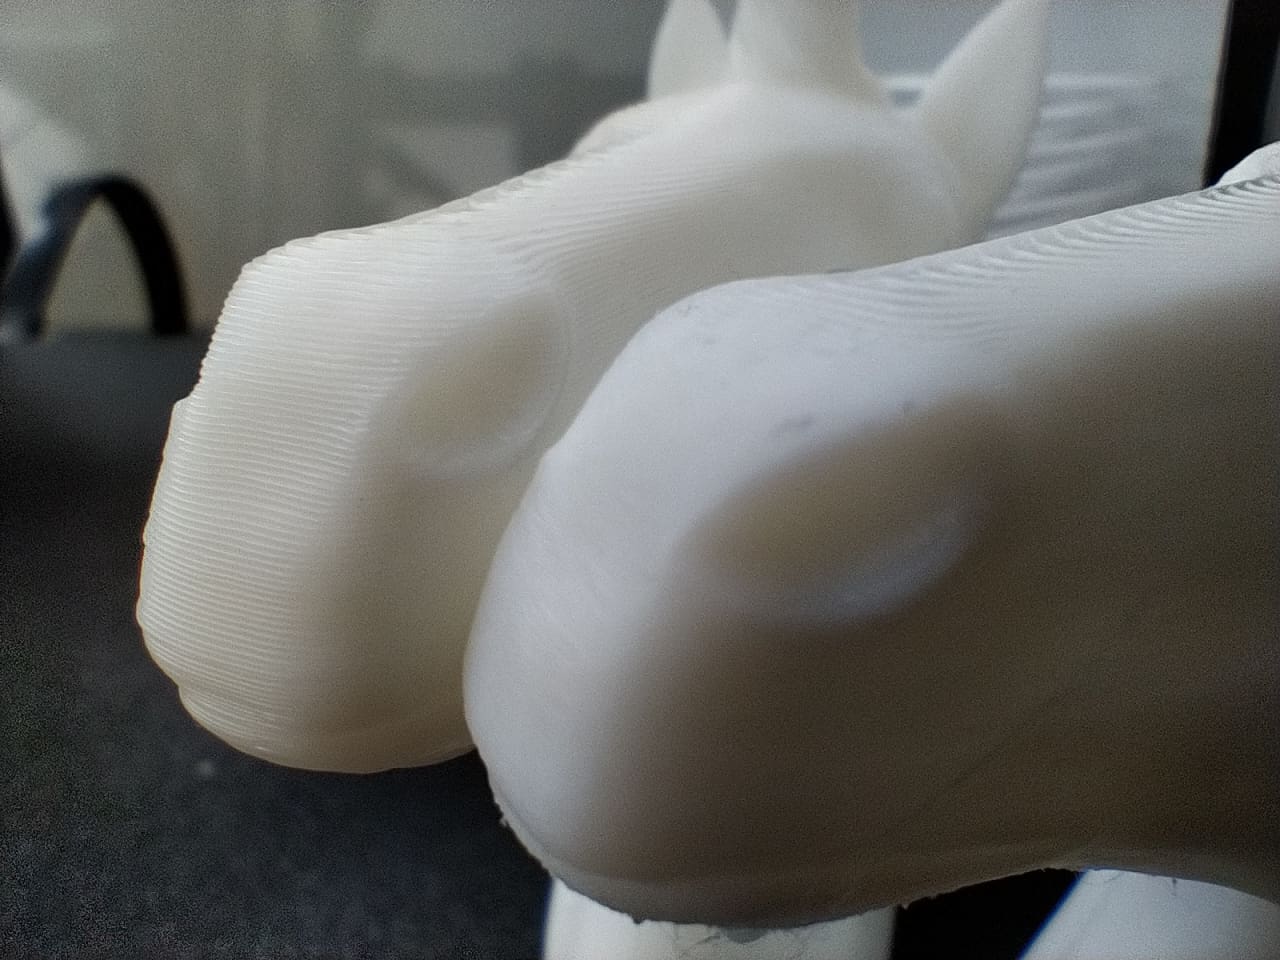
We see that the prints on the surfaces are equally good, but on the sides there are indeed differences in the severity of the ghosting with the HS-PLAs. The SW-X3 Plus has bigger problems with the overhangs, but they were literally printed in the air.
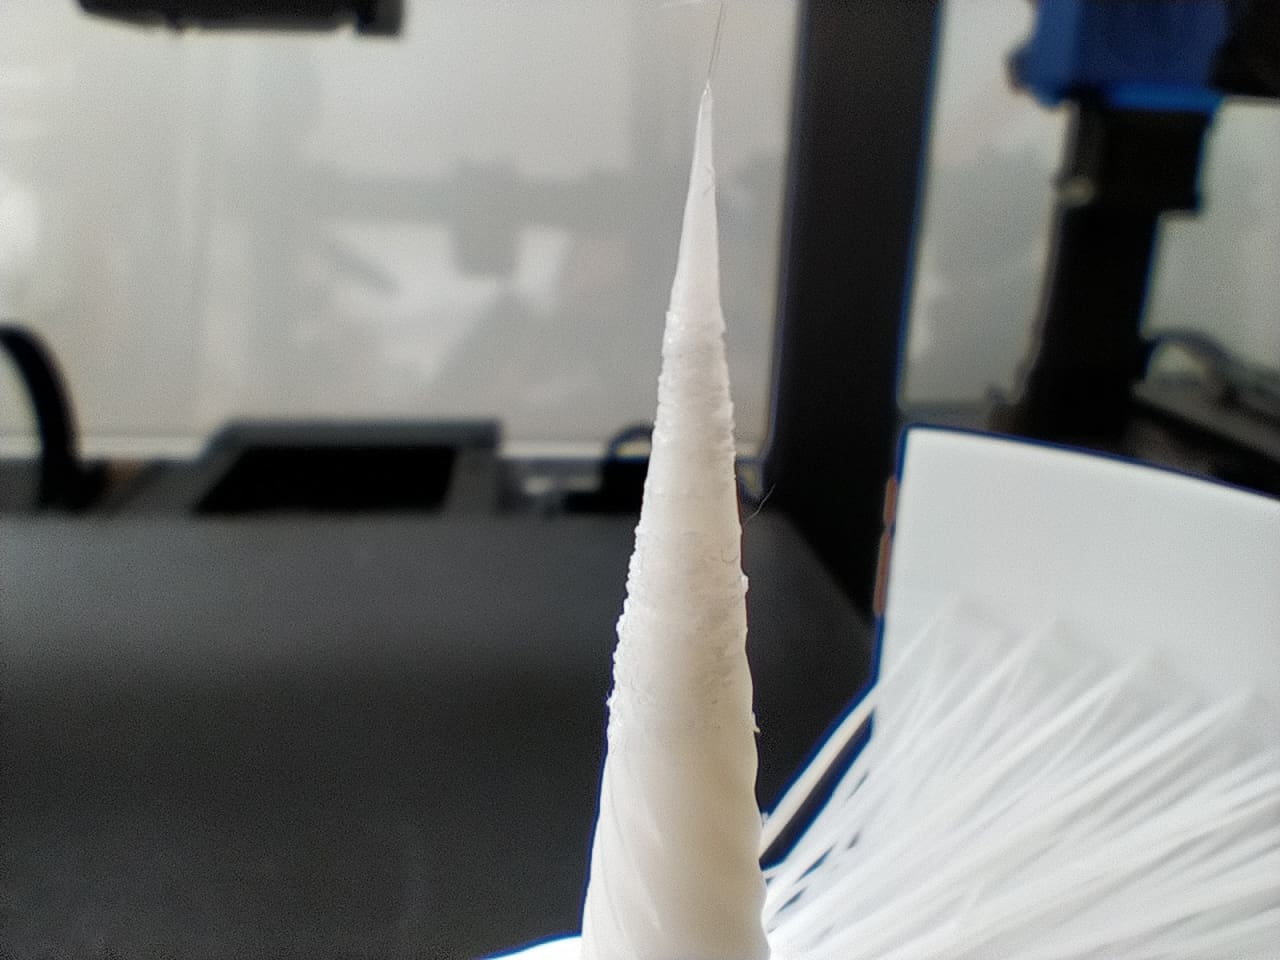
Unfortunately, you can forget about the upper part of the horn. The hair, on the other hand, only shows marginal differences, but the X3 Plus scores again on the back, the carrier of the hair. The surface looks and feels much smoother.
Video
Here I show how to level up the Sidewinder X3 Plus, perform a test print and how the Benchy is printed in real time. This gives you a good feel for how quickly and well the SW S3 Plus really prints.
Summary
Setbacks with the X3 Plus
There are two things that the Sidewinder X3 Plus does worse than its predecessor, the Sidewinder X2:
- Fan noise is much louder
- Heating bed takes much longer to heat up
Improvements to the X3 Plus
For a surcharge of around EUR 100, you still get a lot with the X3 Plus. These are all sensible updates that you would also want to give your X2.
- removable, magnetic PEI spring steel plate
- evenly distributed print bed temperatures
- removable, large display
- LED lighting in the portal
- contactless, wear-free level sensor
- Z-axis support
- Direct-dual extruder
- 300 degree heatend
- Nozzle wiper
- significantly faster than the X2
- Significant improvements in ease of maintenance
- much easier and faster filament change
- More modern, high-quality design, significantly higher WAF
- Drawer for accessories in the front
Equipment in comparison
| X2 | X3 Plus | |
| Tree shape | cartesian | cartesian |
| Installation space (mm) | 300 x 300 x 400 | 300 x 300 x 400 |
| Weight | 12.9 kg | 16.8 kg |
| Z-axis strut | no | yes |
| Bearings | POM wheels | POM wheels |
| Printing speed | 60 – 150 mm/s | 150 – 200 mm/s |
| Recommended | 80 mm/s | 150 – 200 mm/s |
| Max. Max. speed | 200 mm/s | 300 mm/s |
| Acceleration | 800 mm/s² | 3.000 mm/s² |
| Display | 2,8″ | 4,3″ |
| Colour display | Colour display | |
| Touch | Touch | |
| built-in | removable | |
| Auto levelling | yes | yes |
| mechanical | Hall sensor | |
| Filament sensor | yes | yes |
| Heating bed | Glass | magn. PEI |
| 220 volt | 36 Volt | |
| 500 watts | 300 watts | |
| Max. 130 degrees | Max. 100 degrees | |
| Levelling wheels | 4 | 6 |
| Mainboard | „Ruby“, 32-bit | „STM“ 32-bit |
| SoC STM32F102 | SoC STM32F402 | |
| 36 MHz | 180 MHz | |
| Marlin 1.2 | Marlin 2.1.2 | |
| Power supply unit | 200 watts | 460 watts |
| fanless | Fan | |
| 36 V | 9,7 A | |
| 24 V | 4,2 A | |
| Power consumption | max. 700 W | max. 400 W |
| Noise level | very quiet | loud |
| Extruder | Direct, single | Direct, dual |
| manual | automatic | |
| Nozzle, max. temp | 240 | 300 |
| PC connection | USB-B | USB-C |
| Card reader | microSD | microSD |
| USB stick | USB-A | not possible |
| Self-cleaning nozzle | no | yes |
| Print bed lighting | no | yes |
| Nozzle illumination | in the print head | in the print head |
| WLAN | no | no |
Contra
I am not very impressed by the noise level, which is already too high when idling and of course does not decrease when printing. The print bed could also heat up more quickly. But these are only noticeable in direct comparison with the X2. This is extremely quiet and has a 220 volt heating bed with 500 watts of heating power. Today, however, almost all printers are loud and I am not aware of any serial printer that offers a heating bed with mains voltage. In this respect, the X3 Plus is a standard product.
A PEI plate is a fine thing. But it should also offer much better adhesion. It seems to me that some improvements on the software side should be incorporated into the series. Automatic bed levelling should be carried out before each print. However, this has to be entered manually in the start code.
The firmware is in need of improvement. A first update to version 1.29 has already been carried out, but unfortunately there is still a bug here that sometimes you can’t get back to the main directory from a subfolder on the SD card and you have to press the reset button. Okay, to be honest: I have never used subfolders on an SD card. The slicer software also saves the models in the root directory of the memory cards. The error would not even be noticeable if the sample prints were not in a subfolder on the original 4 GB microSD card from the factory.
This brings me to another point of criticism: as is so often the case, manufacturers put the cheapest storage media they can find in the package. The microSD card didn’t last 24 hours in my case, then it was no longer recognised and I had to replace it with a 64 GB card that I still had lying around. It’s no big deal, because I immediately make a backup of every storage medium that the manufacturer includes. If only there was a USB-A port that you could plug a USB stick into. But no, you have to fiddle with the tiny microSD cards on the computer.
And what about WLAN? An ESP8266 doesn’t even cost five euros, but it would have been another plus point and would have saved users having to fiddle with the tiny microSD card. Nobody likes having to change these things all the time. If it had at least been possible to use a USB stick with the USB-C socket, the lack of WLAN would have been bearable.
Pro
I’m delighted with the filament change, which was nowhere near as quick and easy with any of my previous printers. There is a lot of attention to detail in the X3 Plus.
The detachable, easy-to-read and easy-to-use display is finally a modern size and responds very quickly. The entire operation of the printer has taken a big step forward.
At last there is a PEI plate, so you no longer have to wait for the glass plate to cool down. You can also place the plate with one hand – marvellous! The print bed has neither hotspots nor coldspots, it is evenly warm.
The Sidewinder X3 Plus has LED lighting for the print area in the portal.
For such a large printer and the i3 design, it is surprisingly fast and also surprisingly good. Especially when you consider the price!
Expectations
The fans would have expected 500 mm/s, WLAN and Klipper. And they get all that. But not in the X3 Plus! These will probably all be features of the X4 Plus – and its price (and the other key data) have not yet been finalised.
Target groups
Beginners
People who want to familiarise themselves, even if only a little, with the subject of 3D printing and also want to set up a 3D printer from scratch. The SW-X3 Plus is not a dedicated beginner’s printer. You should never make the mistake of thinking that inexpensive printers are also beginner printers. Inexpensive printers always need a little love.
Switching from the X2
You could consider buying a second SW-X2. A second printer is not unusual. But I would advise against this and recommend buying an X3 Plus, because the upgrades that the printer offers are well worth the extra cost.
Experienced melters
The solid basis is there and if you upgrade the printer with Klipper on a Raspberry Pi, it has the potential to keep up with much more expensive printers.
Conclusion
I said at the beginning that I was sorry I hadn’t bought the SW-X3 Plus straight away. And what do I say after testing it? Should I have bought it straight away? A very clear „Yes!“.
Even though the old Sidewinder X2 certainly has a well-deserved reputation, I’m still struggling with mine. The X3 Plus, on the other hand, worked for me straight away, apart from a few minor details. From my subjective point of view, the Sidewinder X3 Plus is an inexpensive printer that prints quickly and, above all, well for its size.
The Artillery Sidewinder X3 Plus is a more than worthy, albeit louder, successor whose improvements are more than worth the extra cost.
Rating
3,8/5
0.2 points deducted for each:
- the old-fashioned manual levelling! And that with six levelling wheels!
- Manual entry of the values for the start code (could have been solved in firmware).
- Problems with the adhesion of the first layer.
- the really annoying fan noise.
- the missing WLAN.
- the missing USB-A port and the fiddly microSD cards
All these problems could have been avoided with little or no effort. What a pity!
Reaction
I posted this article in the official Artillery 3D User Group. The post was not deleted, and Artillery responded:
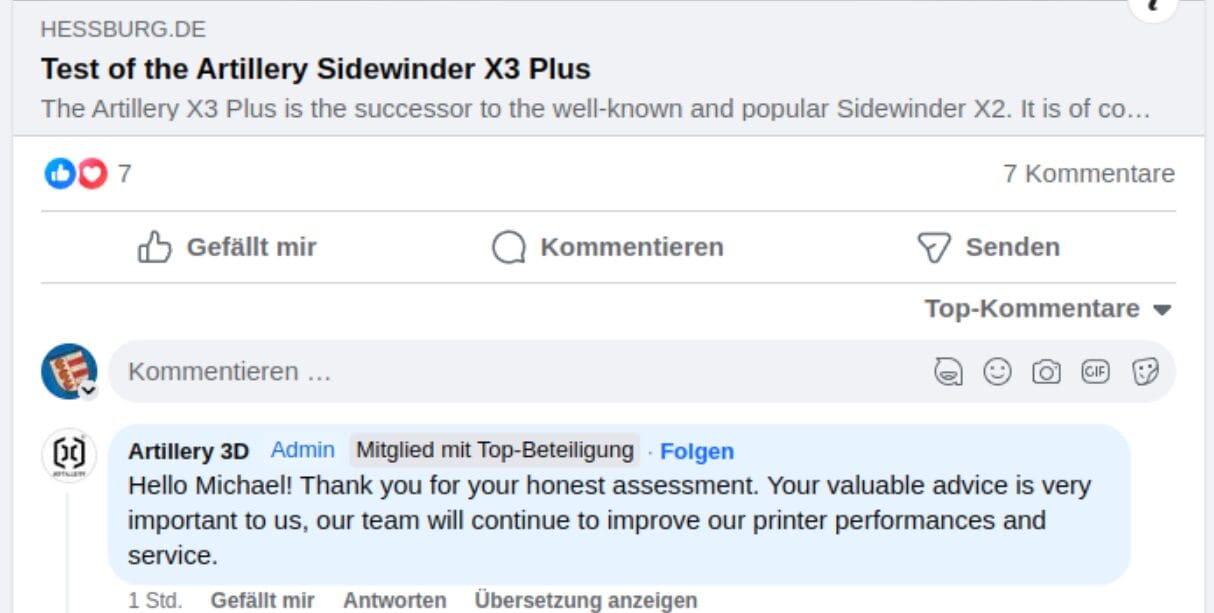
Hello Michael! Thank you for your honest assessment. Your valuable advice is very important to us, our team will continue to improve our printer performances and service.
I can’t say whether this is meant honestly. It reads like a sample response from the social media handbook to a mixed review.
Maybe Artillery will give me an X4 Pro / Plus to test, if they meant it honestly 😉