Inhalt: [-]
- 1 Help for self-help
- 2 Shopping list
- 3 Complicated?
- 4 Configuring WLAN
- 5 Update? NO!
- 6 Initial setup
- 7 Aligning the WiFi smart meter
- 8 Analysing the data stream
- 9 Consult the instructions!
- 10 Get an overview!
- 11 Sift it out!
- 12 Format correctly!
- 13 Script
- 14 Explanation of the script
- 15 Almost done!
- 16 Configure MQTT
- 17 And what about the water meter?
- 18 Further links
Hichi was not idle and developed a WiFi smart meter (reading head) with an ESP32 and Tasmota. Here I show you how to configure it. It doesn’t take much to read our electricity meter. Above all, it doesn’t need expensive equipment. I have already described how to do this here: Making electricity meters smart for 25 euros. The new WiFi smart meter from Hichi, with Tasmota, no longer needs an intermediate Raspberry Pi with ioBroker or a Volkszähler, it is an AIO smart meter. But why isn’t it just shipped „working“? Plug it in and it’s good? Well, because Tasmota (and also MQTT) first have to be adapted to the electricity meter. With the multitude of electricity meters hanging in households, this is a topic that is as necessary as it is confusing for the layman. The instructions are always written by people who know Tasmota in detail for people who know Tasmota in detail. Unfortunately, that doesn’t help us ordinary people one bit. But you have me. :-D I have struggled through the crap and now I will explain to you in detail what you have to pay attention to in order to make it work for you.
Help for self-help
As always, this is not a manual that you can follow blindly, but it only offers help for self-help. Please refrain from telling me your meter type in the comments and from asking me for a ready-made script. Although … for an expense allowance of 40 Euro per hour … :-D No, please no requests! Help yourselves.
Haftungsausschluss
ACHTUNG! NICHT NACHMACHEN!
- Dies ist keine Anleitung!
- Der Artikel dient der persönlichen Dokumentation!
- Dieser Artikel soll nicht die beiliegenden Anleitungen, Einbauhinweise oder Installationsanleitungen ersetzen!
- Dieser Artikel soll einen groben Überblick über die anfallenden Arbeiten ermöglichen.
- Der Artikel erhebt keinen Anspruch auf Vollständigkeit oder gar Korrektheit.
- Hier beschreibe ich, wie ich diese Arbeiten als Laie erledigt habe – nicht, wie man sie korrekt oder nach handwerklichen Standards, Vorschriften oder Gesetzen erledigt.
- Ich lehne jede Verantwortung, Haftung und Gewährleistung ab. Jeder muss selbst wissen, was er macht.
- Einige Arbeiten sind durch Fachfremde nicht zulässig, respektive gesetzwidrig und bedürfen teilweise mindestens der Abnahme durch einen ausgebildeten Berechtigten.
- Einige Handlungen und Arbeiten sind im öffentlichen Bereich (Straßenverkehr, Stromnetz, Luftraum, Internet, etc.) verboten oder verstoßen gegen Lizenzvereinbarungen, was straf- oder zivilrechtliche Konsequenzen nach sich ziehen kann.
- 230 Volt sind tödlich!
- Kein Backup? Kein Mitleid!
- Meine 3D-Modelle sind nur Machbarkeitsstudien, keine geprüften, funktionsfähigen Bauteile.
- Die beschriebenen Tätigkeiten sind in der Folge rein akademischer Natur.
- Bedenke, dass durch Deine Arbeiten Dritte an Leib und Leben gefährdet werden können und Du persönlich dafür haftest.
Mit dem Weiterlesen stimmst Du diesem Haftungsausschluss zu.
Shopping list
- Hichi WiFi reading head with Tasmota: 29 euros
- Micro-USB power supply: 2 A: 7 Euro
Not a purchase, but you need the …
- Instructions for your electricity meter
The electricity supply company should have left them in the sub-distribution board during the last exchange. If not, you can find them on the internet. I will describe the search in more detail below.
Complicated?
No, not really. At first glance, it all looks worse than it is. Just follow the instructions step by step and you’ll be done in no time.
Configuring WLAN
First of all: You should have sufficiently strong WLAN reception in the room where your electricity meter is located. Please verify that the doors of your sub-distribution do not interfere with the WLAN reception. See also my article on optimal WLAN reception. Supply the reader with power using the power supply unit. A few seconds later you will see an open WLAN with the identification „tasmota_xxxxxx-xxx“ and connect to it. Now the mobile phone display says something like „Requires registration/authorisation“. Note:If this does not happen, we have to call up http://192.168.4.1 in the browser and enter the access data for our WLAN there. The reader reboots and can now be found in the WLAN of your smart home. Look in the router for its new IP and open it. Continue with the initial setup below.
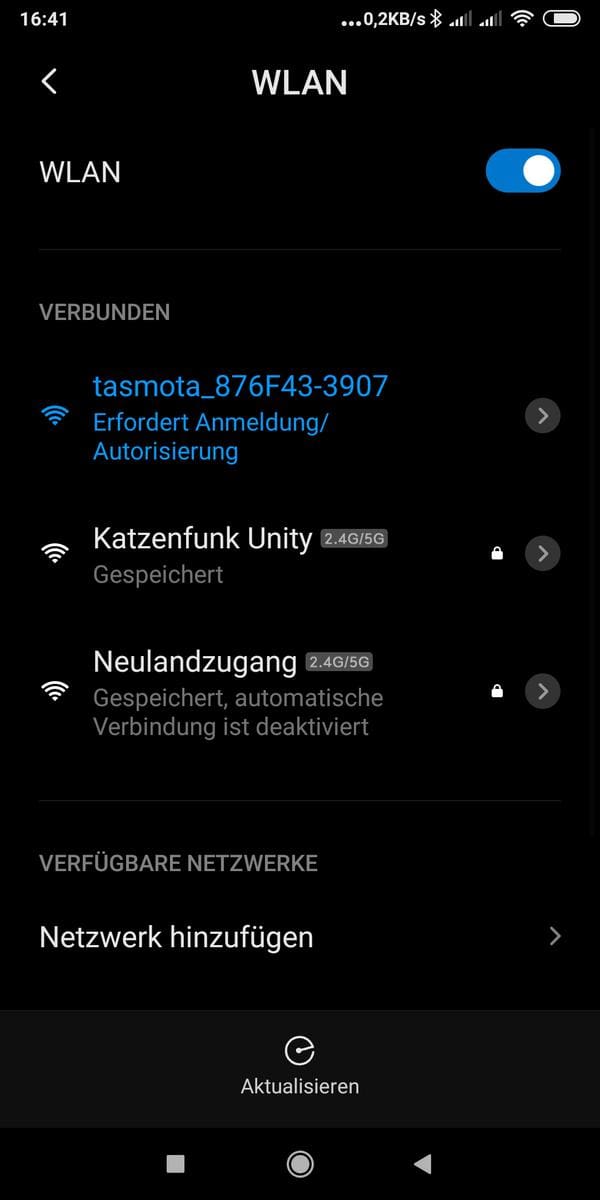
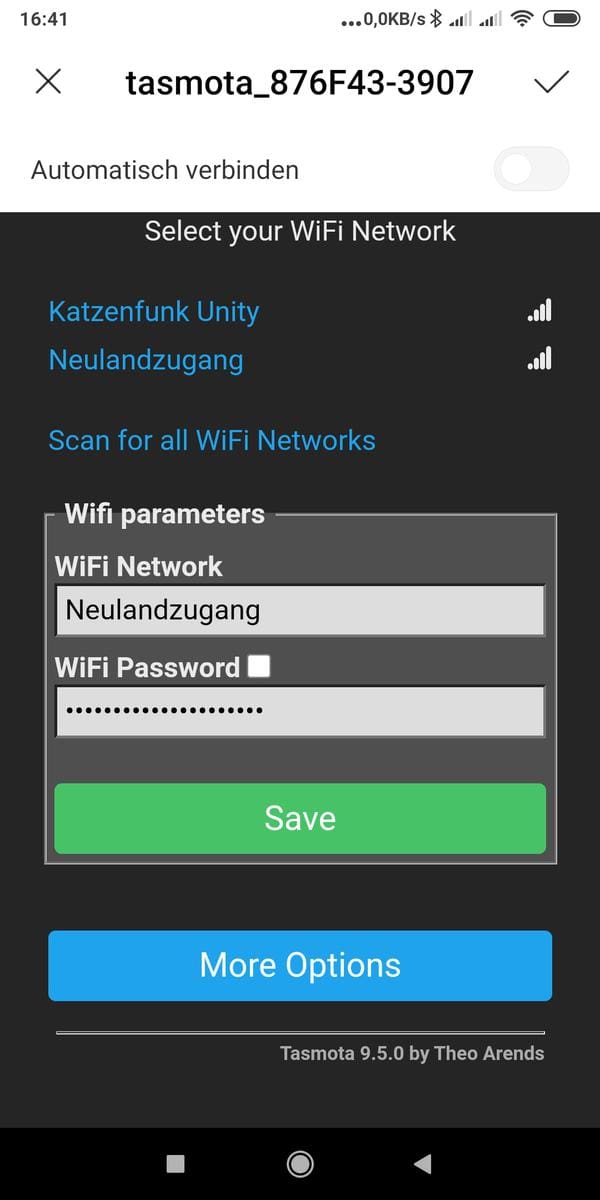
We tap on the network and the following screen appears:
Here we type in the access data to our Smarthome WLAN. tap „Save“ and …
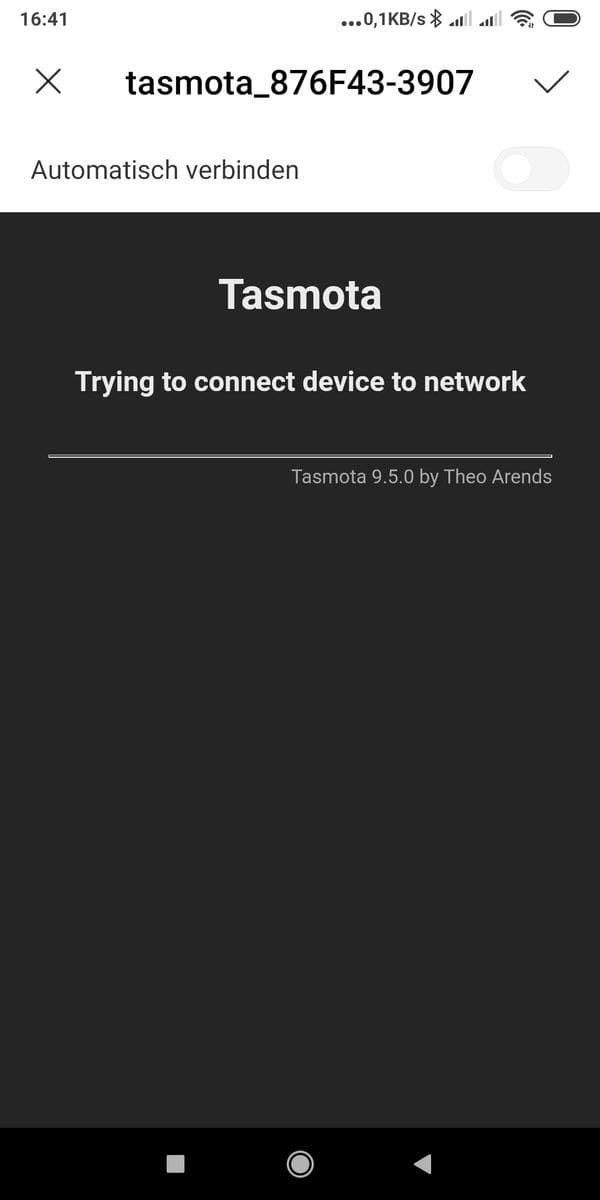
„Almost there…“
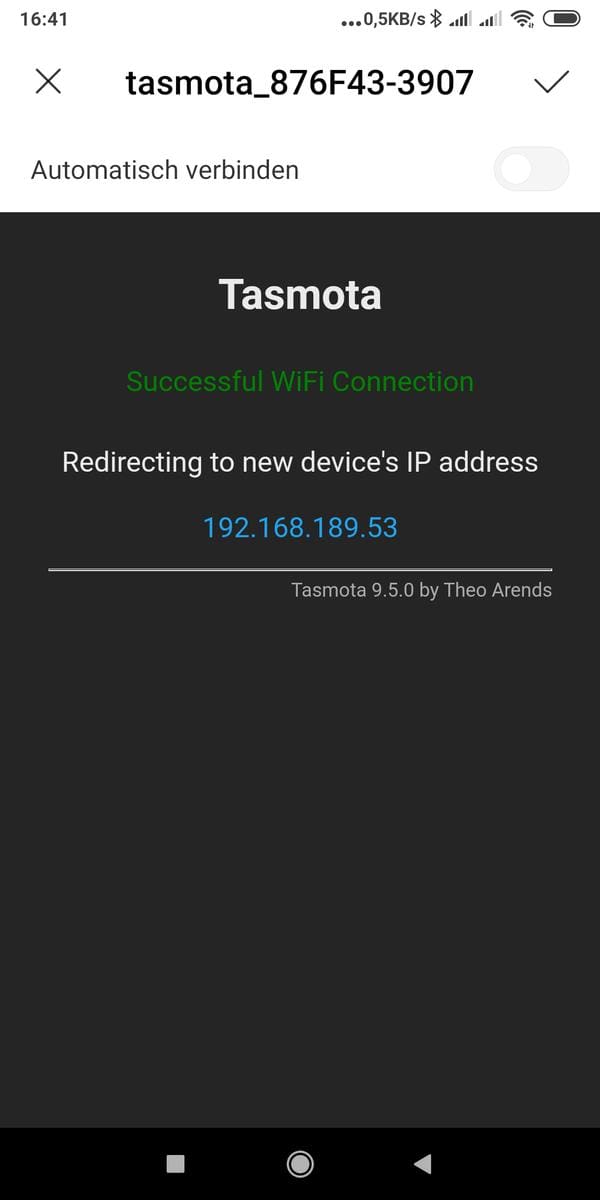
Success! The reading head is in your network and we can click on the IP address displayed!
Update? NO!
Unfortunately, I have to write this here, just look in the comments if you want to know more. These are problems of users‘ own making that have cost me valuable time. Why do Windows people always have the urge to click on everything that isn’t in the recycle bin? Why can’t you just follow a step-by-step guide without doing anything that isn’t written here?
I haven’t used Windows privately for 18 years, I didn’t even notice the upgrade function in the menu. IT IS NOT IMPORTANT! Your electricity meter doesn’t want to surf the evil internet, it’s not exposed to any danger. There is no great new function added to Tasmota that somehow reads your electricity meter differently, better or faster.
The device will not be hacked like in a movie! Ah! Wait! The only way to hack it is if you tell it to look for updates! How do you know it’s installing the right update file? Have you enabled DNS over HTTPS in the router? And lo and behold! A wrong update was installed, not a malicious one, but now you still have problems.
FORGET WINDOWS! Here are real operating systems at the start! No click-bunti! „Oh, whoopsie! Haha! Reinstall!“ Here you have to know what you’re doing! If you don’t know, don’t do it! How do you think it works in companies? Do you think they distribute Windows updates just like that? Of course, they are tested beforehand!
If you do the upgrade, you’re in for a long battle with the depths of Tasmota.
Why am I getting upset? Because I’m supposed to be providing support here and you Windows guys can’t or won’t even remember that you’ve done an update! How many times have I heard that in IT support? „I didn’t do anything!“ – thousands of times! And 99.9 percent of them were lies! Knowingly or unknowingly! „Update? Yes, oh, there was something, wasn’t there? You do, don’t you?“
I’m really getting the shits! ? „I didn’t do anything!“ BOAR!
Follow these instructions point by point in the given order and it will work!
If an update were important, this would be here!
Initial setup
The sensor must now be set up very roughly so that we can install it on the electricity meter in the sub-distribution.
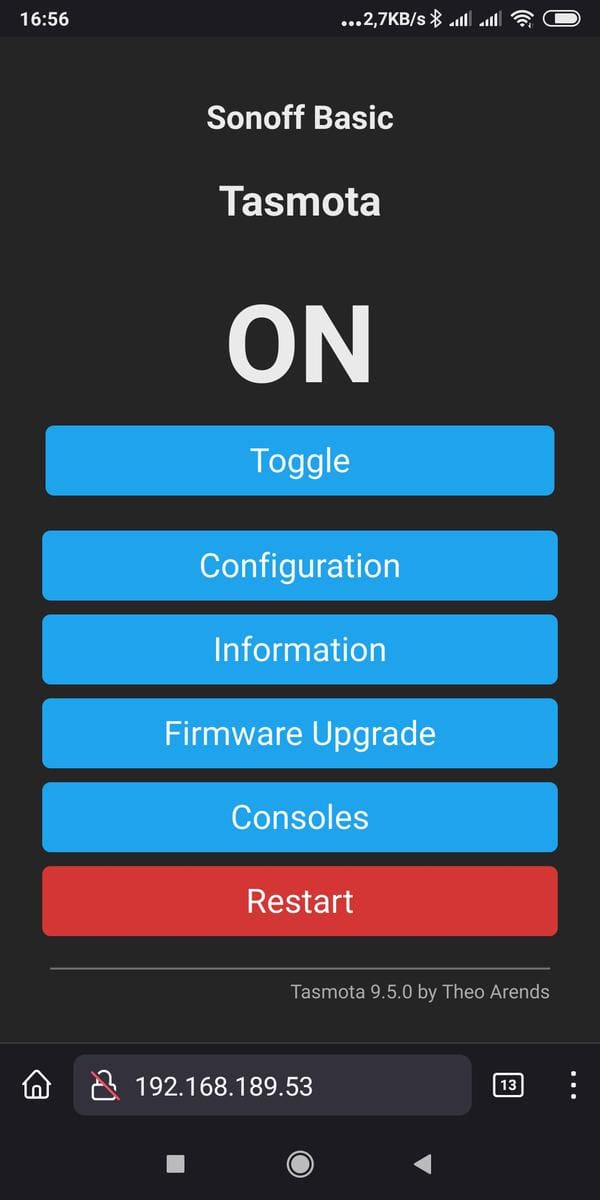
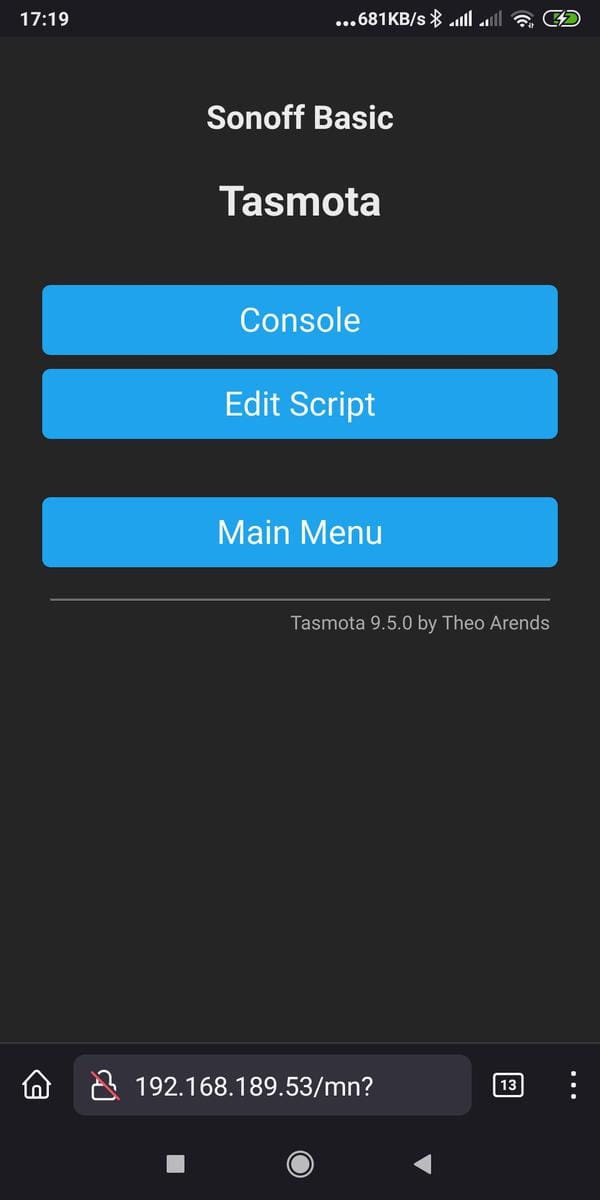
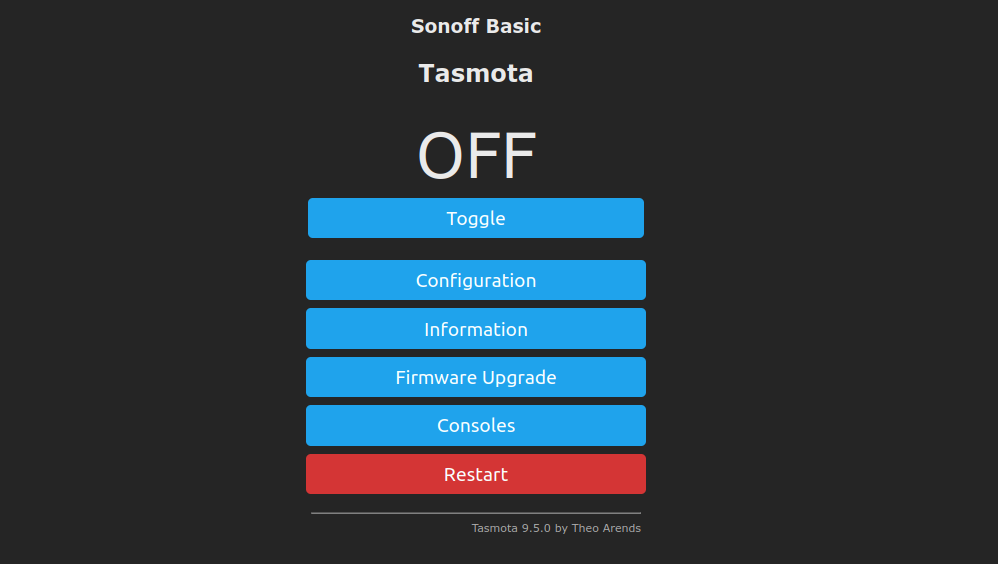
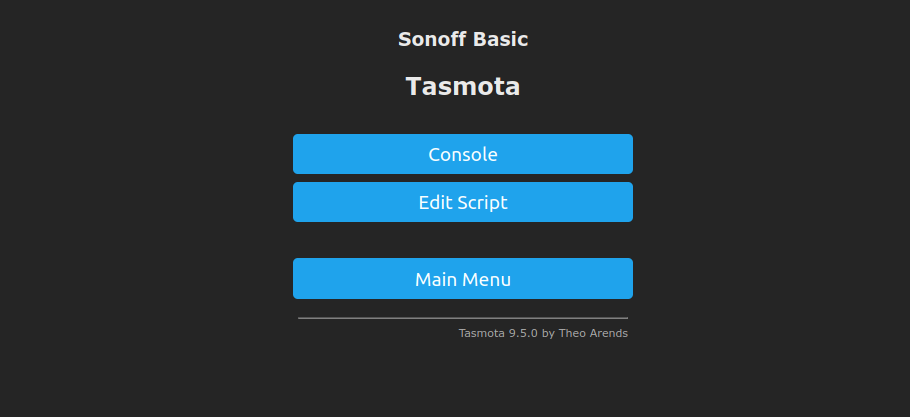
Attention! Only http and not https! In the main menu we click –> „Consoles
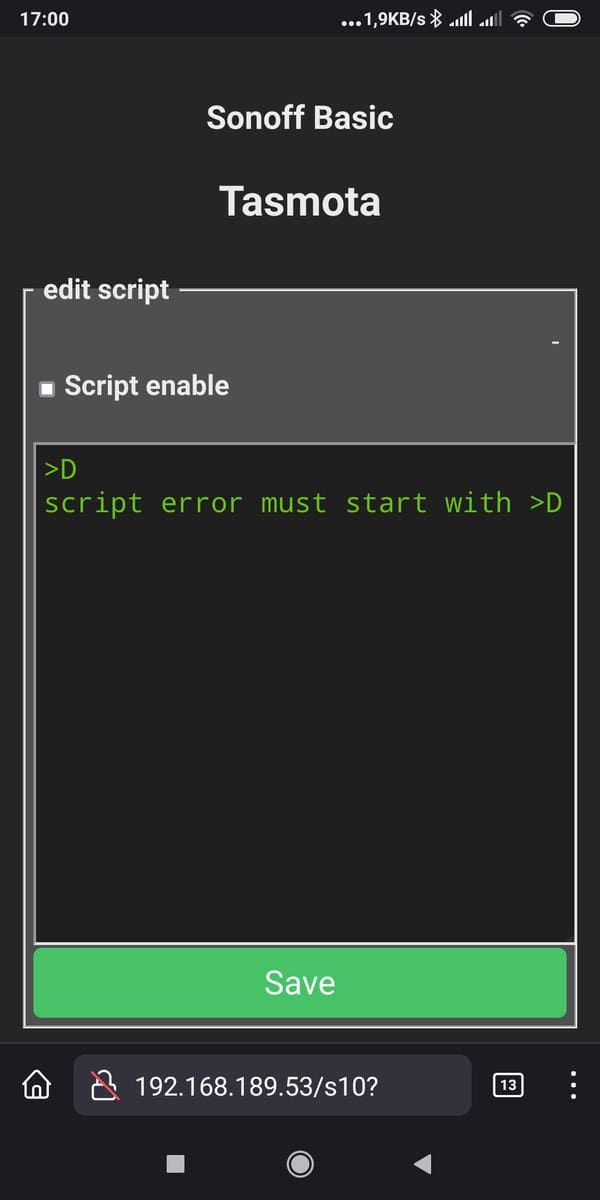
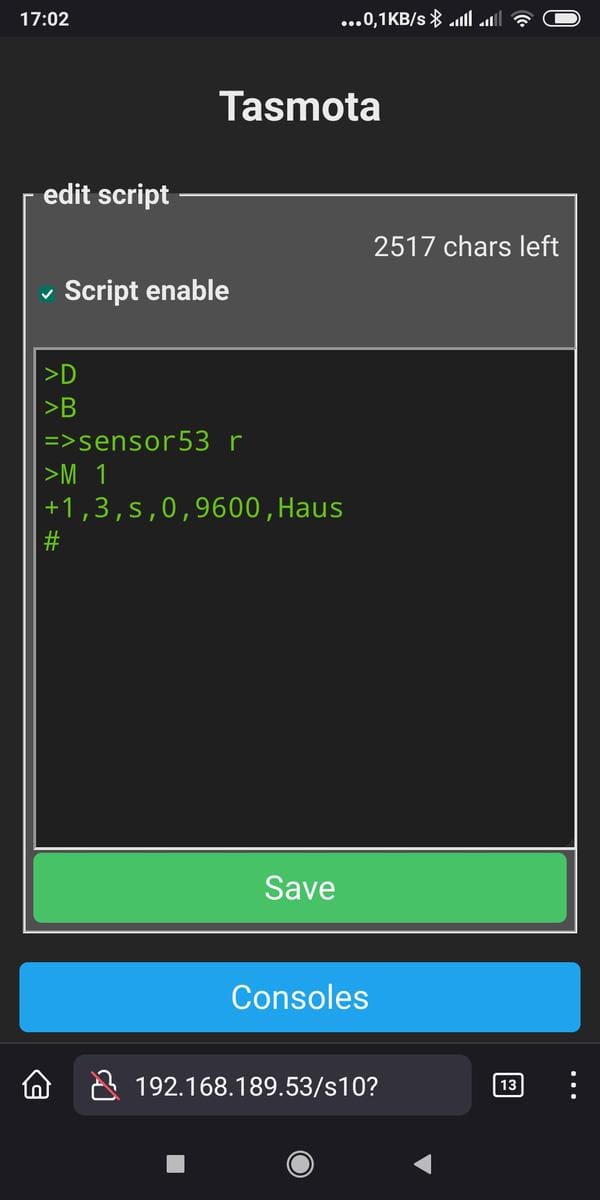
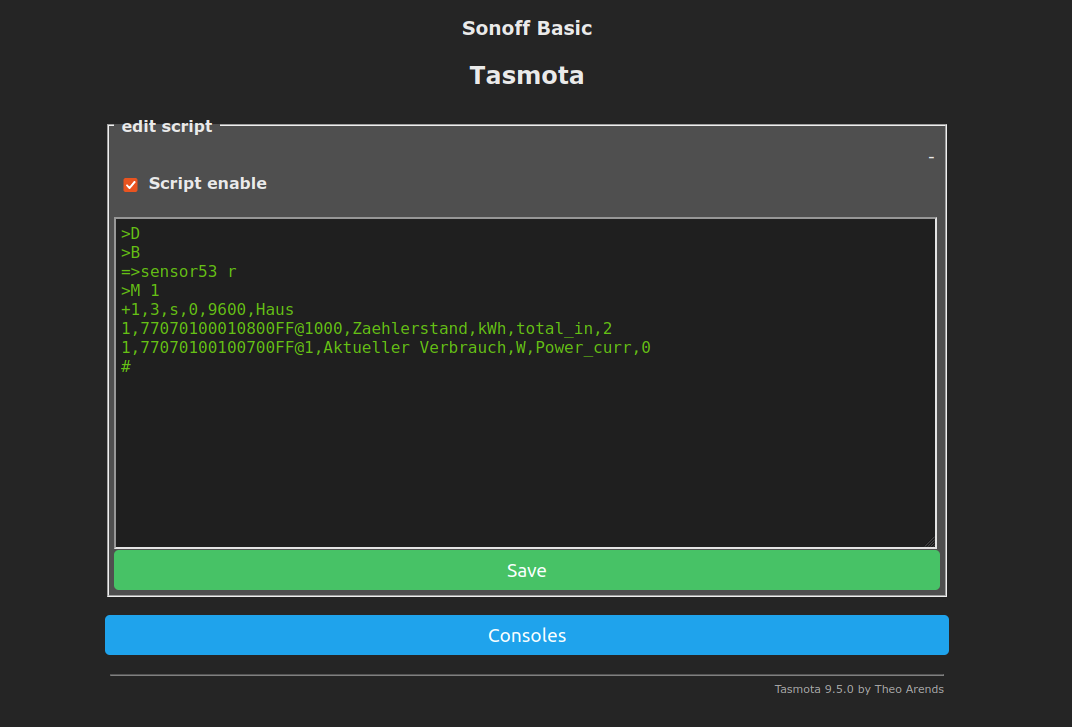
–> „Edit Script“. The following screen is normal. On this screen we have to activate the sensor on the ESP.
Delete this script and enter the following script:
>D
>B
=>sensor53 r
>M 1
+1,3,s,0,9600,house
Just accept this for now. This script should run with the usual household electricity meters in Germany. Should. I explain it in more detail below, but here the sensor is activated and set to port 3. It communicates with the SML protocol at 9600 baud. –> „Save Once this has all worked, we go down to the basement with the phone in hand and stick the reader head on the electricity meter.
Aligning the WiFi smart meter
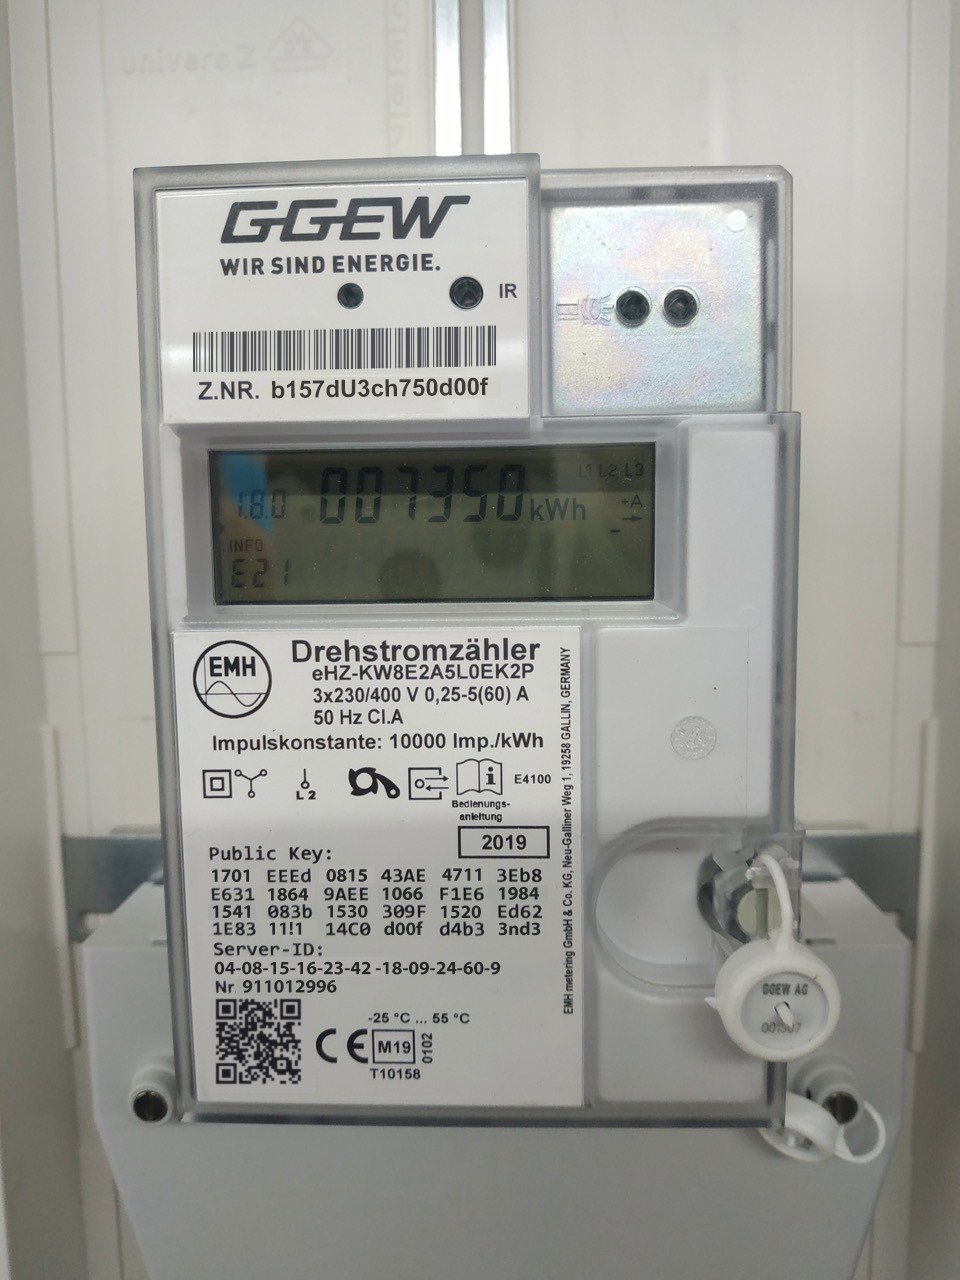
The reading head has a strong magnet inside, so it will be centred fairly precisely over the IR diodes on the electricity meter. On our electricity meter, it fits exactly into the (square) recess on the meter. Great. 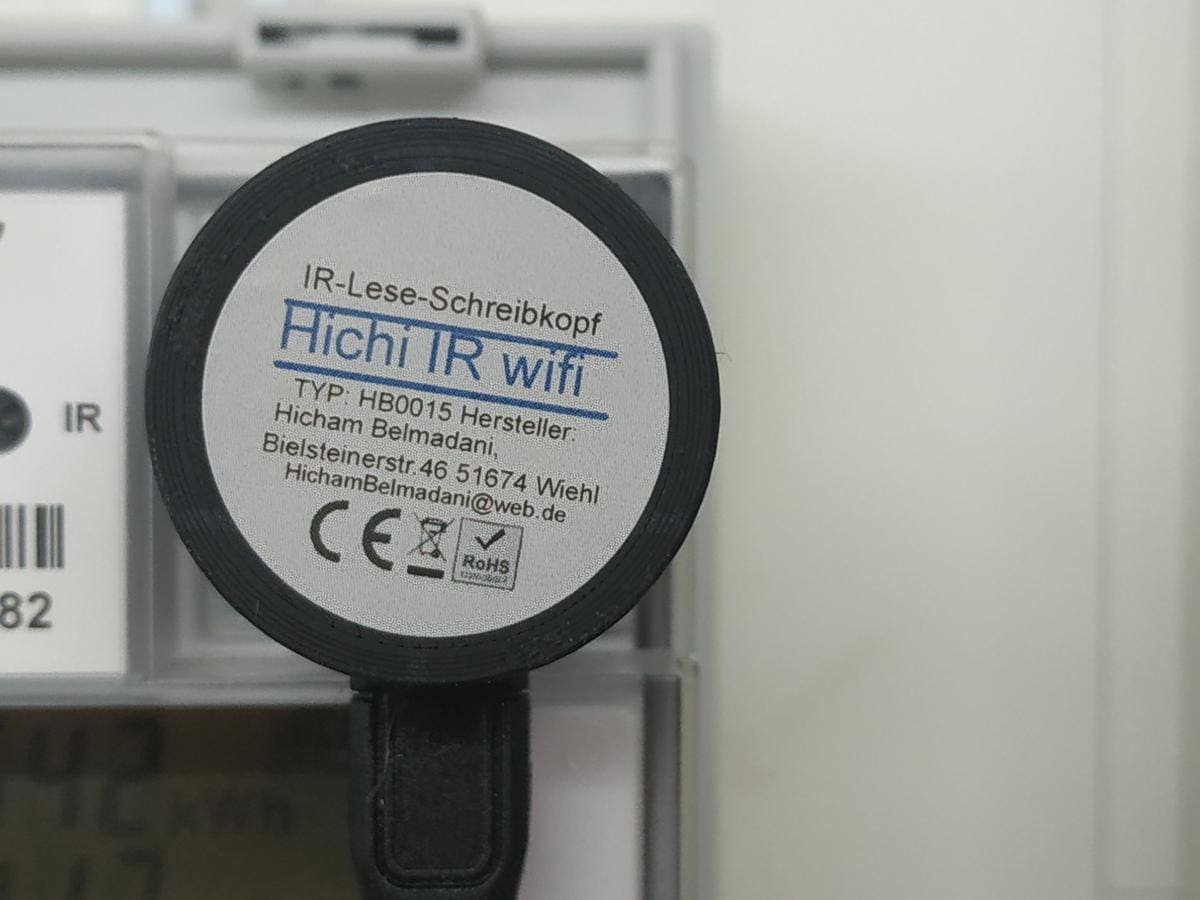
The old USB reading head used to sit there. The new one is not significantly bigger. I stood in front of the counter with my mobile phone and entered …
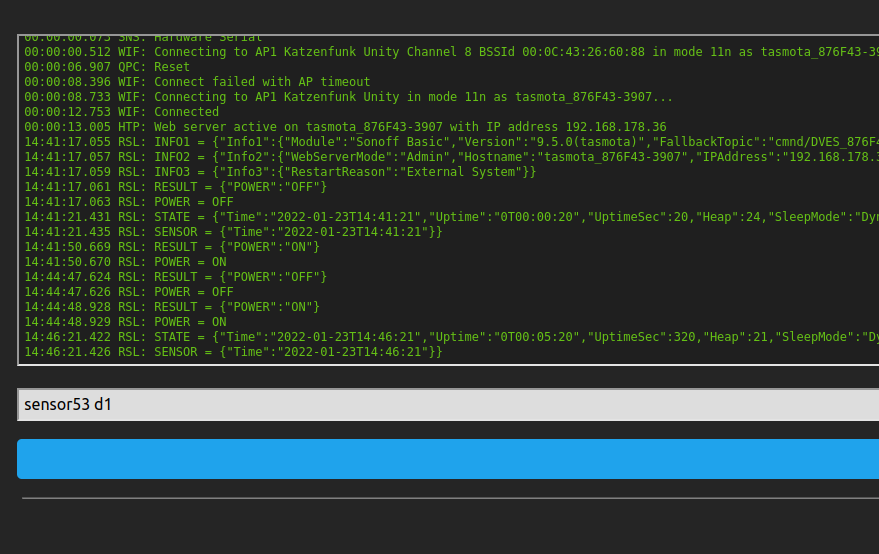
–> „Console“ ..
enter the following command:
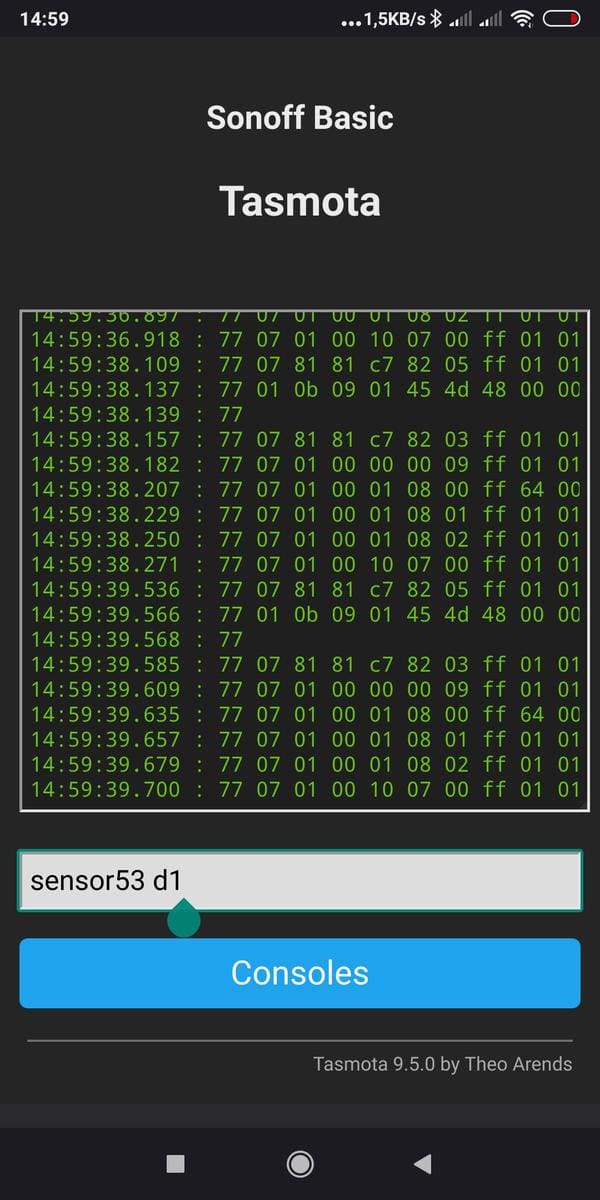
sensor53 d1
Now you should actually see the data stream of the counter. But nothing happened!
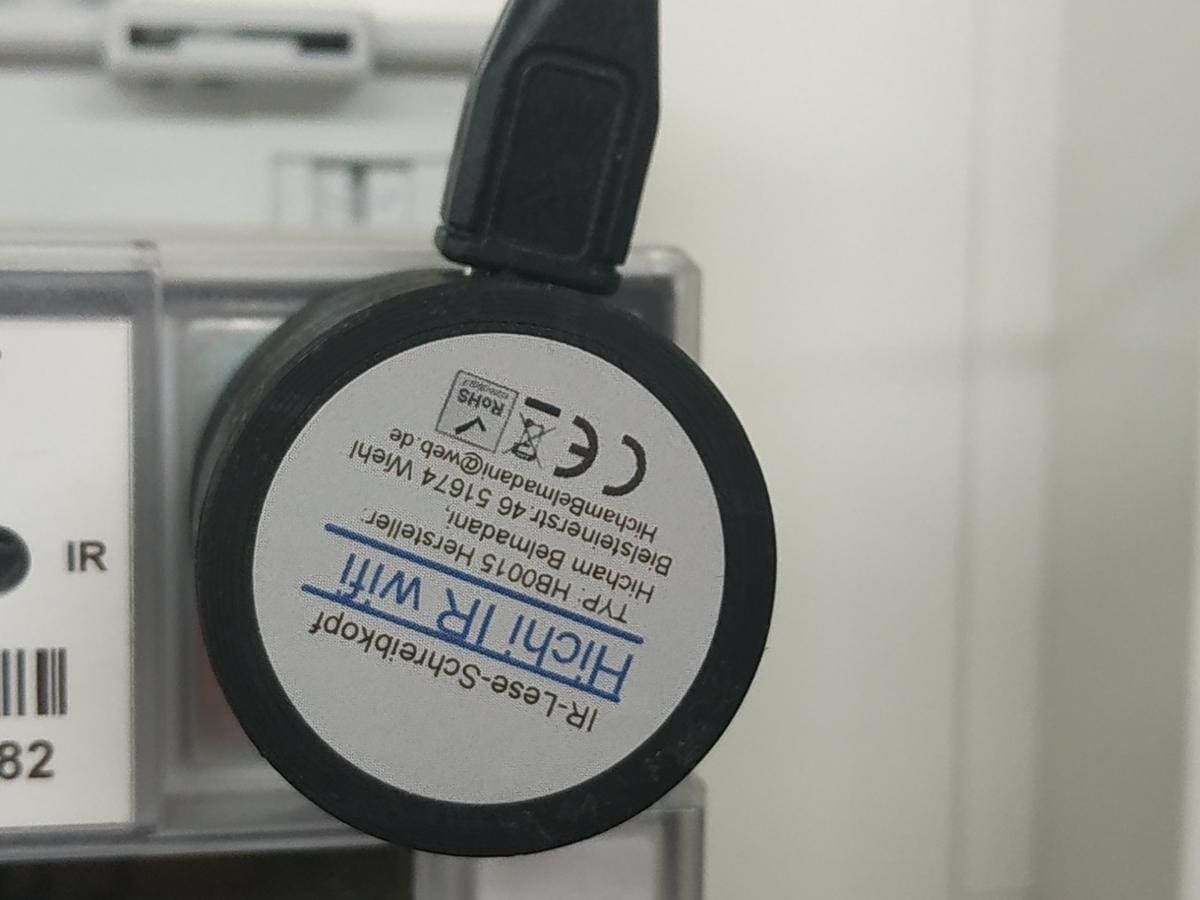
Yes, the lid with the sticker is not horizontal with the LEDs, but when the plug is facing down, the LEDs are in the „water“ Strange … wait a minute ..
Could it be that … I turned the read head 180 degrees and the data stream appeared on the mobile phone display!
The thing is upside-down! With the corded reading head, the USB cable was still pointing downwards. It was probably hanging over the display for some users. I turned the cover so that the writing on the reading head could be read, because order is a must! :-) Great. So far, the head is running, quickly back to the computer! Note:If you have no success here, please consult the manual of your electricity meter and check which transmission protocol it uses.
Analysing the data stream
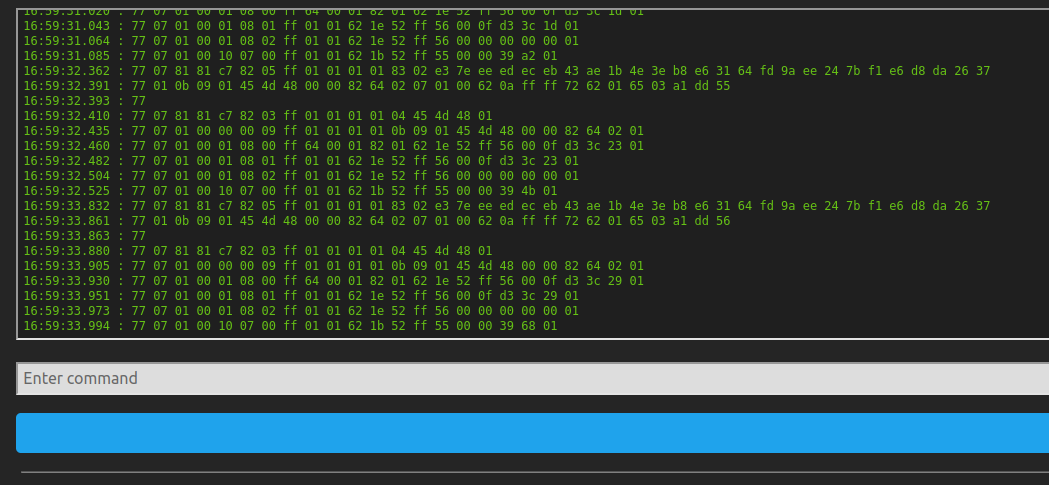
If you enter „sensor53 d1“ in the console of Tasmota, a jumble of data will now appear. Reminiscent of the matrix. :-)
Bad, isn’t it? :-) We look closer and see a pattern:
77 07 81 c7 82 03 ff
77 07 01 00 00 09 ff
77 07 01 00 01 08 00 ff
77 07 01 00 01 08 01 ff
77 07 01 00 01 08 02 ff
77 07 01 00 10 07 00 ff
77 07 81 c7 82 05 ff
77 01 0b 09 01 45 4d 48
All lines start with this again and again! But the data behind it changes. These are the meter readings.
Consult the instructions!
You must now look for the instructions for your meter on the net. I googled for the type number of our meter:
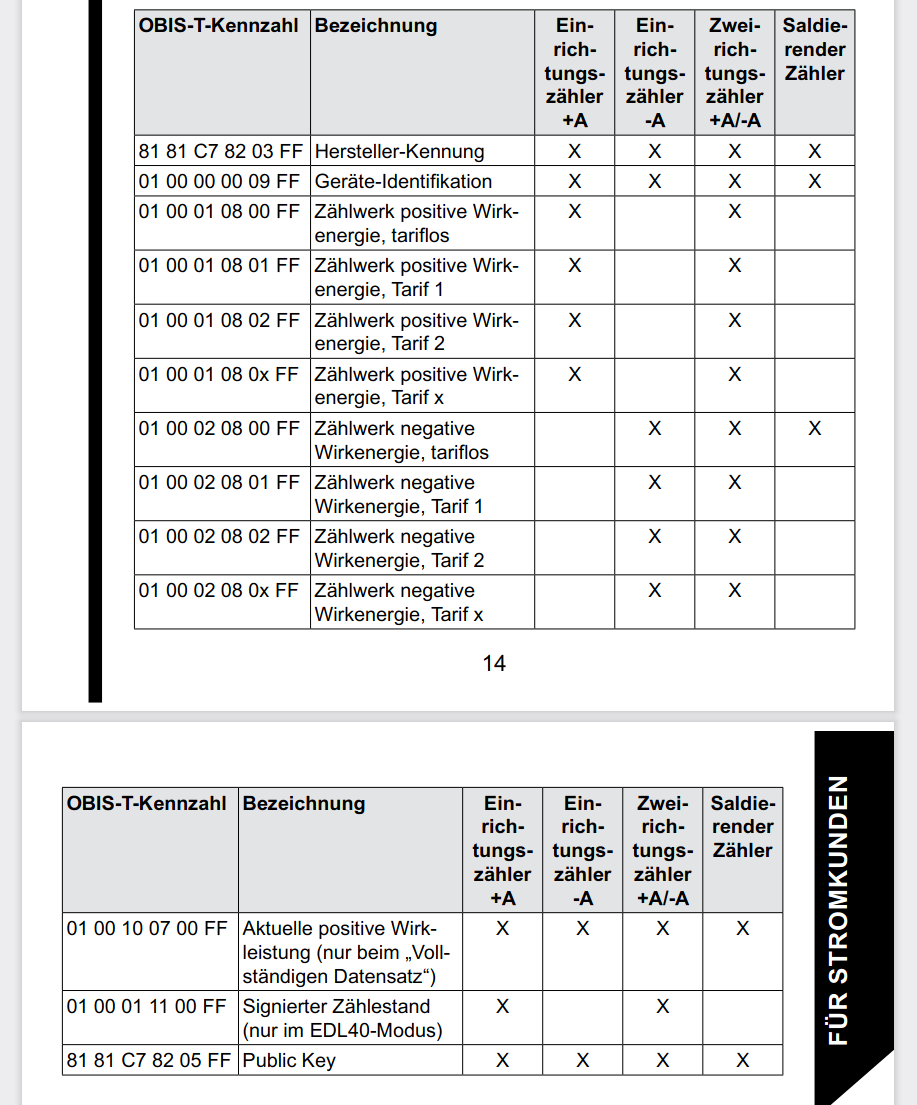
„eHZ-KW8e2a …“ that will have to do. Bingo! There is an EMH product page for the meter! Under Downloads, I found the instructions with the parameters for data transmission. We are interested in the setup counter values here, because there is only a unidirectional D0 interface at the front of the unit.
Perfect!
Get an overview!
In a text editor, I copied the above-mentioned number blocks from the Tasmota console so that I knew which data package had which task. Then I looked at the manual and wrote it down:
77078181c78203ff Herstellerkennung
770701000009ff Device identification
77070100010800ff Counter, positive active energy, tariffless
77070100010801ff Totalizer, positive active energy, tariff 1
77070100010802ff Totalizer, positive active energy, tariff 2
77070100100700ff Actual positive active energy
77078181c78205ff Public key
77010b0901454d48 not documented?
All this is transmitted. Manufacturer ID, device ID, different tariffs? I don’t need all that. I want to see the meter reading and the current consumption!
Sift it out!
The following packages remain:
77070100010800ff
77070100100700ff
The first is the meter reading, the second the current consumption.
Format correctly!
This must now be formatted sensibly. You can find more details on this topic on GitHub in the documentation. Here is my line for the counter reading:
1,77070100010800FF@1000,Zaehlerstand,kWh,total_in,2
Explanation
1 (first counter) 77070100010800FF (data packet involved) @1000 (I have no idea at all. All scripts use @1000 for the meter reading and @1 for the instantaneous consumption) Zaehlerstand (the name for MQTT and for the display in the webend) kWh (name for the definition of the read value) total_in (common name for the incoming current) 2 (transmit two decimal places of the value) Here comes the script, it will become clearer to you:
Script
For the meter EMH, eHZ Generation K I created this Tasmota script:
>D
>B
=>sensor53 r
>M 1
+1,3,s,0,9600,house
1,77070100010800FF@1000,Zaehlerstand,kWh,total_in,2
1,77070100100700FF@1,Aktueller Verbrauch,W,Power_curr,0
#
Explanation of the script
Definition as Smarmeter
>D (Script) >B (Boot) =>sensor53 r (Smartmeter, reset) M 1 (Meter, counter number, e.g. for additional feed)
Parameter meter 1
+1 (counter 1) 3 (GPIO number of the ESP in the Hichi read head, here must always be „3“!) s (type of interface, here: SML binary smart message coding) 0 (counter without pull-up) 9600 (baud rate) House (prefix for WebUI and MTTQ, maximum seven digits, freely assignable) A heat flow meter would be called „Waerme“ or „Heizung“, for example.
MQTT
Here you define the data as they should be displayed in ioBroker. The first packet that the electricity meter „house“ sends is the variable „total_in“, which is displayed in the unit „kWh“.
Almost done!
Now the script under —> Consoles —> Edit Script.
Do not forget! Check be:
Script enable
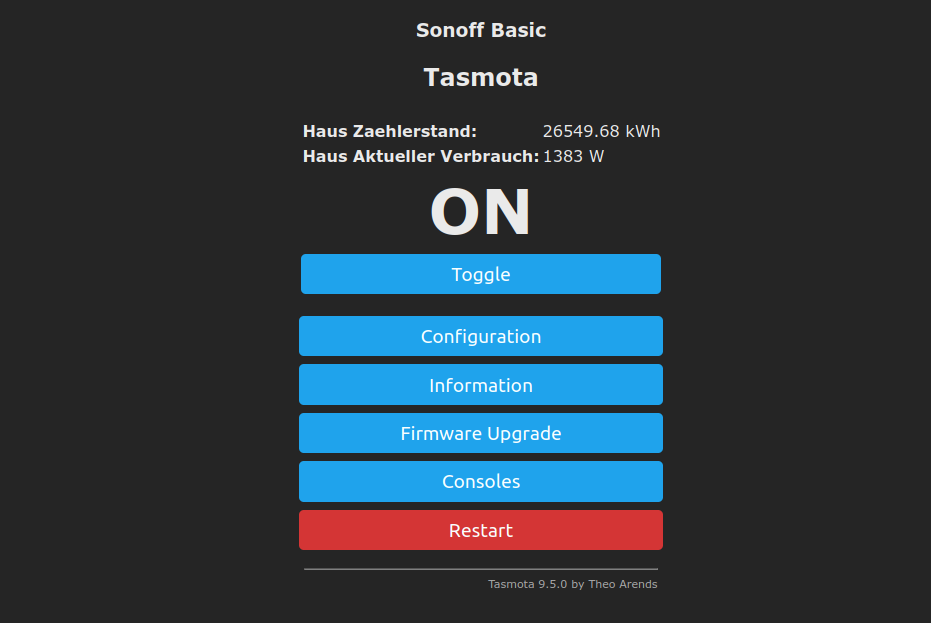
Save and return to the main menu. Do the meter reading and the current consumption already appear there?
Great, otherwise we now finally click on „Restart“.
Configure MQTT
We enter the IP and the access data of our host under –> Configuration –> MQTT Configuration. This is the SmartHome centre, for example your ioBroker. There you can now receive, save and process the data of the electricity meter with the Sonoff adapter (or the MQTT adapter). You have already configured the MQTT data in the script: Watt, kilowatt, sources, name. Then the data should come in automatically. This works like with the water meter: Integration in ioBroker (MQTT) – or as with the window contacts: Install Sonoff adapter, pp (Sonoff adapter).
And what about the water meter?
No problem either: make the water meter smart for 20 euros.
Further links
MSX-FAQ (Basics about the hardware of a reading head) MSX-FAQ (Smart Message Language protocol explained) BSI (Technical Guideline of the SML of the BSI)
Hallo, den beitrag finde ich interessant .. aber der Link zum „Hichi WiFi reading head“ auf amazon geht nicht mehr. Gibt es den noch irgendwo zum kaufen?
viele Grüße
Hermann
Wie kamst Du auf den englischen Artikel? Habe es im deutschen geändert, der hie folgt, wenn die automatische Link-Prüfung den Link meldet. :-)
Vielleicht könnt ihr mir bei meinem Problem mit dem Smart Meter Stromzähler ESP01 helfen. Ich benutze den Hichi WIFI-Lesekopf mit Tasmota zum Lesen, und er zeigt mir die Zählerstände immer wieder mal mit einer Null an. Ist es in Tasmota nicht möglich, den Zählerstand zu prüfen und den Wert nur bei positiver Veränderung zu aktualisieren? Ich hoffe, Sie könnt mir helfen! Mit freundlichen Grüßen Lutz Müller
Das ist mein Code:
>D
;Die Kommentare im Code müssen immer am Zeilenanfang stehen und nie hinter einer Funktion.
scnt=0
res=0
pcurr=0
xTotal_in=0
xHT_in=0
xNT_in=0
xTotal_out=0
xHT_out=0
xNT_out=0
>T
curr=SML#Total_in
pcurr=0-SML#Power_curr
xTotal_in=SML#Total_in
xHT_in=SML#HT_in
xNT_in=SML#NT_in
xTotal_out=SML#Total_out
xHT_out=SML#HT_out
xNT_out=SML#NT_out
>S
;curr=curr*(-1)
;print pcurr %pcurr%
if xTotal_in!=0
then
print Total_in %xTotal_in%
endif
if xNT_in!=0
then
print NT_in %xNT_in%
endif
if xHT_in!=0
then
print HT_in %xHT_in%
endif
if xTotal_out!=0
then
print Total_out %xTotal_out%
endif
if xHT_out!=0
then
print HT_out %xHT_out%
endif
if xNT_out!=0
then
print NT_out %xNT_out%
endif
if upsecs%tper==0
then
if pcurr>260
then
;=>WebSend %url% POWER1 ON
endif
if pcurrWebSend %url% POWER1 OFF
endif
endif
>B
->sensor53 r
tper=10
>F
scnt+=1
switch scnt
case 10
scnt=0
ends
;>W
>M 1
+1,3,o,0,300,SML,1,30,2F3F210D0A,063030300D0A
;1,0.0.0(@1),Meter No./:,,Meter_number,0
;1,0.1.0(@1),Rückstellz.,,RSZ,0
;1,0.9.1(@#),Zeitpunkt,Uhr,hhmmss,0
;oder
;1,0.9.2(@#),Gerätedatum,Tag,JJMMTT,6
1,=h ———— Bezug ————
1,1.8.0(@1),Wirk Bezug ET,kWh,Total_in,16
1,1.8.1(@1),wktgs. 6-22°° Uhr,kWh,HT_in,16
1,1.8.2(@1),ab Sa13°°-Mo6°° Uhr,kWh,NT_in,16
;1,=h ———— Bezug ————
1,1.6.0(@1),Aktuelles Max IN,A+,Max_latest_in,4
1,1.7.0(@1),Aktueller Verbrauch,W,Power_curr,3
1,=h ——– PV-Modul ————
1,2.6.0(@1),Wirk Lieferung Max,kW,Max_latest_out,3
1,2.8.0(@1),Wirk Lieferung ET,kWh,Out,16
1,2.8.1(@1),Wirk Lieferung T1,kWh,Out_HT,16
1,2.8.2(@1),Wirk Lieferung T2,kWh,Out_NT,16
;1,=h ——– PV-Modul ————
1,2.7.0(@1),Überschusseinspeisung,W,P_out,3
1,=h —– Blind Leistung T1 ————
1,3.8.1(@1),Bezug,kvarh,R_in,3
1,4.8.1(@1),PV-Modul,kvarh,R_out,3
1,=h ———— Ampere ————
1,91.7(@1),Stromwert N.,A,I_N,2
1,31.7(@1),Stromwert L1,A,I_L1,2
1,51.7(@1),Stromwert L2,A,I_L2,2
1,71.7(@1),Stromwert L3,A,I_L3,2
1,=h ———— Voltage ————
1,32.7(@1),voltage level L1,V,V_L1,2
1,52.7(@1),voltage level L2,V,V_L2,2
1,72.7(@1),voltage level L3,V,V_L3,2
1,=h ———— Frequenz ————
1,14.7(@1),Hz,Hz,Hz,2
;1,=h ———— kum ————
1,1.2.0(@1),Kum. Max,A+,Kum_in,2
1,2.2.0(@1),Kum. Max,A-,Kum_out,2
1,1.4.0(@1),lauf. Max,A+,Lauf_in,2
1,2.4.0(@1),lauf. Max,A-,Lauf_out,2
1,3.7.0(@1),reactive power Q+,kvar,Q_in,3
1,4.7.0(@1),reactive power Q-,kvar,Q_out,3
#
danke für den Beitrag, ich hatte den Lesekopf nicht korrekt positioniert und dein Hinweis „sensor53 d1“ hat mich gerettet.