To read our electricity meter, it doesn’t take much. Above all, it does not need expensive equipment. Who wants to buy „professional“ adapters for the electric meter, gets easily a hysterical laughing fit, because they call up full three-digit buzzers. I cannot financially represent this in front of myself, so a DIY solution comes to use. But is it any good?
Inhalt:
Shopping list
In general, we need the following things:
- Read head
- Raspberry Pi Zero
- micro SD card, 8 GB
- Micro OTG adapter
- Micro USB power supply
- Case
Or if using the brand new WiFi Tasmota read headonly:
- Read head
- USB power supply
The packages
I have prepared something, so you don’t have to search for your desired package. For the work I took the liberty to set affiliate links. This means that nothing changes for you in the price, but I receive a tiny (!) Commission. If you order through them, you help me to be able to write such tutorials in the future. Thank you for your support!
ATTENTION: If you use a Zero, there might be some problems. Please note Sacha’s comment below this article. He followed these instructions, but it didn’t work. He had to set a symlink from his newly installed node in the home directory(!) to /usr/bin, so that IOBroker could find the node.
NEW!
The AIO-I-won’t-tinker package! (29,- Euro) Don’t want to set up and configure a Raspi with ioBroker? Just put the read head on the power meter, USB power supply in, configure Tasmota, done.
- Hichi WiFi reading head with Tasmota((advertising)): 29 Euro
But you still need
- Micro USB power supply((advertising)): 2 A: 4 Euro
All in all: 34 euros. If you decide for this solution, there is no need to configure a slave IO broker! The read head transmits the received data directly via MQTT! Here you can find a dedicated manual: Configure WiFi Smartmeter with Tasmota.
Zero-Set for hobbyists (24,50 Euro)
You are a hobbyist and your drawers are filled with memory cards, adapters and power supplies? You print out your own cases with the 3D printer? Great, that will be cheap!
- Read head((advertising)): 18,50 (ready built)
- Raspberry Pi Zero((advertising)): 6 Euro
Total: 24,50 Euro But you still need
- microSD card 8 GB
- Micro OTG adapter
- Micro-USB power supply
- Case
Zero set for beginners (40,50 Euro)
You don’t have a drawer with very basic electronic chunks?
- Read head((advertising)): 18,50 (ready built)
- Raspberry Pi Zero((advertising)): 6 Euro
- Sandisk microSD card((advertising)), 16 GB, Class 10: 5 Euro
- USB OTG adapter((advertising)): 2 Euro
- Micro USB power supply((advertising)): 2 A: 4 Euro
- Case((advertising)): 5 Euro
Total: 40,50 Euro The micro-SD card can also be 8 GB, which is plenty. Only getting something new like that is tricky. We have to pay 16 Euros extra, but we also have everything we need to get started right away.
Zero-Set all-round carefree (58.50 euros)
- Read head((advertising)): 18,50 (ready built)
- Raspberry Pi Zero set((advertising)): 38 Euro
- USB OTG adapter((advertising)): 2 Euro
Total: 58,50 Euro Yes, 18 Euro surcharge compared to buying the single components. Shouldn’t sets be cheaper? Well, a micro-HDMI adapter is still included here.
Upgrades through bottlenecks
Due to Corona, the prices not only for building materials but also for semiconductors are rising. The above prices can already be much higher. The Zero is also often out of stock. The next largest model still available is the 3A+. Let’s see what we have to pay here.
3A+ for hobbyists (43.50 Euros)
- Read head((advertising)): 18,50 (ready built)
- RaspberryPi 3A+((advertising)) for 25 Euro
Total: 43,50 Euro But you still need
- micro SD card 8 GB
- Micro OTG adapter
- Micro-USB power supply
- Case
19 Euro surcharge to the Zero? That’s steep, but you get a lot more bang for the buck to realize many other projects with it. MicoNAS? Weather station? ioBroker server? Sure, it’s not a 4, but even the 3 can do something.
3A+ for beginners (67,50 Euro)
- Read head((advertising)): 18,50 (ready built)
- Rasperry Pi 3A Set((advertising)): 49 Euro
Total: 67,50 Euro Compared to the Zero Beginner package, this corresponds to a surcharge of 27 euros. That’s steep! But in return, there is a much higher performance, so that you can read several electricity meters without any problems. It is also easy to install an ioBroker on the Raspi, which takes the load from the main computer and possibly even stores the data from the water meter.
4B DIN rail set (125,50 Euro)
Money does not play Rolex! What makes the world go round? Speed and Power! Future oriented power! The Raspi must be installed in the meter cabinet! (Whether the WLAN still works there, I doubt). You like to spend 100 Euro more, simply because you have the money? Here you go, gladly:
- Read head((advertising)): 18,50 (ready built)
- Joy-It rail set Raspberry Pi 4B with 4 GB((advertising)): 96 Euro
- Active heat sink((advertising)) (Important!): 11 Euro
Total: 125.50Euros The professional package at a professional price. Advantage: It looks really professional in the meter cabinet. I would also like to have it, but I am a proven saver. 🙁 With the power of the Pi 4B you can do pretty much anything you can think of, the thing is a small server with real power.
2B Savings Bun Hobbyist Set (38,50 Euro)
Used is cheaper. Used is sustainable and environmentally friendly! Excellent works for example already a Raspi 2, which you can get used with some luck for not even a Zwanni. Mostly with case. With the Raspi 2 you also save the USB OTG adapter and can connect several IR heads or other USB sensors to the thing. For an additional heat meter, or for the whole neighborhood in an apartment building. Thedisadvantage of the 2 is: no WLAN, no Bluetooth. The savings compared to a new 3A+ is also just five euros. If you have a LAN cable at the meter cabinet: good. If not: take the RaspberryPi 3A+((advertising)) for 25 euros (or the above mentioned set).
Total: 38,50 Euro But you still need
- micro SD card 8 GB
- Micro OTG adapter
- Micro-USB power supply
2B Savings Buns Beginner Set (47,50 Euro)
- Read head((advertising)): 18,50 (ready built)
- Used Raspi 2((advertising)) with case: 20 Euro
- Sandisk microSD card((advertising)), 16 GB, Class 10: 5 Euro
- Micro USB power supply((advertising)): 2A: 4 Euro
Total: 47,50 Euro
Suitable electricity meter
And of course we need an electricity meter with a (usually unidirectional) infrared interface. We have one from the eHZ series (generation K) from EMH. This one communicates via the D0 interface, so it provides us with all relevant data in plain text. Therefore we can ignore the pulse constant. 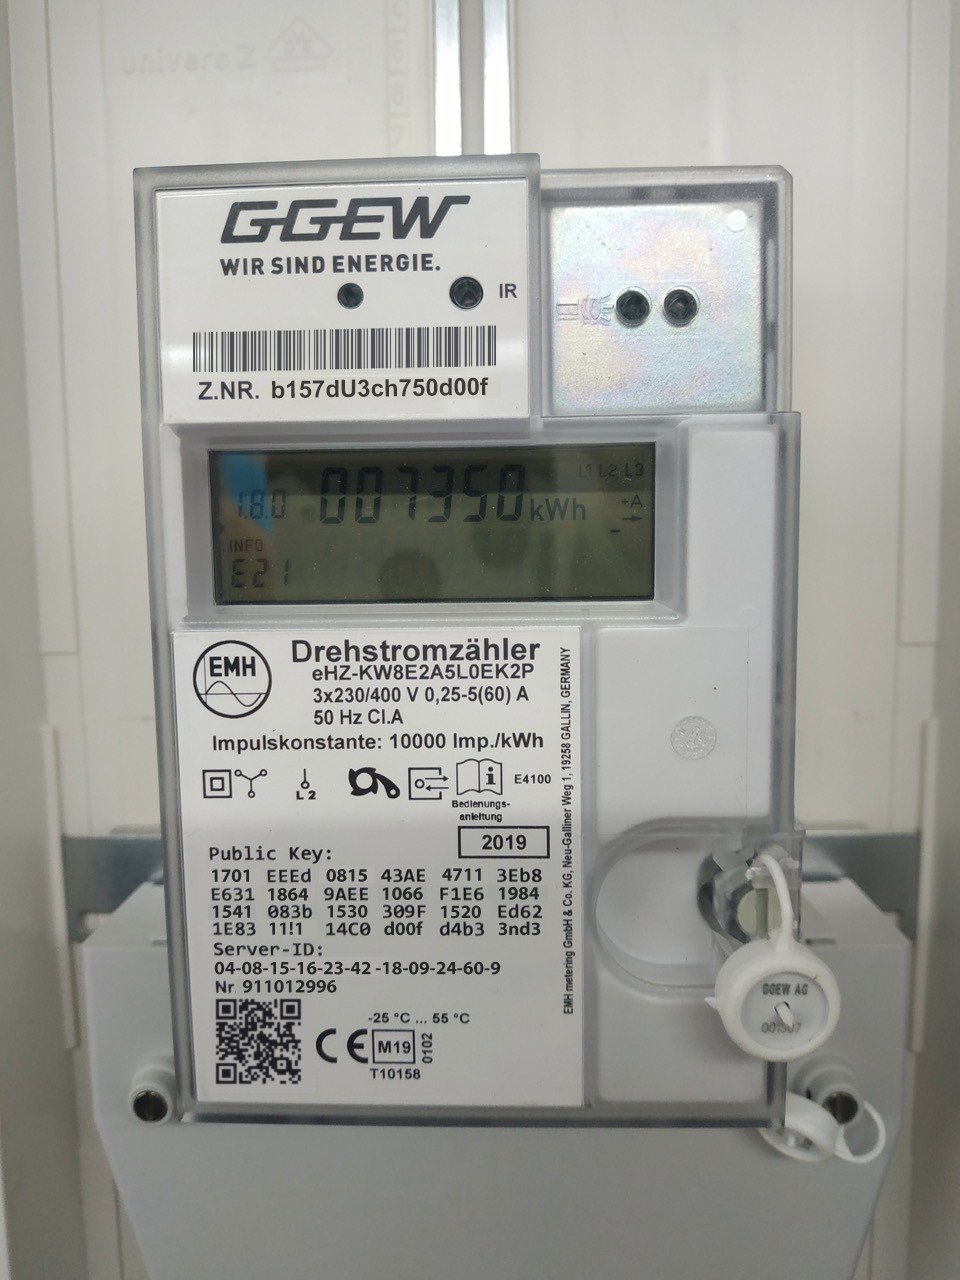 Top right: two IR LEDs Write down the meter number, call the power company and get the activation code on the phone. Then (no joke!) enter it with a flashlight. Shine the flashlight on the LEDs mentioned above (one is a photodiode, it’s clear, isn’t it?) until the display shows PIN. Then, send the first number, pause, the second number, pause, and so on. Instead of pressing the button of the flashlight, you can also swivel it, which is faster. There are also apps for the cell phone that can automatically morse the code with the flashlight LED. Now the meter is ready to output its data. Why this is not set at the factory remains the creamy secret of the utility companies. Waaaas? You don’t have an electricity meter with IR interface? No problem! You can be helped with the smart water meter, which can also be used for the electricity meter. It’s just more tinkering and the door of the cabinet of the sub-distribution probably no longer closes.
Haftungsausschluss
ACHTUNG! NICHT NACHMACHEN!
- Dies ist keine Anleitung!
- Der Artikel dient der persönlichen Dokumentation!
- Dieser Artikel soll nicht die beiliegenden Anleitungen, Einbauhinweise oder Installationsanleitungen ersetzen!
- Dieser Artikel soll einen groben Überblick über die anfallenden Arbeiten ermöglichen.
- Der Artikel erhebt keinen Anspruch auf Vollständigkeit oder gar Korrektheit.
- Hier beschreibe ich, wie ich diese Arbeiten als Laie erledigt habe – nicht, wie man sie korrekt oder nach handwerklichen Standards, Vorschriften oder Gesetzen erledigt.
- Ich lehne jede Verantwortung, Haftung und Gewährleistung ab. Jeder muss selbst wissen, was er macht.
- Einige Arbeiten sind durch Fachfremde nicht zulässig, respektive gesetzwidrig und bedürfen teilweise mindestens der Abnahme durch einen ausgebildeten Berechtigten.
- Einige Handlungen und Arbeiten sind im öffentlichen Bereich (Straßenverkehr, Stromnetz, Luftraum, Internet, etc.) verboten oder verstoßen gegen Lizenzvereinbarungen, was straf- oder zivilrechtliche Konsequenzen nach sich ziehen kann.
- 230 Volt sind tödlich!
- Kein Backup? Kein Mitleid!
- Meine 3D-Modelle sind nur Machbarkeitsstudien, keine geprüften, funktionsfähigen Bauteile.
- Die beschriebenen Tätigkeiten sind in der Folge rein akademischer Natur.
- Bedenke, dass durch Deine Arbeiten Dritte an Leib und Leben gefährdet werden können und Du persönlich dafür haftest.
Mit dem Weiterlesen stimmst Du diesem Haftungsausschluss zu.
Software installation
What do we steam the Raspi with now? Volkszähler: Leaned! Unfortunately the documentation on Volkszähler is historical. Important explanations are missing. Instead, there is one sentence of completely uninteresting information, e.g. how to change the keyboard layout on the Raspi, or that the Volkszähler automatically changes the partition to the size of the SD card. This is information that you don’t need as an end user (especially since the keyboard layout via SSH is completely irrelevant). Explanations about the protocols are missing for this. This has all been written by developers for system electronics engineers, spiced with interjections to absolute Linux noob Basic, because they themselves apparently do not know Linux so well. On the other hand, knowledge of the Minicom is assumed for troubleshooting. The last time I used such stuff was in the early 1990s. Absolutely no word on what it is supposed to do and which parameters to change and how. This only leads to frustration. I wasted a day’s work with the census, especially since their server was down again and again – and so was the documentation. Conclusion: Volkszähler is something for masochists with a lot of time and patience. ioBroker: The revelation! And then I installed ioBroker on the Raspberry. A revelation! What a dream! Restore Raspian Lite image to a micro SD card, monitor and keyboard to the Raspi and with
raspi-config
configure. Most importantly, SSH needs to be set up. Once that’s done, you can access the thing remotely (ssh USER@IPADRESSEDEINESRASPIS, or access it on „Windows“ via PuTTY) and install ioBroker. First Node.js:
 curl -sLf https://deb.nodesource.com/setup_12.x | sudo -E bash -
  sudo apt-get install -y nodejs
Then install ioBroker
curl -sLf https://iobroker.net/install.sh | bash -
If you have a „real“ ioBroker running, you only have to configure it as master and the meter as slave. If not, skip this step. On the master enter the following:
sudo iobroker multihost enable
On the Raspi in the meter cabinet:
 sudo iobroker multihost browse
  sudo iobroker multihost connect
Select the master from the list and you’re done.
Hardware installation
We hang the Raspi near the meter box (the sub-distribution), plug the IR head into a USB port and pin the magnetic head to the electricity meter so that the transmit and read infrared diodes are above those on the meter. 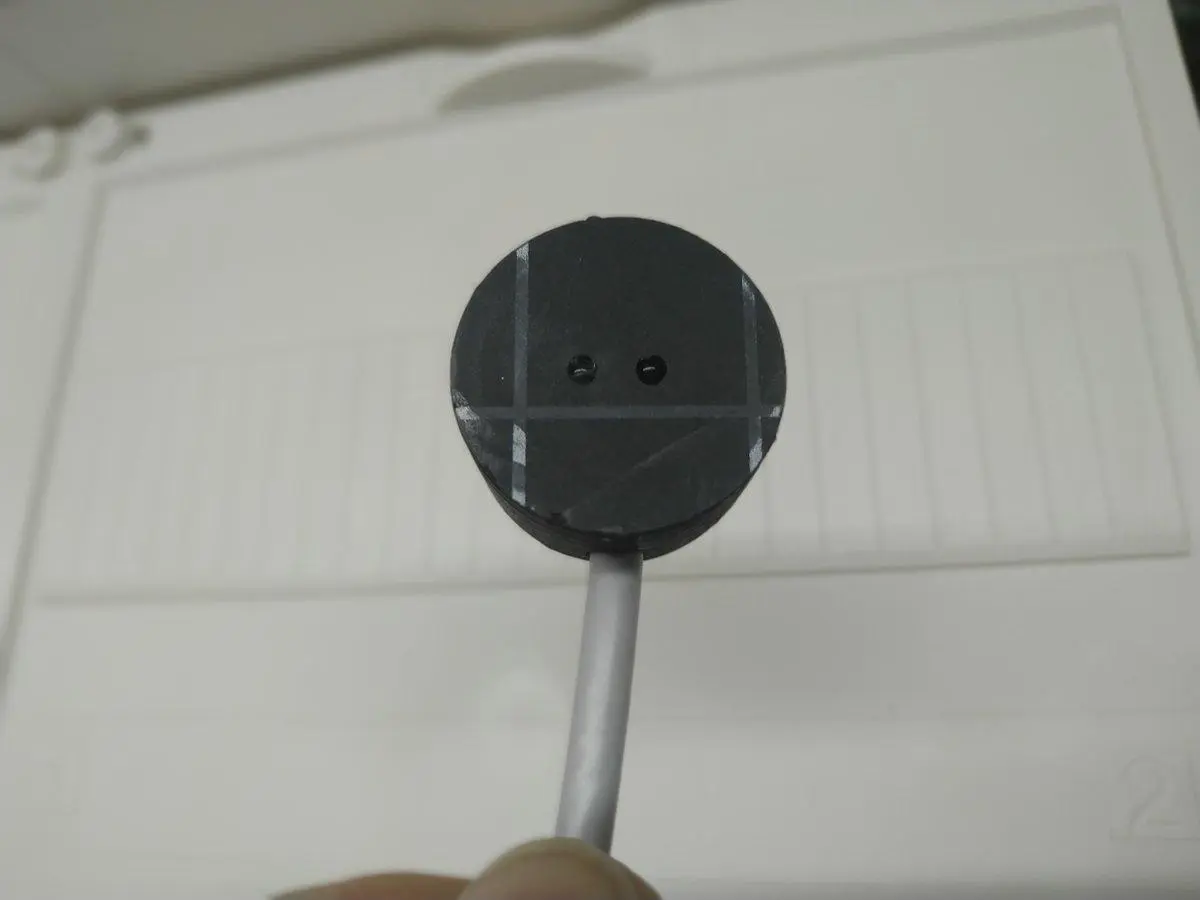 The reader head’s LED and photodiode. Some electricity meters probably still need a prompt before they output data. But we don’t have to worry about that.
 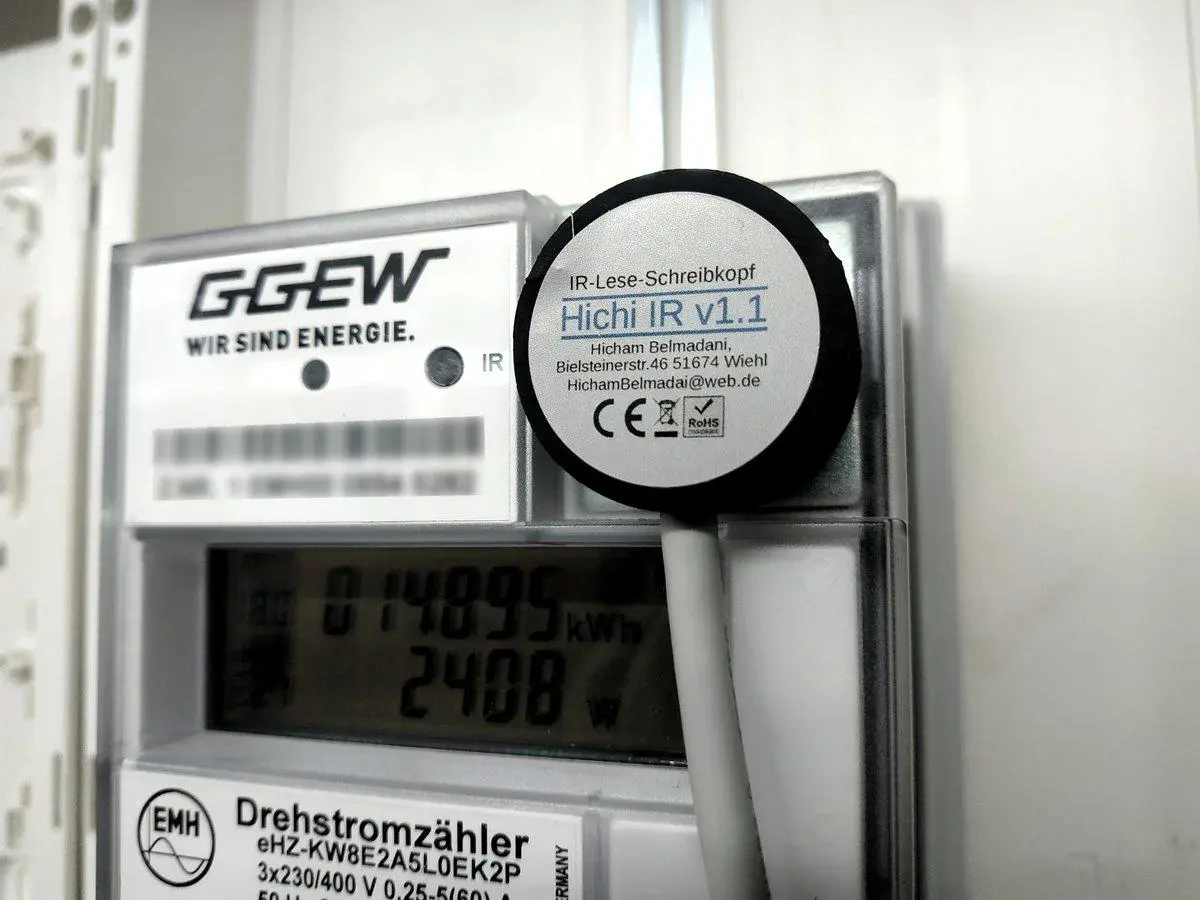 The IR interface of the meter has a built-in metal plate, so you can conveniently attach a magnetic read head. This Hichi IR v1.1 is available on Ebay((advertising)). Excellent quality and a top ebayer. Fast delivery! Gladly again! Everything perfect…. i uh… uuups… 😀
Configuration
The Raspi is still connected to the WLAN or LAN in the basement? Great! Now the ioBroker is accessible under the IP address of your Raspi at port 8081 in the browser. Now we leave the Raspi alone in the dark basement…. We access the web interface of the ioBroker via our browser as mentioned above and install the adapter„Smartmeter devices support„. Type in the search bar at the top, click on the three dots, and click on the + icon. Done. You need all adapters listed here in blue. But only the smartmeter should be missing after the initial installation. Apparently, the installation script of ioBroker is constantly being tweaked, so that the installation scope changes again and again. My installations were equipped differently. This can also be due to the hardware performance of the computers. Smaller systems get a slimmer installation? No idea. It doesn’t matter either.  For reading the electricity meter we only need these blue marked adapters
  If the adapter is installed, it must still be configured. We choose the polling interval, here I have set 5 seconds and the serial interface. I have chosen 8N1 and 9600 baud, this worked with my counter.
 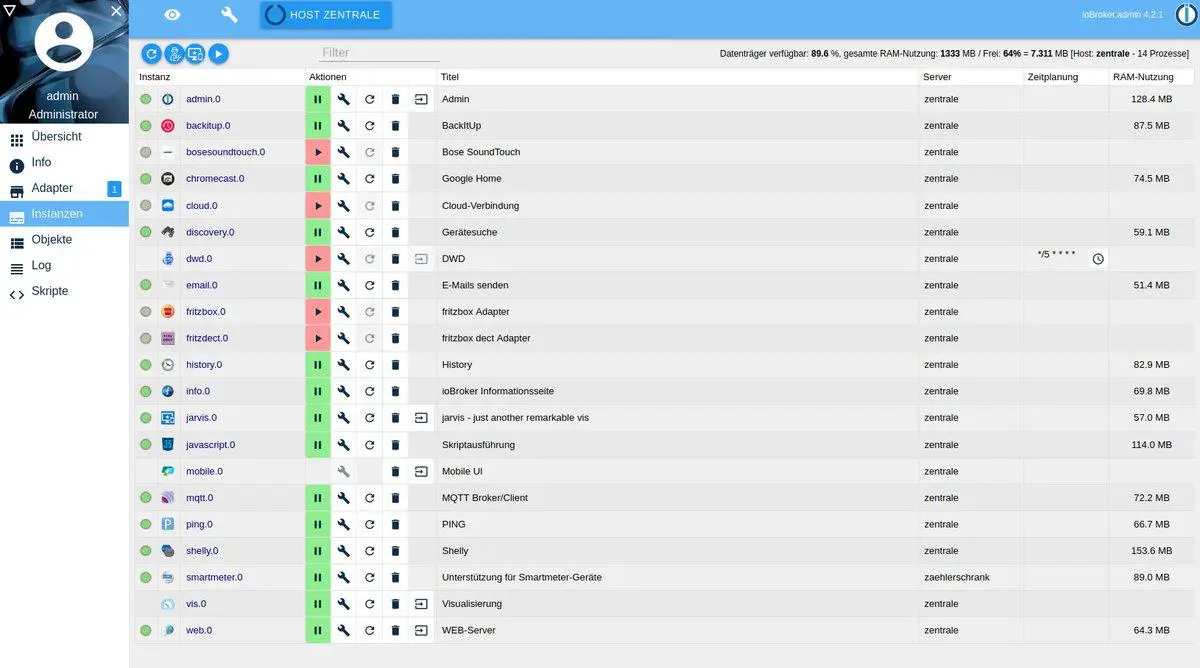 Now we start the smartmeter instance by clicking on the red play icon. After a few seconds this will turn green. God willing. 😀
  To record everything, we have to configure the history adapter. To do this, click on the wrench next to the start button. Well, you see my settings. Activate, only record changes and no automatic deletion. I want to observe this over more than two years. I have left the location as it is. It is a text file in the default. Let’s see if I change this to a real database sometime when I log more data.
 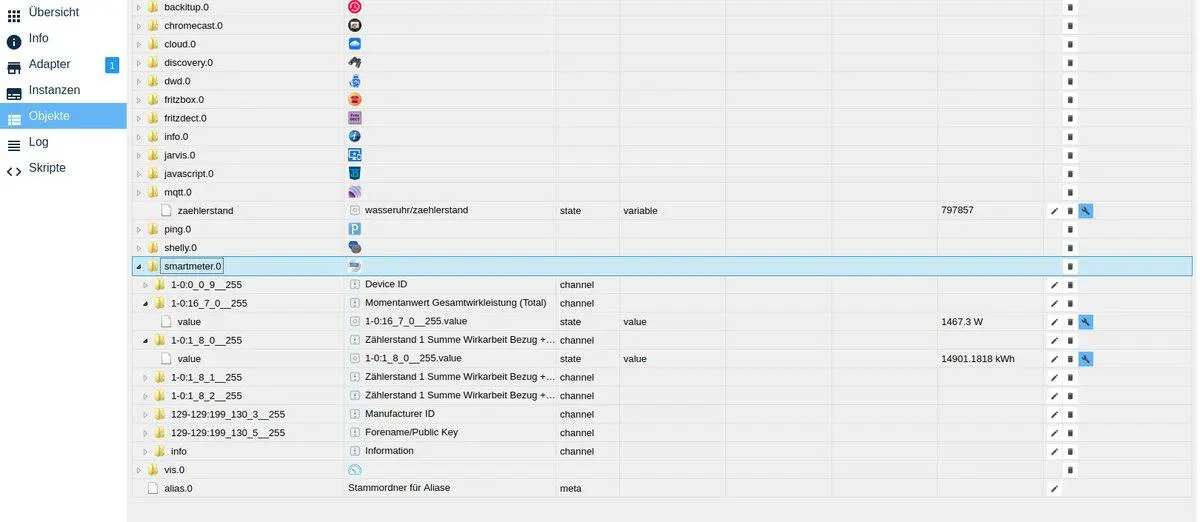 Now we should discover a smartmeter.0 among the objects. Let’s open it up and have a look at what the electricity meter is spilling out. The interesting information for us should be the meter reading and the power currently being drawn. Click on the small wrench and set there analogous to the history adapter. Everything with a blue wrench is recorded.
  Next to the settings, we now also find the„Table“ tab. There are all recorded data in it. That’s it so far. I will not go into how to visualize this. There are many adapters. One of the best known is (still) Flot Diagrams.
  Typical course of an oven. First the heating phase and then always the intermittent heating to maintain the temperature.
  In front of the „oven“ you can see the enormous peak of the heat pump, which usually also has this typical course in our case.
 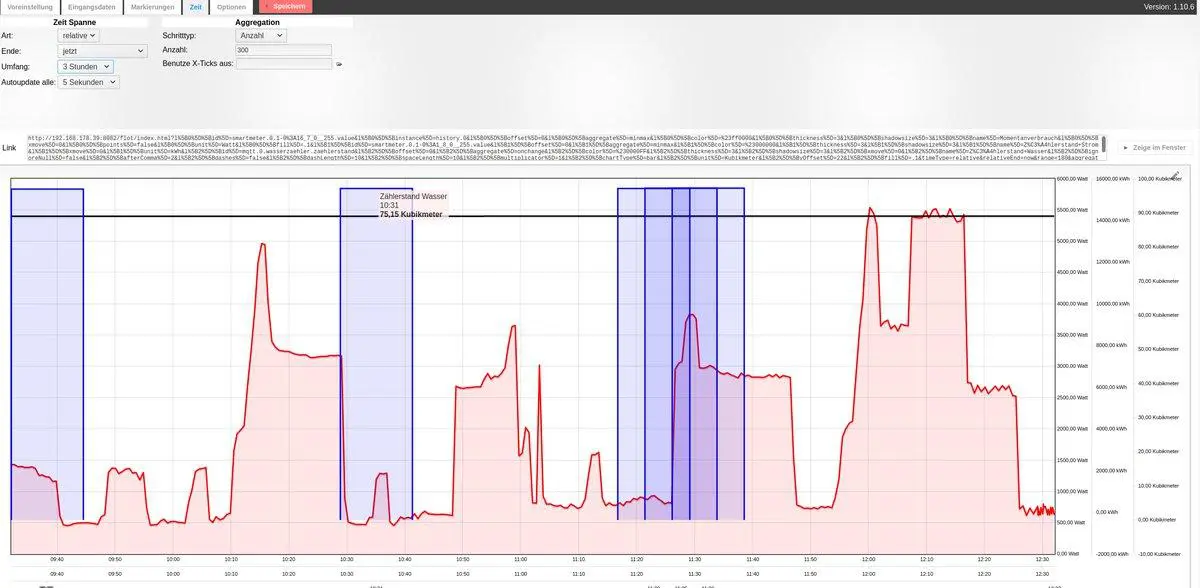 Here is a diagram together with the water consumption, but I’ll write another article about that. Again, you can see the typical mountains of our heat pump, peaking up to 8,000 watts. The heat pump has a heating capacity of 14 kilowatts. Installing a backup solution now would not be a mistake either. Not that the nice collected data are suddenly gone because the SD card in the Raspi burns out, right? Perhaps this would also be interesting for you if you have a vacation home far away, perhaps in another country, and want to measure the power consumption there. Maybe someone steals the power from you? 🙂 With ioBroker you can also send e-mails. With the help of simple scripts you can click together (literally!) a course of action. But again a completely different topic…
And what about the water meter?
No problem: make the water meter smart for 20 Euro.