The sky is falling on your head? Use contact adhesive rather than a helmet. In the past, skies were stretched. That was time-consuming and a job for a saddler. Then some thrifty guy came up with the idea of making the headliner out of pressboard and just gluing fabric on it.
Later, some accountant came around the corner and said that the glue was too expensive… and a few years later the sky falls on your head.
Inhalt:
ATTENTION
I am not liable for any damage you may cause by following these instructions. Errors and omissions excepted If your box burns down, explodes when you operate the central locking, gets torched, gets lead poisoning when you breathe in the soldering fumes, burns a hole in your jumper with the soldering iron, or sticks your hand to your head: I am not to blame! I do not say: „Do it exactly in such a way!“, I say only: „I did it in such a way“. Everyone must know himself, what he does there.
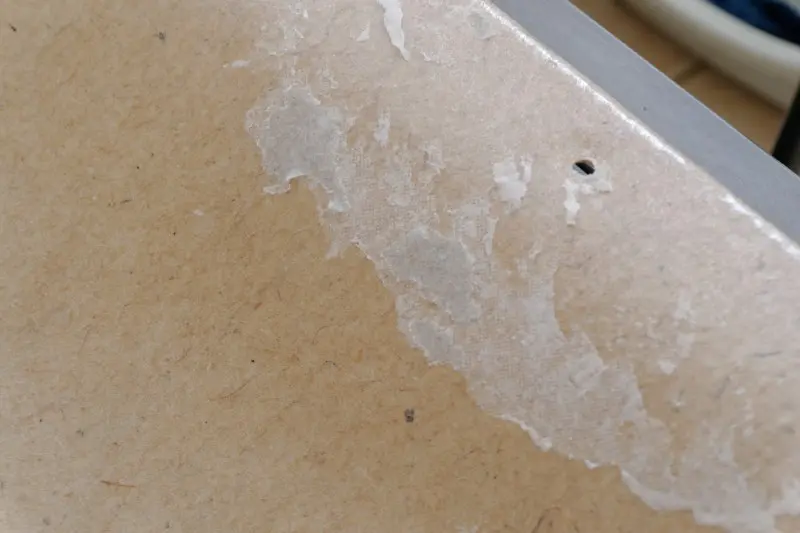
On the Picanto, after 10 years, the fabric on the headliner began to separate from the backing material around the windshield. Attempts with spray adhesive to prevent worse failed miserably. There was no stopping it.
When a dent formed in the centre of the headliner and threatened to destroy headroom, I had to do something. There was a nice report in „Oldtimer Markt“ (a german classic car magazine) about how to renew the headliner – what they can do, I can do too. 🙂 The instructions apply to any car with a headliner of this type.
You need:
- Spirit
- old towel
- a non-hairy, wide brush
- Pattex PCL6C, 650g (enough for a small car)
- Sandpaper
- sharp knife
- sharp scissors
- Headliner fabric of your choice
FAQ
Pattex? That won’t hold! Take headliner glue!
I don’t care. According to the product data sheet , the adhesive is designed for a temperature range of -40 to 110 degrees Celsius. That’s enough, even when the sun is beating down on the roof. Besides, the great headliner adhesive hasn’t held up so well if it doesn’t stick after 10 years, has it?)
Doesn’t Pattex stink terribly?
No, not when it has set. It sets after three days.
Can I also use a thicker (premium) fabric?
I did, and it went easily.
Can I also take normal fabric?
After my experience with the Espace: install sunroofs, I would be careful. The headliner fabric is stretchable in every direction, some fabrics are not stretchable at all, others only in one direction.
With such weaving you will then inevitably get problems (wrinkles, creases) when gluing it on. Furthermore, it is not said that the colour or the fabric itself is UV resistant.
The canopy fabric is also not very expensive. I ordered the headliner fabric from Amazon. Unfortunately, it is too dark and has a blue tint to perfectly match the Picanto gray.
In retrospect, I would have been better off with a black headliner, but that seemed too gaudy at first. Afterwards, one is always smarter. So consider if black (or even an entirely different colour) wouldn’t be an option. Only if the seller guarantees the colour as in the original, then this is not an issue.

(working materials)
Removal
The headliner has been quickly removed.
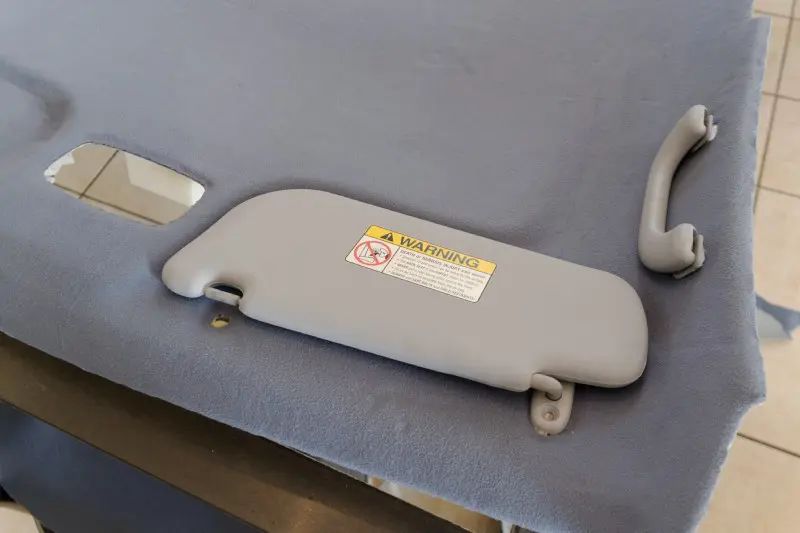
Unscrew all lamps, handles, and the sun visors.
Pull off the rubber seals at the top of the doors and tailgate.
Detach the trim panels on the A-, B- and C-pillars.
A- and B-pillars can usually be pulled off manually, but for the wider C-pillar you may have to resort to a removal kit as described here.
Some headliners are still attached to the roof with additional clips. This is usually the case with vans. Loosen these as well.
Put all screws and clips in the glove box. The headliner will fall down now.
Slant it a bit and pull it out to the tailgate. This is best done by two people. You can try to glue the old fabric back on, but sooner or later, the old glue will dissolve, and you’ll have to start all over again.
So get rid of the crap. Just pull on it and the fabric will come off. There is a thin plastic film between the cardboard and the fabric. Remove this and the remains of the headliner fabric as far as possible.
(Must be removed)
Preparation
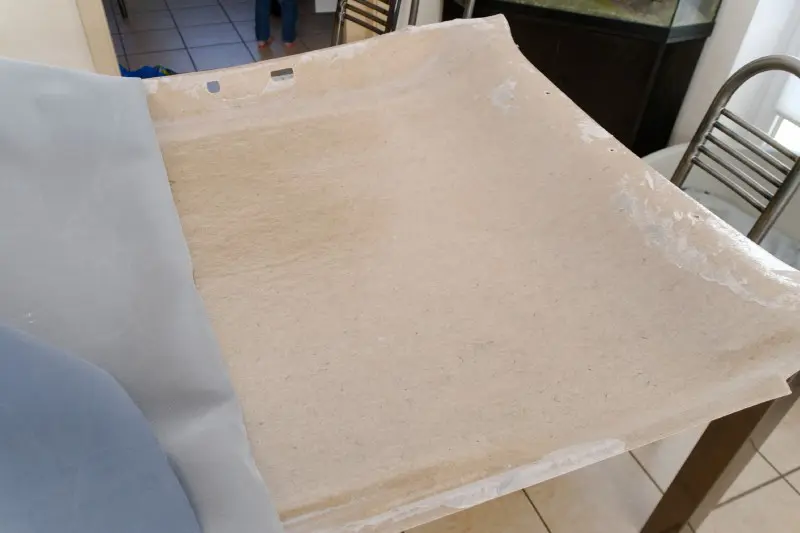
Now use the sandpaper to roughen the headliner a bit and tap or vacuum everything off. It is best to take the headliner inside and lay it on a large table. Outside, the glue simply sets too quickly, depending on the weather.
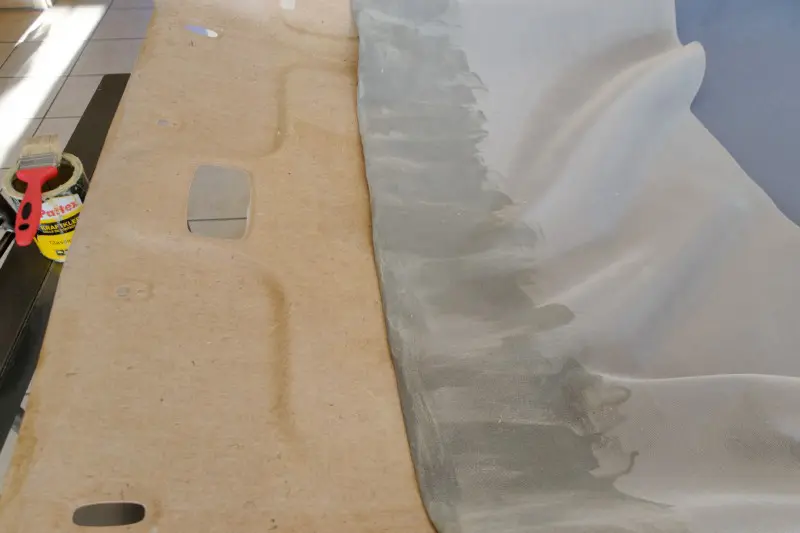
Now clean the canopy with alcohol and a lint-free old towel. It must be free of grease. Align the fabric on the canopy on a trial basis, allowing it to overlap generously.
(Try on)
Quick and clean!
When everything is ready, you’re ready to go. You have to pay attention to the following from now on:
– work fast
– work clean.
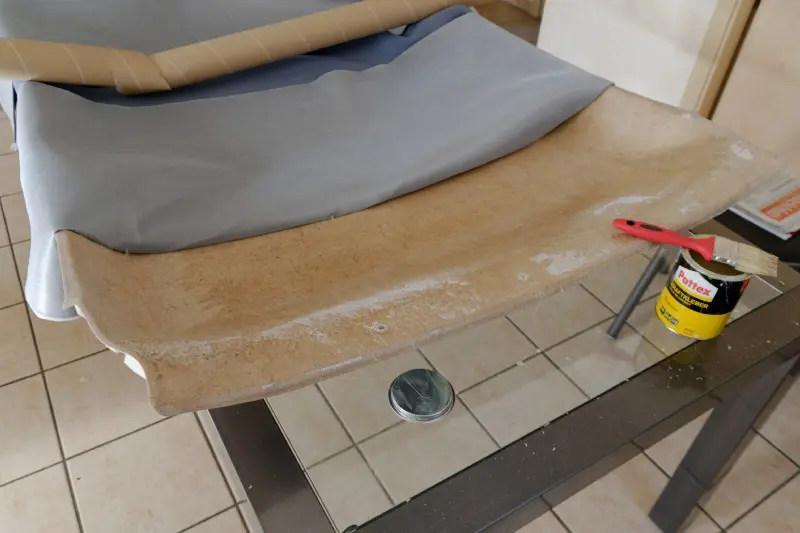
Glue the fabric
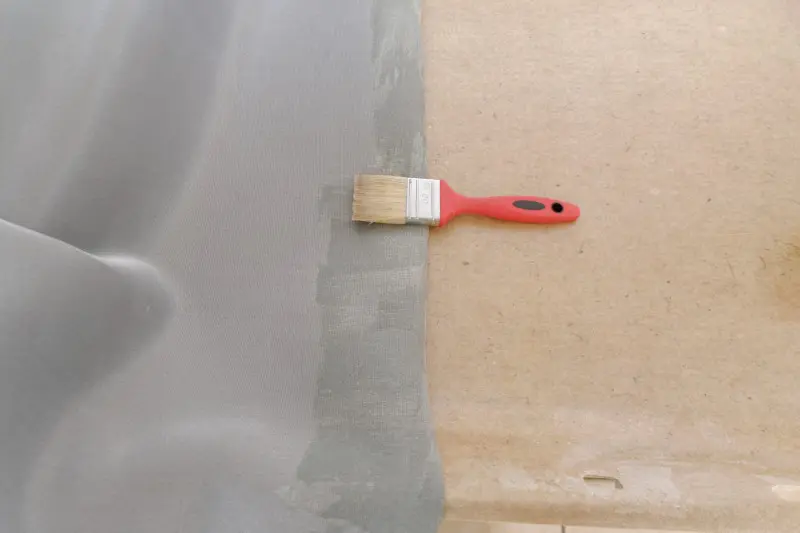
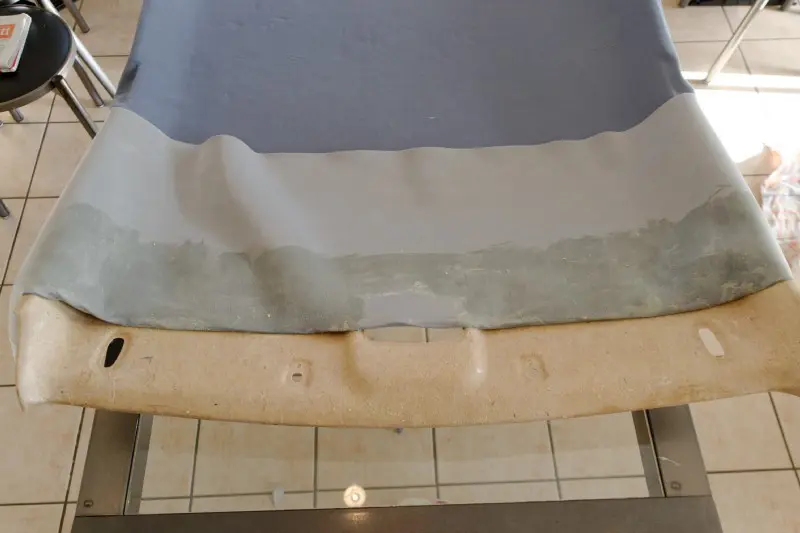
Fold the fabric over on one side. Paint the first 20 cm of the sky and the fabric evenly thin with the brush. Fold back fabric and press everything carefully.
(Still visible: torn off remains of the thin foil) Now fold the fabric over in the other direction and continue working as before, piece by piece.
(Glue headliner on both sides) Apply the glue particularly carefully to beads, edges, and holes. But please do not apply it too thickly and – as already mentioned – evenly.
(Here come the holes!) The front edge, on the windshield, fold over and also glue from on the back of the sky. There is no trim or rubber seal on the windshield that would cover the edge later.
(Almost done!) In the pictures, you can’t see that I also applied the glue to the headliner carrier. The reason is simple: Then it had to go fast. No time to take pictures. 🙂
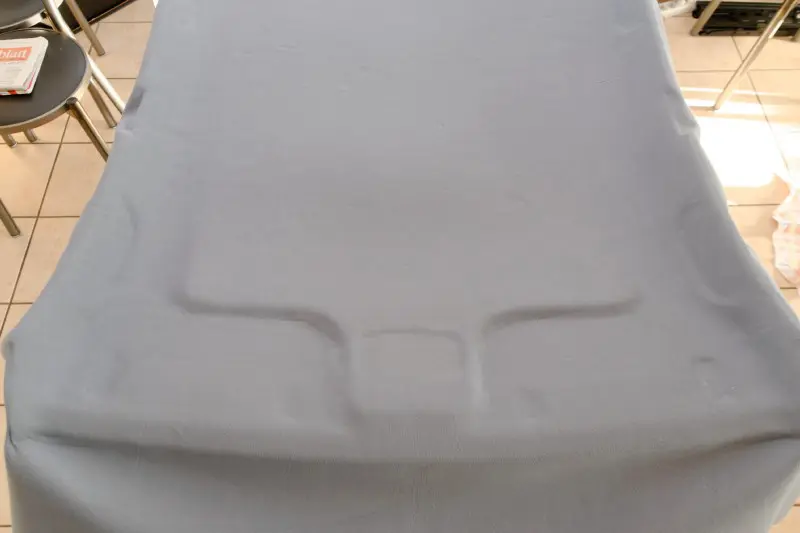
(Ready!)
It does not look good!
All the dents and dents you cannot see later, they come by pressing. You can see well on the beads of the sun visors, as I pressed there with my fingernail. I admit it: I sometimes applied the glue too thickly and didn’t let it set long enough. When pressing on, the adhesive is then pressed through the lamination and pulls the floor down. This happened to me in two places. 🙁
Trimming the edges
Now, with sharp scissors, cut off the fabric around the remaining edge about three inches “too much”, fold it over and glue it down. Cut out the holes for the lamps, etc. with a sharp knife.
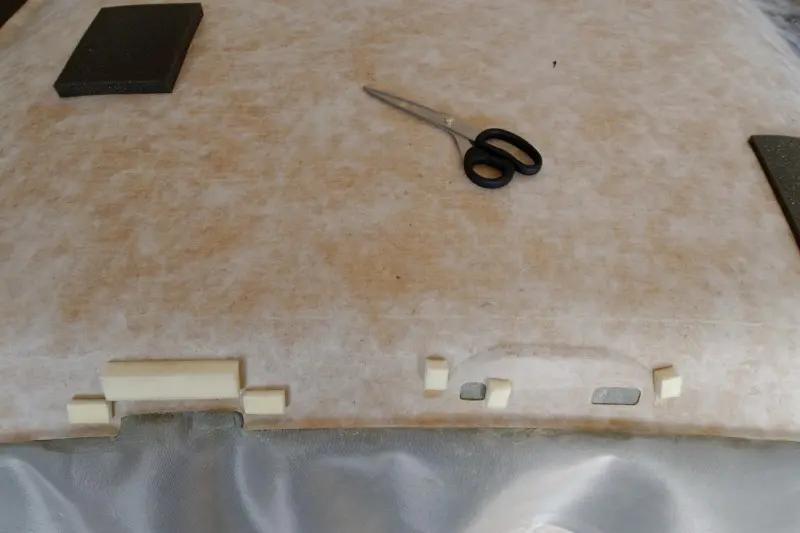
(Cutting!)
(Incorrect colours, a black sky would have been better)
Installation
Done! That was it already.
The installation goes again exactly the other way around and is done in 10 minutes.