I would like to monitor our water consumption, also to be warned in time enough in case of leakage. But… our water meter is stupid! It doesn’t even have a magnet for a reed relay or a holder for a light barrier.
You can buy smart water meters for hundreds of Euros and have the official water meter installed in the back for hundreds of Euros again. Fortunately, there are resourceful tinkerers and geniuses interested in the common good (from my point of view) who have coded something together. So let’s make the water meter smart.
Inhalt:
Who invented it?
Jomjol, for example, is one such guy. He wrote„Digitizer – AI on the edge – An ESP32 all inclusive neural network recognition system for meter digitization„.
The program runs on a tiny ESP32 that has a built-in camera and is probably capable of using artificial intelligence with its few megahertz. I don’t care how exactly it does it, but the result is absolutely fascinating! 🙂
„WELCOME (dramatic pause) TO THE FUTURE!“
Wow! I’ve always wanted to write that!
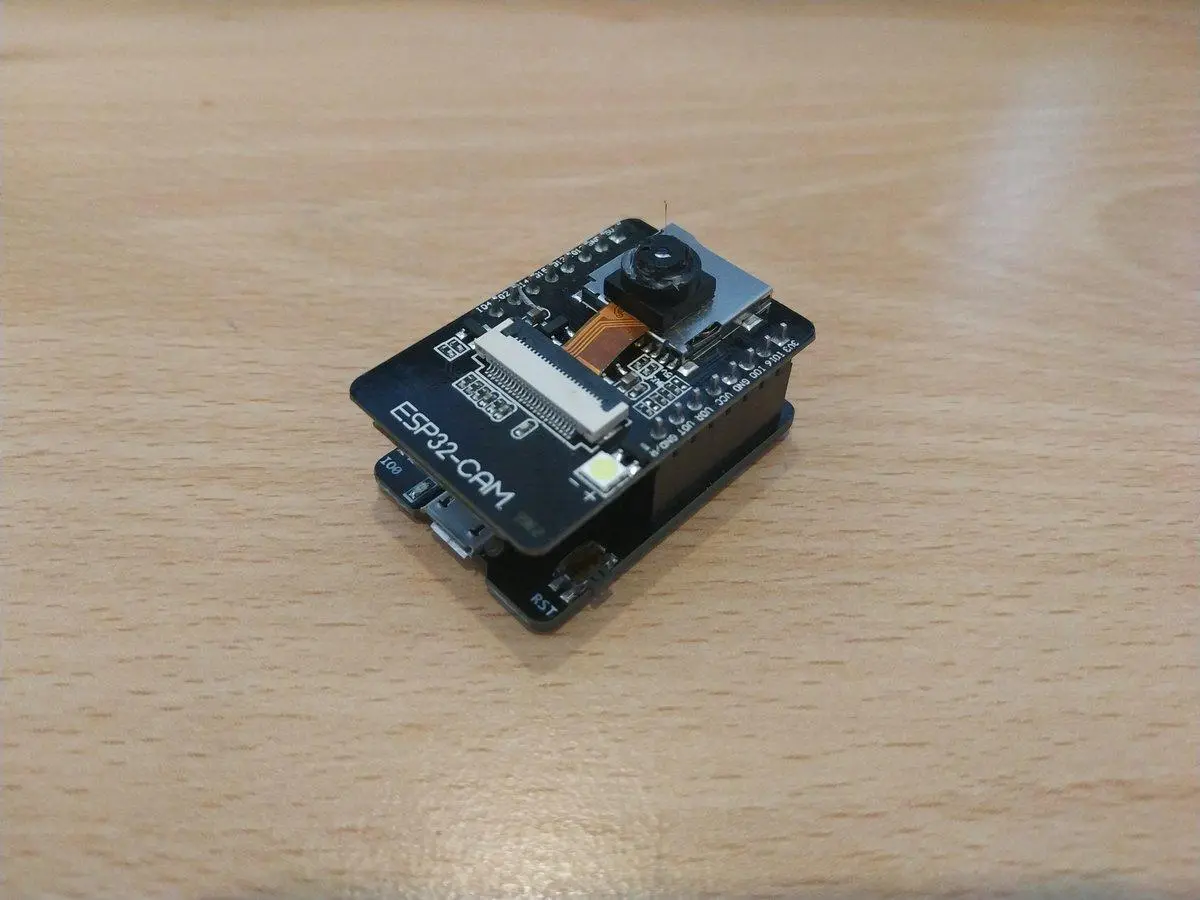
An ESP32-CAM with a power supply and programming module. Wait… is that a piece of lint in the upper left corner? Yeah, that thing is really small.
Where to buy the ESP?
I got the ESP on eBay at janfriedrichelektronikversand((advertising)). As bulky as the eBay name is, the good man is friendly and courteous. The set is called „Starterset HK-ESP32-CAM-MB | ESP32-CAM + OV2640 camera + CH340G USB2Serial“ and costs just 13 Euro with shipping.
Arm!
But the camera on the board is set to a greater distance than we need. So we have to score the glue with a scalpel all around and turn the lens about 1/4 turn counterclockwise so that the camera can focus the dial of the water clock from a halfway acceptable distance.
Accessories!
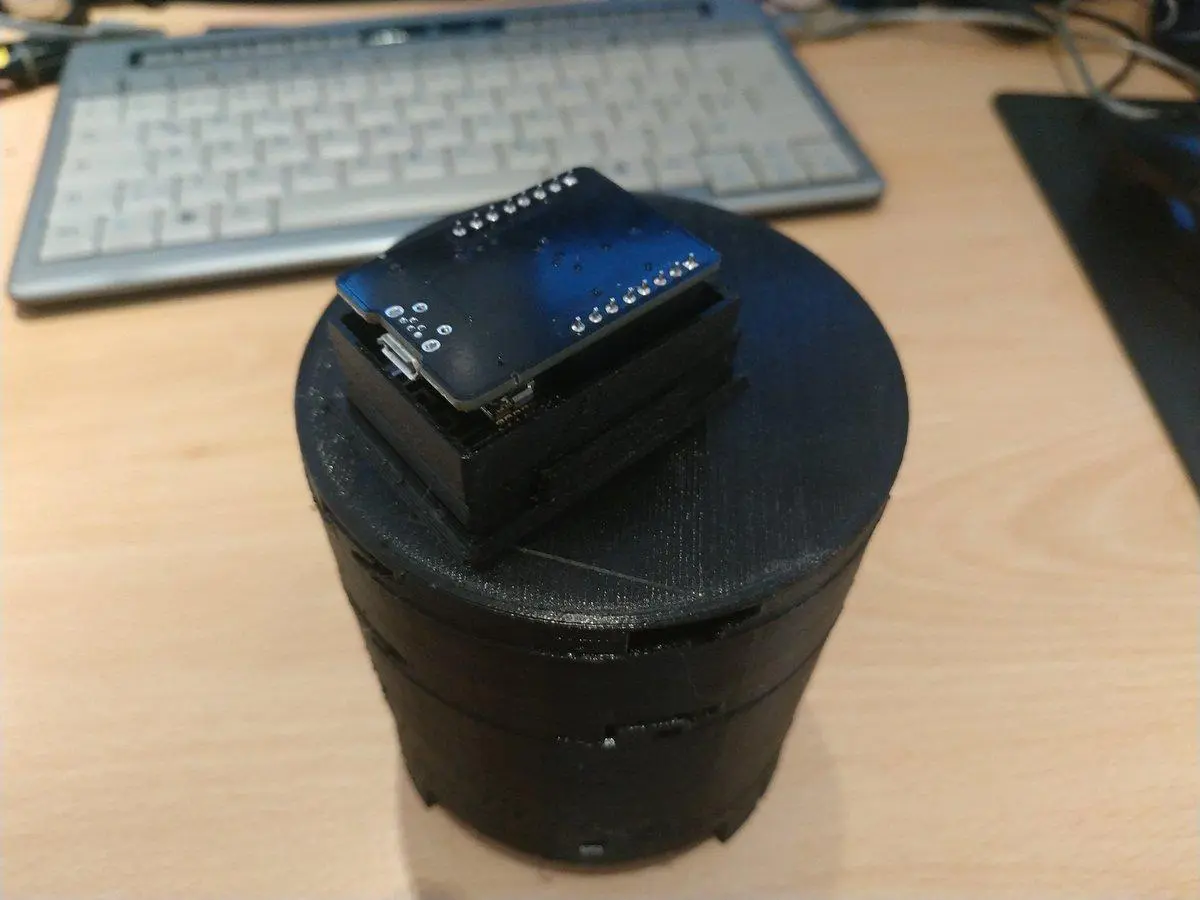
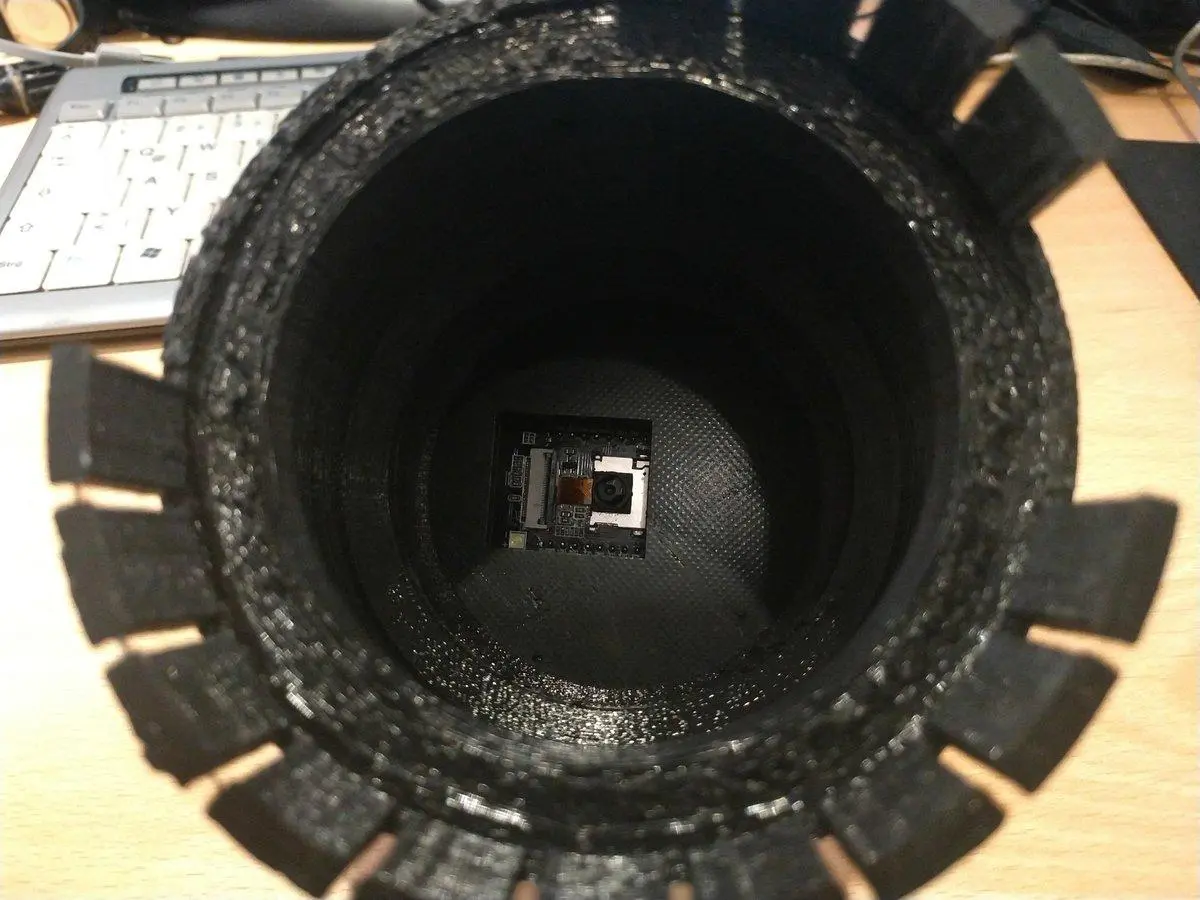
We also need a simple, small micro USB power supply with 500 mA (0.5 A, 2.5 watts) and a maximum 16 GB microSD card. The total cost is about 21 Euros. Oh yes… a 3D printer would be good. But you can also easily and quickly build a holder for the water meter from a suitable sewage pipe (or rolled cardboard) and a piece of cardboard for the lid. I used PETG to print the holder that Jomjol designed for it. Unfortunately, I didn’t have any black PLA in stock – but it should be black, otherwise the images will be overexposed.
Well, I’m not that much of a PETG printer under the Lord. Doesn’t look so cool. But it works. Addendum: Jo, recently printed a spare part for my RC car and drove 240 degrees. The result was absolutely great! Looked almost like carbon.
Yes, it looks even sillier on the edges (bottom) of the parts, but I printed the whole thing straight into the air without support. However, right when I tried it on the water clock, some of the „clips“ broke off. Maybe I need to print hotter?
But let’s worry about the installation first!
Well, it’s already extremely fast. Much faster and easier than I expected. I have never held such an ESP32 in my hand, let alone vaporized it with a new firmware. The instructions are for a Debian Linux. I don’t use Windows since 2005. For Windows, however, there are programs with a graphical interface that do the same (only more awkwardly) that I do under Ubuntu with a few copied command lines in a few seconds. Before the Windows disciples have downloaded their programs from the net, installed and at the start, I’m already long finished 😉 So, for you sweaty, mouse pushing, virus-loving, security-installing and optimization-tools-believing Windows fanboys: You need the Flash-Download-Tool from Expresif. Use it to delete the firmware of the ESP and reflash it with the firmware.bin from the link below. But Windows 10 also has the Powershell (start as admin!), which provides Linux compatibility. So you can also just replace „sudo apt-get install“ with „npm install“ I guess. But no idea if Windows has pip and esptool in the sources. You can post a comment below if that works. But honestly: With Windows you won’t get far in the smart home world. Just to flash Tuya devices OTA with Tasmota, you have to have a Linux at the start. You might as well switch completely to Ubuntu, you won’t have the stress of constant update restarts and you don’t need to be afraid of viruses and other malware. The programs (or similar) you use are also available for Ubuntu. And, hey, you are also completely legal and don’t need to steal programs anymore. Great, isn’t it? Download Firmware! https://github.com/jomjol/AI-on-the-edge-device Unzip in the downloads directory. Open terminal! Install Pip!
sudo apt-get install python3-pip
Install ESP-Tool!
sudo pip install esptool
ATTENTION: DO NOT install ESP-Tool from the package sources of the distribution! Change to the directory of the loaded firmware!
cd ~/Downloads/AI-on-the-edge-device-master/firmware/
Connect the ESP32 via USB to the computer and:
esptool erase_flash
esptool write_flash 0x01000 bootloader.bin 0x08000 partitions.bin 0x10000 firmware.binFormat a micro SD card with FAT32. For example, with Gnome Disks. In Downloads/AI-on-the-edge-device-master/sd-card/ adjust the file wlan.ini and save it again. Just enter the SSID and the password of your network:
nano ~/Downloads/AI-on-the-edge-device-master/sd-card/wlan.ini
Change the following lines:
ssid = "YOUR-SSID"
password = "YOUR-PASSWORD"
Optional:
hostname = "waterclock"
ip = "XXX.XXX.XXX.XXX"
gateway = "XXX.XXX.XXX.XXX"
netmask = "255.255.255.0"
Copy the content of the directory „/SDCard“ to the empty SD card and insert it into the ESP32. Short test on the desktop: Is the thing running? The ESP32 needs only a few seconds to boot and to log on to the WLAN.
You can find out the IP address by looking for the network devices in your router, using the tool „Angry IP Scan“, or you were so smart (like me 🙂 )and gave the ESP a fixed IP in the wlan.ini. 😛 Open this IP in the browser!
It should open /setup.html (remember this path, if you want to start the installation later again) Good, that’s all we can do right now. Off to the basement! Fix the ESP on the holder and put both on the water meter.
The ESP doesn’t boot? You can’t find it on the network?
You read this more often on the forum! According to the user pfried, it is best to use SanDisk Extreme SD cards. He recommends the tool „SanDisk RescuePro Deluxe“. But the licence key can only be found on the Extreme card packaging.
I haven’t had such a problem yet. Did I mention that I’m only running Ubuntu now…? no? So, if the ESP doesn’t run, please try any fresh partitioned and formatted other SD cards (up to 16GB max). In my ESP there is a SD card with 8 GB from Toshiba.
Went on the first go. What I messed up was a typo in the WLAN password. This can also be the reason that the ESP cannot be found. Under OpenWRT, however, you can see in the overview all devices that wanted to connect to the WLAN. With the frit, you have to rummage through the log.
Attachment on the water meter
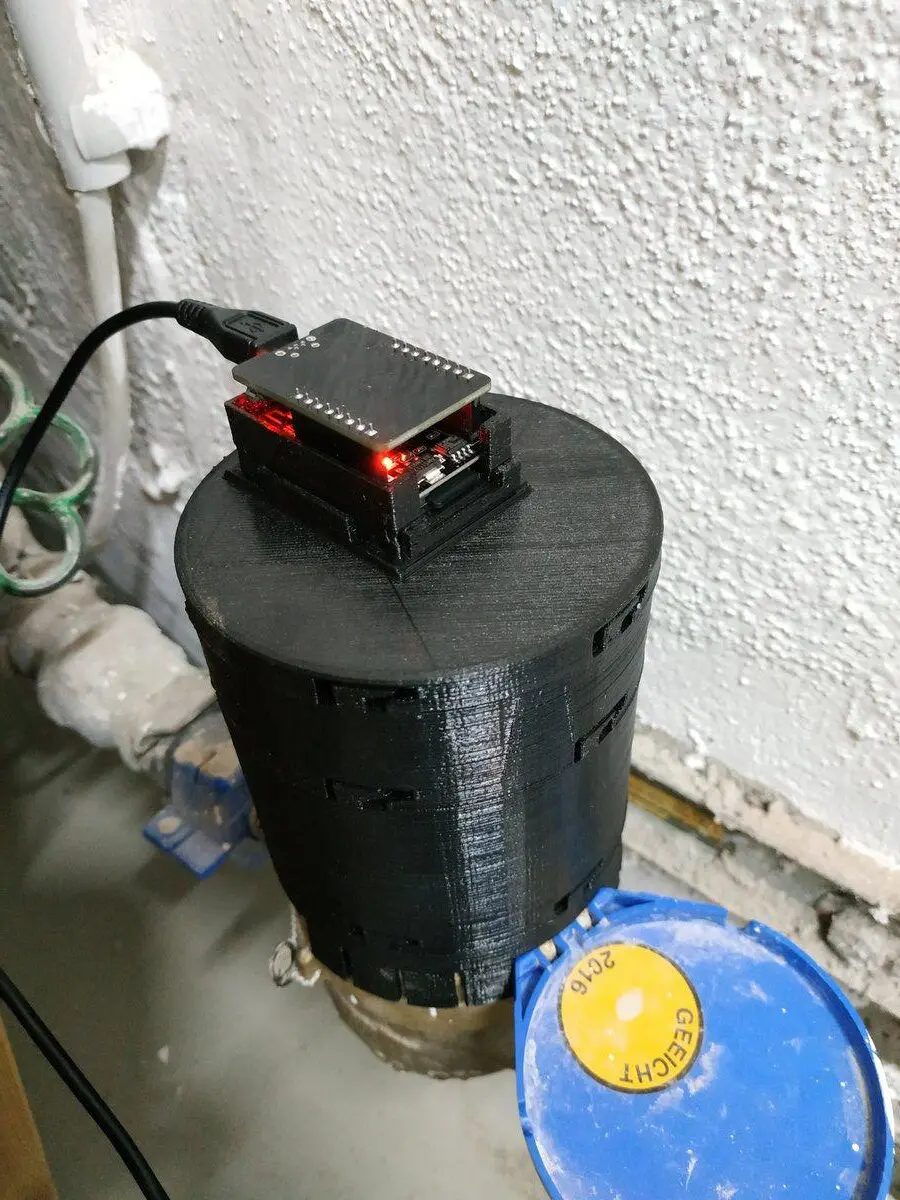
Sits and wobbles. Fits rather poorly.
Yes, Jomjol did not reckon with the fact that I leave the programming module on the ESP right away, so his cover does not fit over my ESP. But for three euros extra I preferred not to solder a USB power supply together.
The above-mentioned eBay dealer was also kind enough to measure the voltage the programming board outputs. It is 5V, which is good because the ESP does not run reliably with only 3.3V.
The only other thing it said was that the module was not meant to be stuck on the ESP all the time. Well, nothing gets warm, and the thing runs absolutely reliable with me now for over four weeks in continuous operation.
Of course, this contradicts the purpose of an ESP, if its GPIOs are occupied, but I don’t need them. This is just a better webcam.
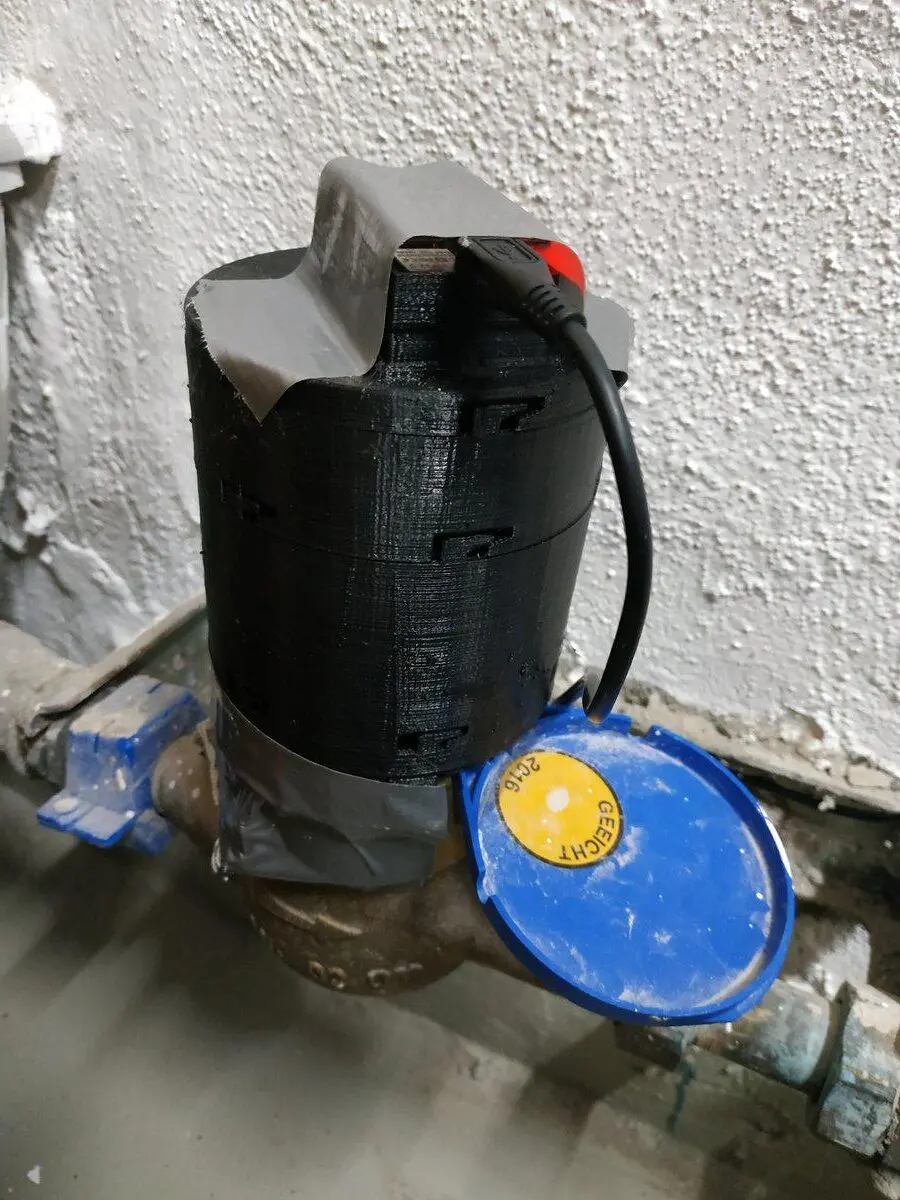
Fixed and protected the ESP from short circuits with the fig leaf of armour tape.
In the summer, the water clock will condense and then everything probably falls off anyway.
Sure, I could have designed a lid for the ESP. I might do that someday, but not now. Armour tape will have to do. Furthermore, the bracket didn’t quite want to fit on the water clock. It’s kind of oddly shaped, so I used tape again to fix everything roughly and very provisionally. Maybe I’ll build myself a suitable base there, too.
Jomjol has provided everything interchangeable with bayonet fasteners so that you do not have to reprint the entire bracket when replacing.
But I wanted to see quick results!
RESULTS!😀
Okay, you have the power supply connected to the ESP?
Great!
Setup
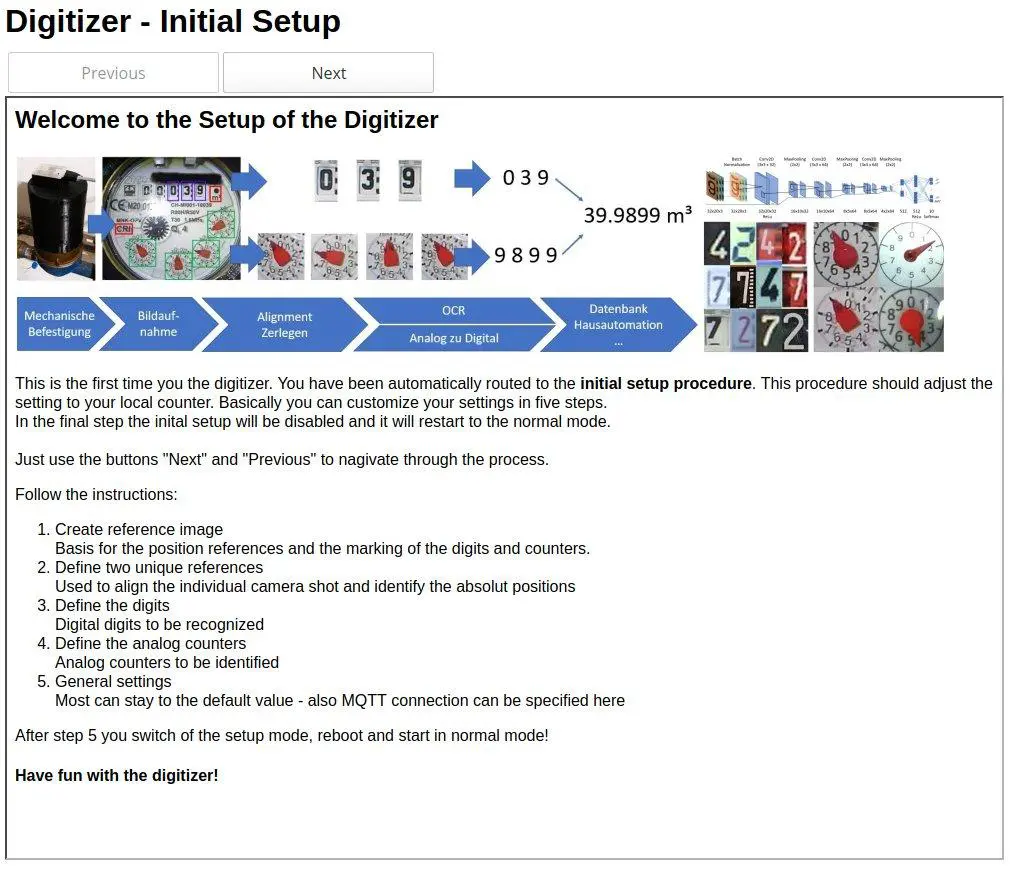
Welcome. Unfortunately, I didn’t take a screenshot, but in the first dialogue you align the image horizontally. It is quite intuitive. First in rough steps, then finer. You can draw an auxiliary line and align the edges of the digital digits in one line, for example. Set reference points.
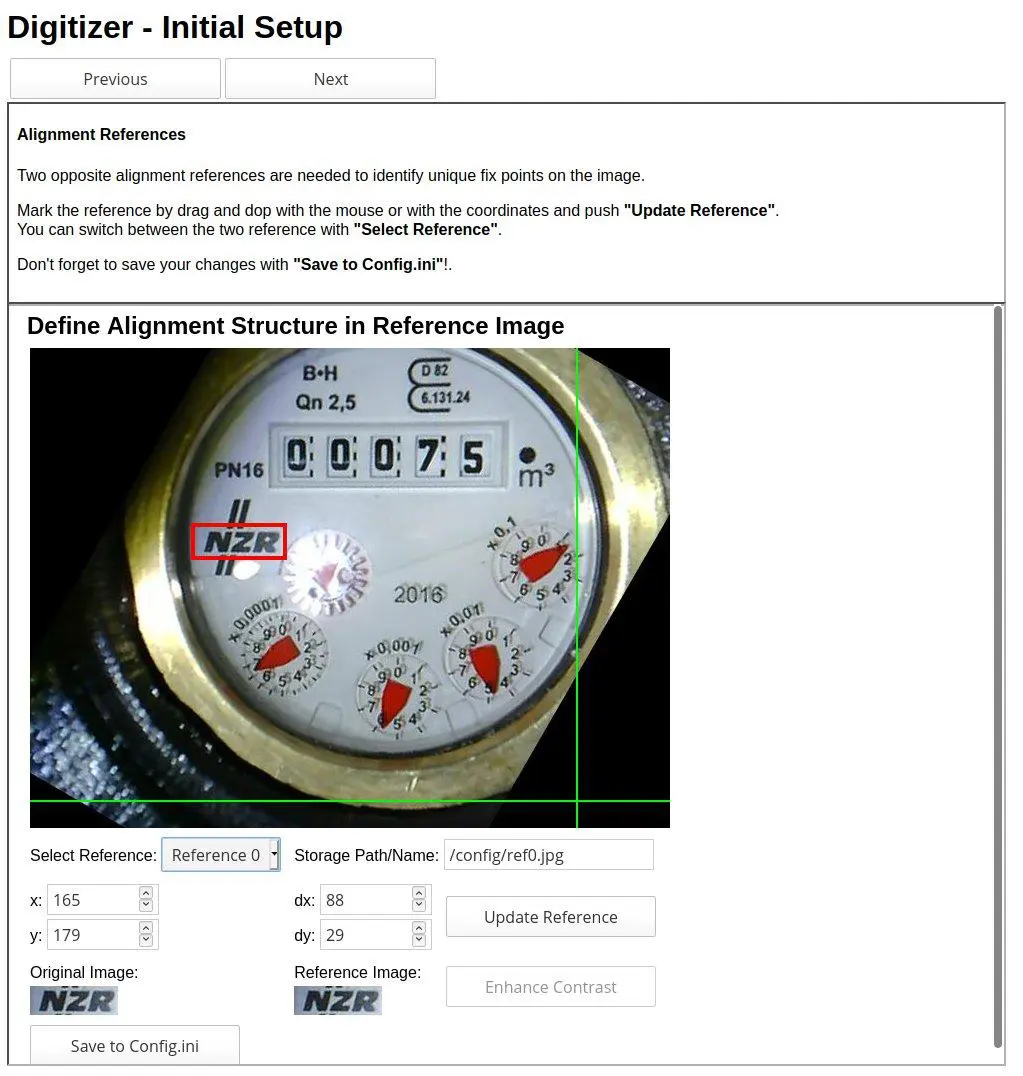
We mark two invariable marks on the water clock so that the AI can orient itself better.
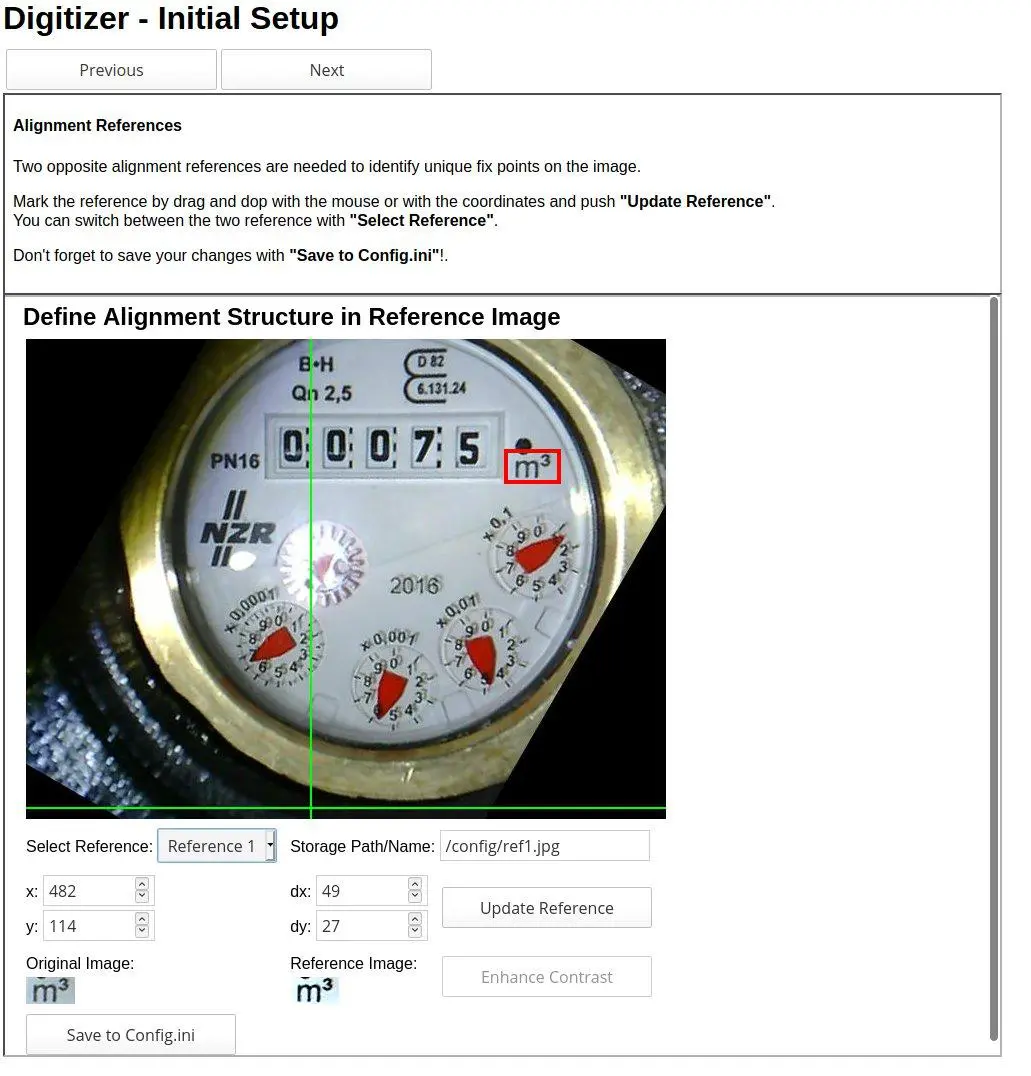
Here I have chosen the cubic meters as the second reference point.

We mark all digital numbers from left to right. This is done by drawing a frame over each digit with the mouse. Child’s play. Please pay attention to the names and make sure that you delete superfluous ROIs. This happens quickly when you play around a bit. Finally, simply call up each area again individually and check it. Don’t forget to save with Save and continue with Next.
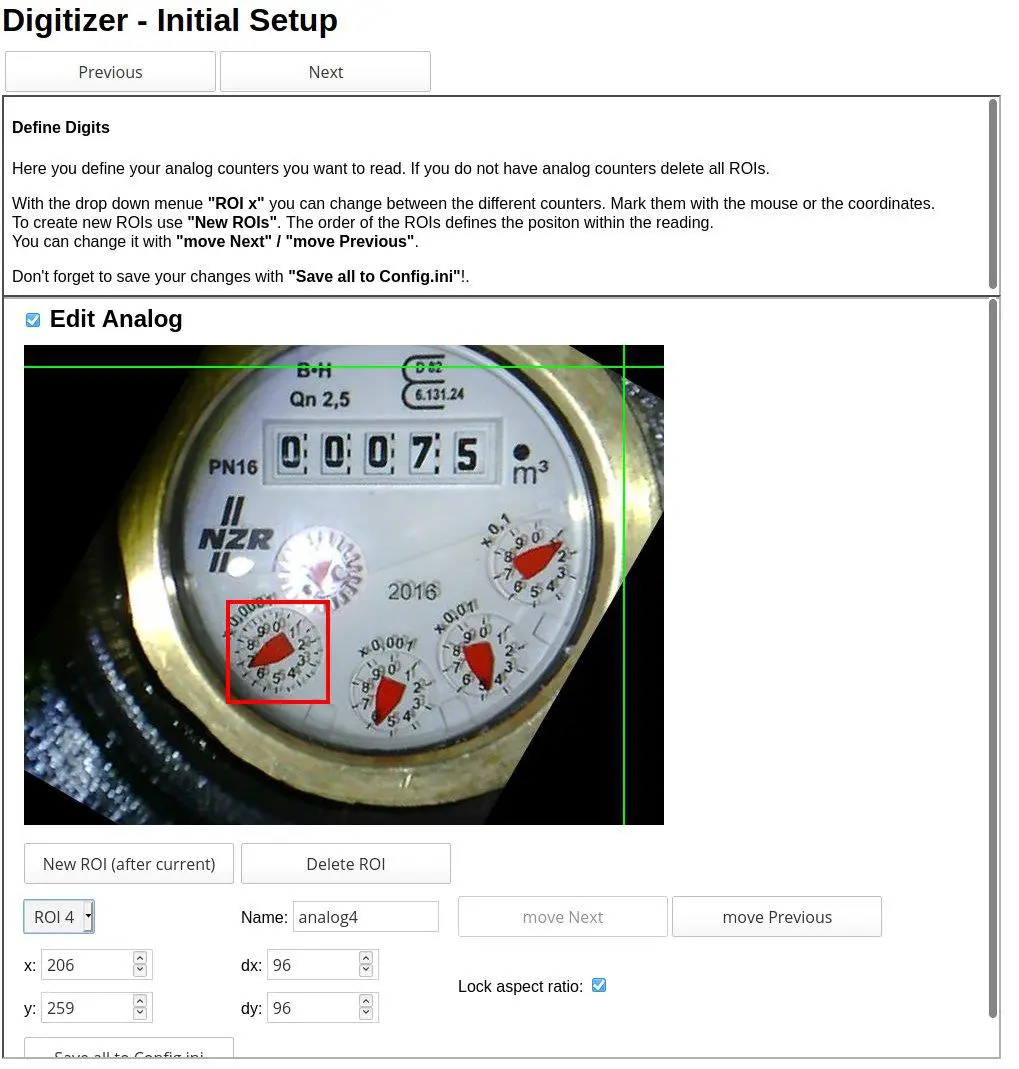
The same game with the analogue pointers. Here, however, from right to left, from large to small.
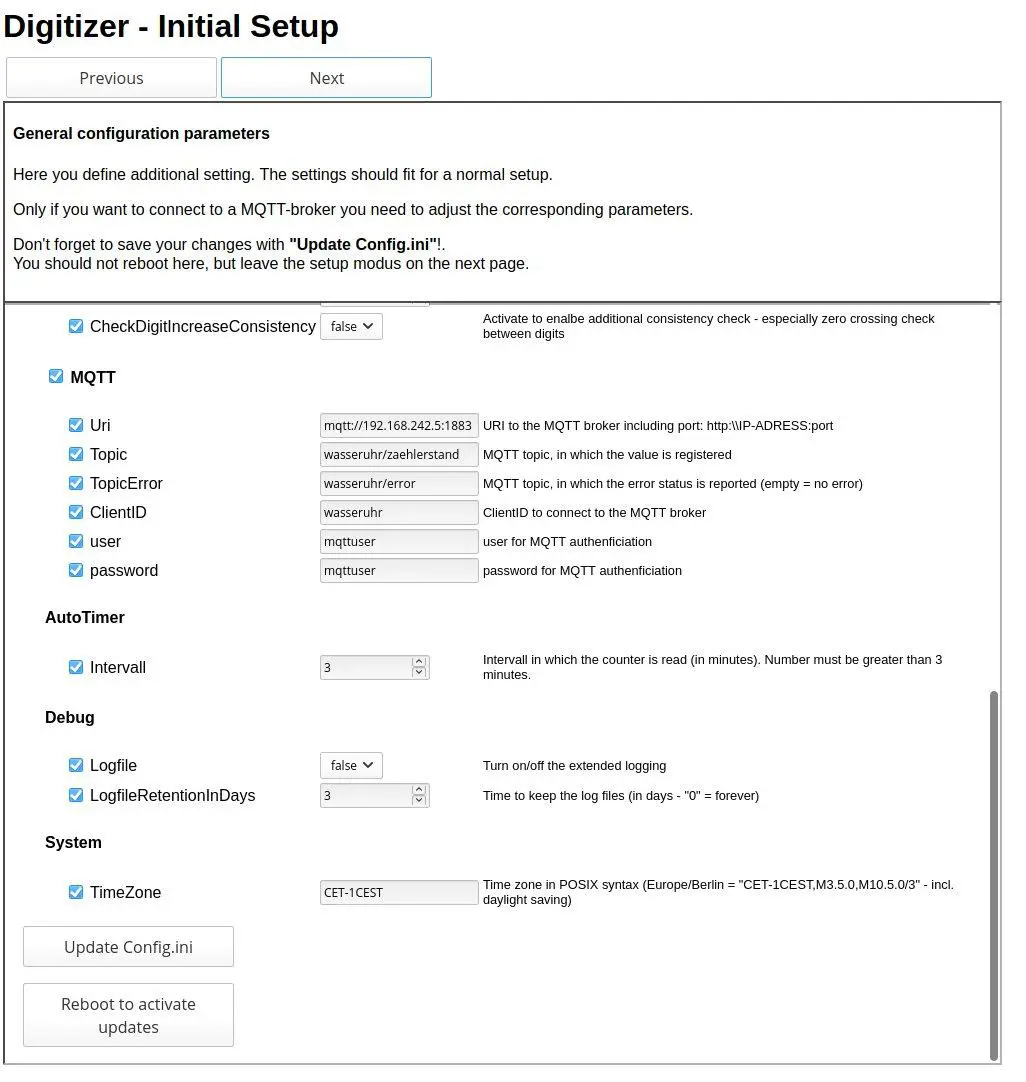
In the config.ini you still have to specify the MQTT server. mqtt://IP_OF_IOBROKER:1883 As MQTT user I have here… well, you see it. 😀 So, what? Nobody can get into the network anyway, and I won’t want to have remote access either.
Update and continue.
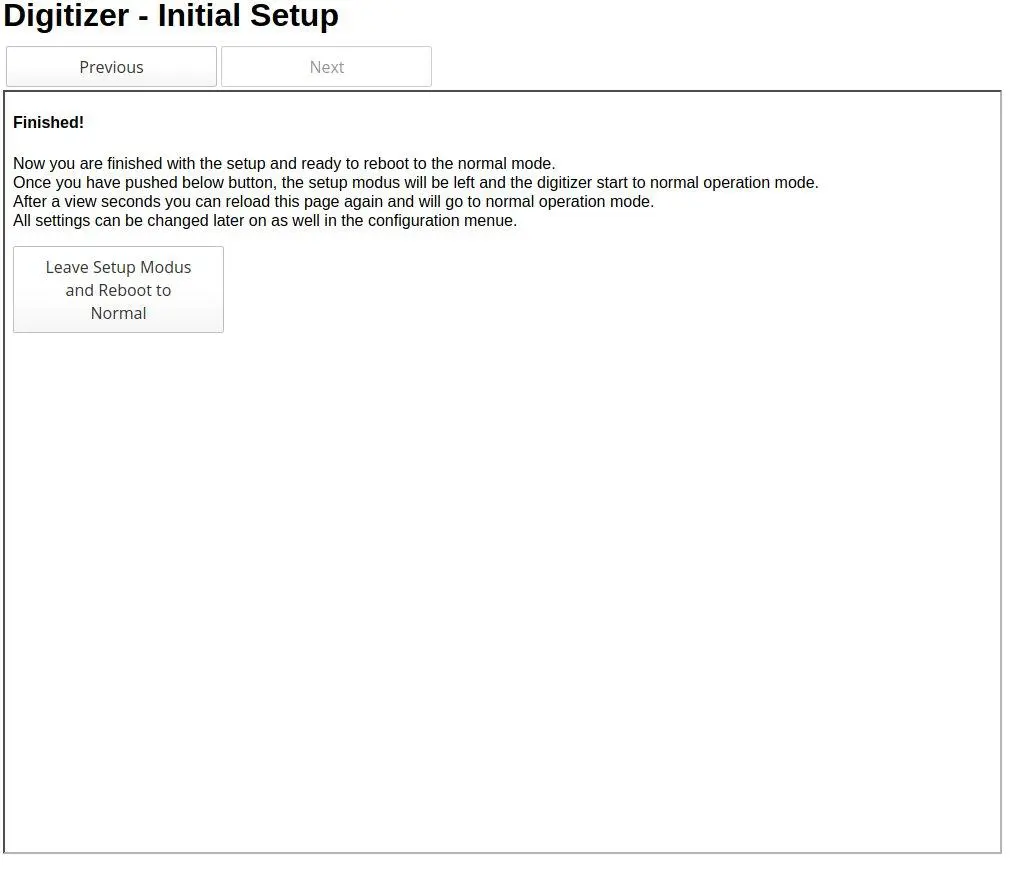
Now you can reboot the system. This will take five seconds or so.
Integration in IOBroker
In ioBroker it continues: Of course, this is how it works with all other MQTT-enabled (that is, all) SmartHome control centers like openHAB and what they’re all called.
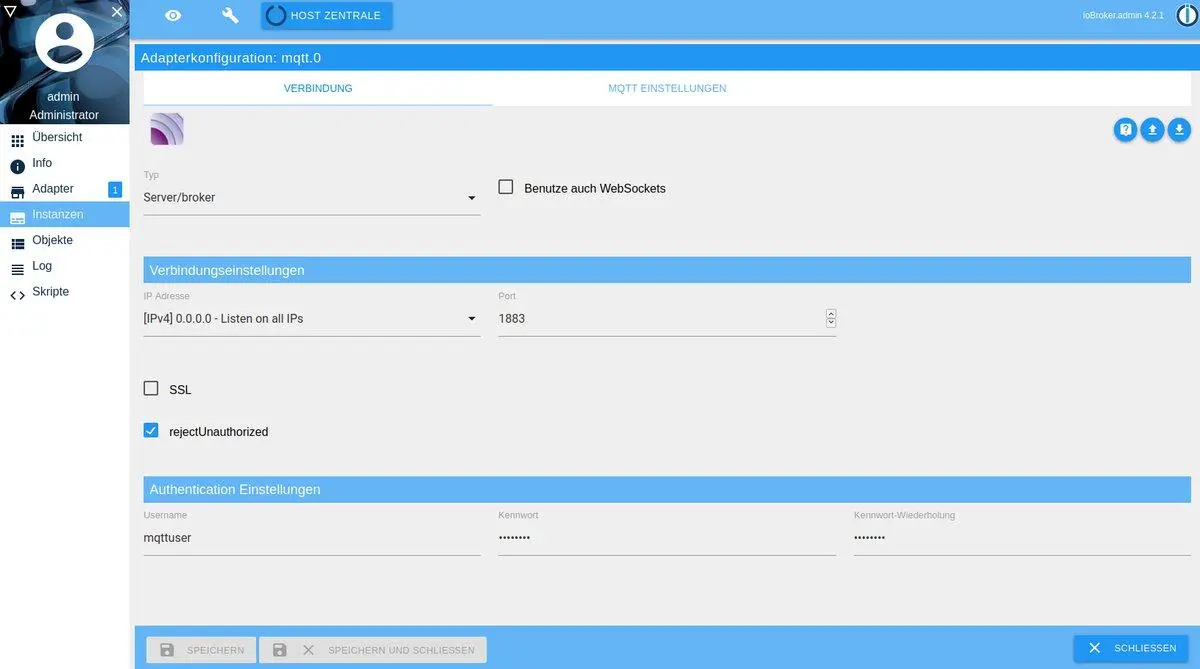
Before you have installed the MQTT server/client adapter in the IOBroker and matched it with the MQTT usernames from the config.ini of the ESP. Or just afterwards. Doesn’t matter. 🙂

Now our counter reading appears under Objects, mqtt.0. Quite automagically! 🙂
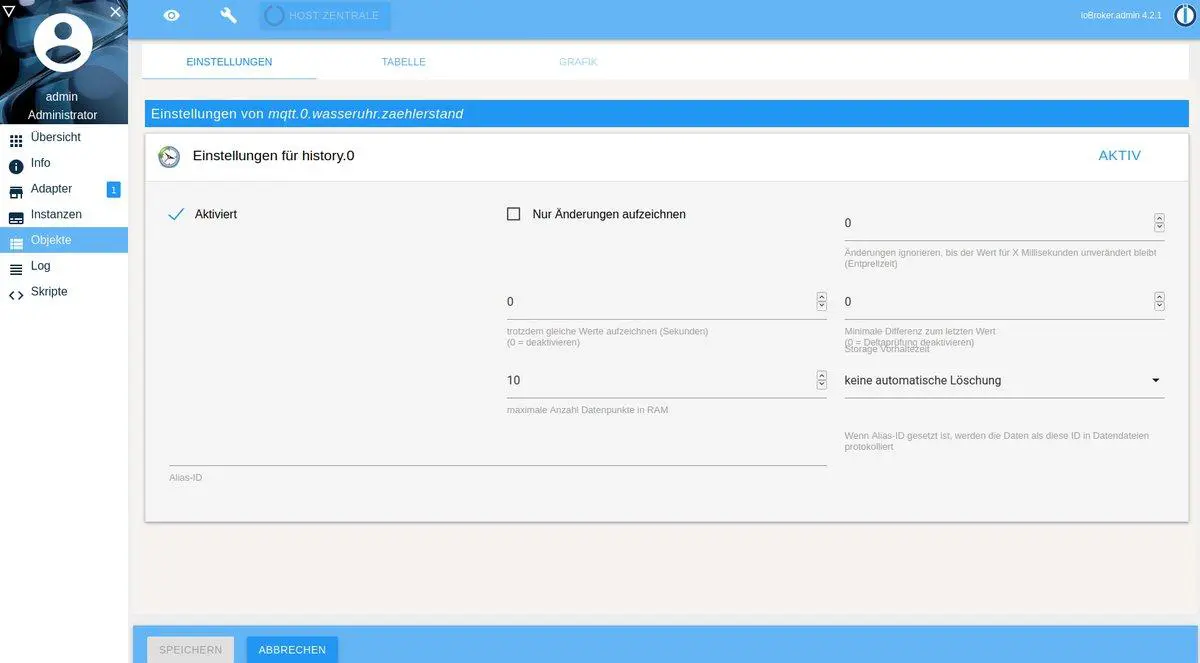
We click again on the small tool symbol and activate the recording by the history adapter. We had already done this with the electricity meter. However, there is one small drawback: The ESP is not that fast. It only manages about one reading every five minutes. But no matter, that’s fine, it just doesn’t look that great on the diagrams:
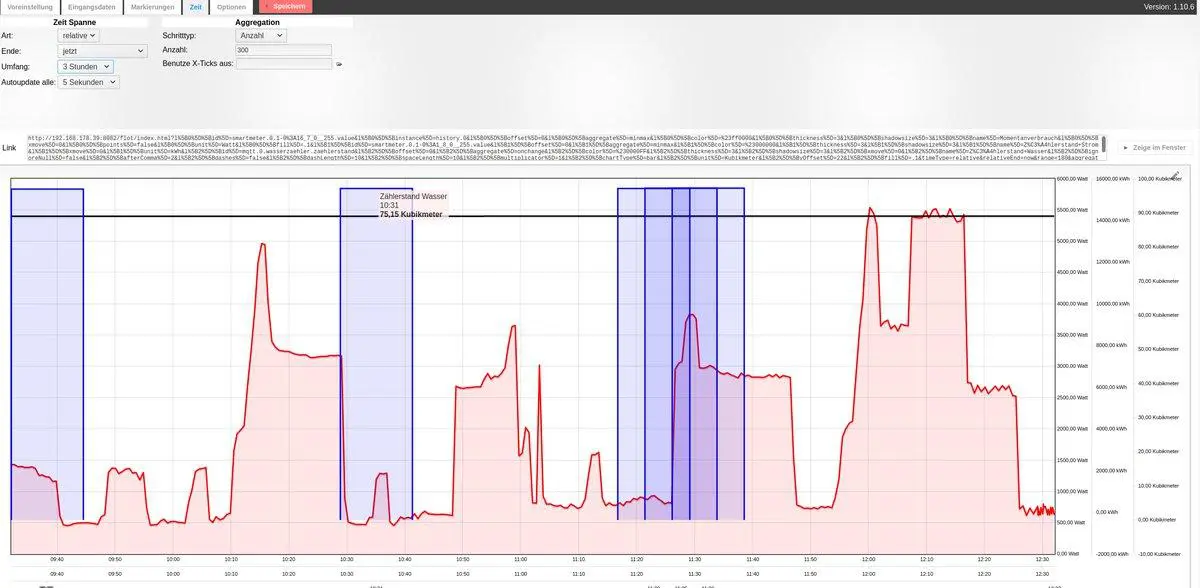
Here the blue angular water consumption compared to the fine diagrams of the power consumption. This solution is also interesting for weekend and vacation homes. But I wrote that already in the article about the smart electricity meter.
As a side note: You can also use this project to make an unsmart electricity meter smart! To accomplish this, of course, you have to build another fixture and possibly live with the fact that the door of the meter box (the sub-distribution) no longer closes.